")
This portion of the guide has been written exclusively for SimsVIP’s Island Paradise Game Guide by community member Weealbet. All images and text for the guide below are property of Weealbet, and are copyrighted by SimsVIP in this guide. Any unauthorized use of the guide or images will result in legal action.
Copyright ©2011-2014 SimsVIP – All rights reserved
Click here for The Sims 3 Island Paradise Game Guide
Creating Dive Lots
One of the new game features introduced in The Sims 3 Island Paradise expansion pack was the ability for Sims to go scuba diving, allowing them to interact with the world of Isla Paradiso. Unfortunately, this new feature was designed to be exclusive to the new world of Isla Paradiso. While Sims were able to go snorkeling in the sea of other Worlds, they were not permitted to go scuba diving due to the lack of the ability to place Diving Areas in other Worlds.
The following information is a step-by-step guide which will allow you to place fully functional Diving Areas in other Worlds besides Isla Paradiso. The world used in this guide is Sunset Valley, but it is possible to have Diving Areas in other Worlds too. One of the interesting aspects of Diving Areas in other Worlds is how the sea of each World has its own atmosphere, allowing you to fully unleash your creative pallet in order to seamlessly build Diving Areas in your favorite World.
Over the course of this tutorial, you will learn the basic steps required to include Diving Areas into your Worlds. Once you feel comfortable with setting up a Diving Area and have them functioning, you may want to see what else you can do with them. The Advanced Class section will provide some examples of other items you can use to really set up a unique look to your Diving Areas.
Basics
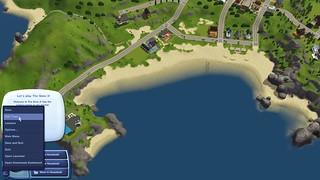
1) Go into ‘Edit Town’ from the Options menu in the lower left hand corner.
2) Bring up the Cheat Console (by pressing Ctrl+Shift+C simultaneously). Enter the following three cheats separately:
a. testingCheatsEnabled True
b. buyDebug on
c. enableLotLocking on

3) You next want to go into World Editor Mode. This is found in the lower left hand corner next to the Options button.
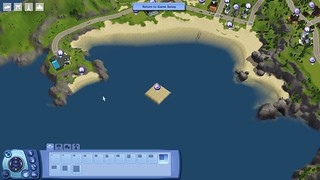
4) Pick any size lot that you wish. Although it is suggested that you use at least a 40 x 40 lot.

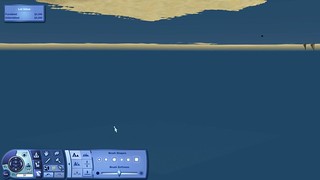
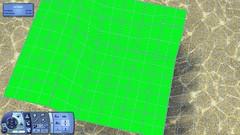
5) Try to place the lot. The grid will be green when you have found a valid location. Then place it.
6) If you are seeing a red grid, move the lot around until you can find a valid location to place it.
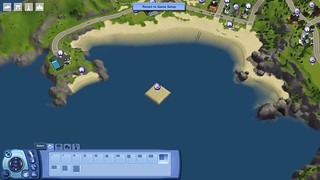
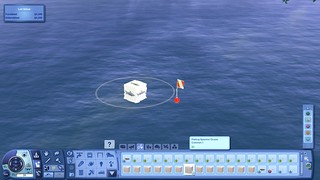
7) Once it has been placed, you will see something that looks like this:
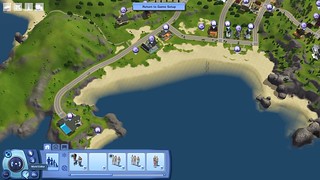
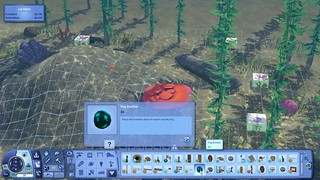
8) You want to hit the ‘Select’ button on your Control Panel (it looks like an arrow).
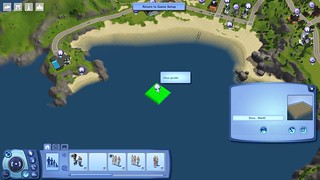
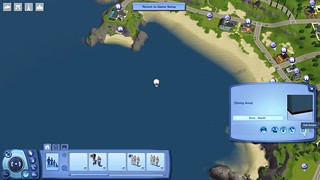
9) Click on the Map Tag of the lot. This will bring up the Information Box above.
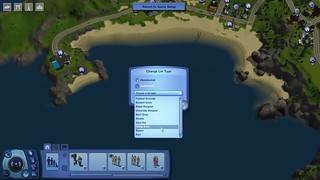
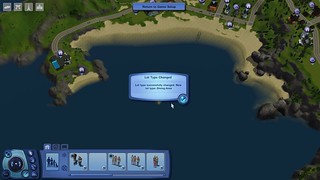
10) Click on the Change Lot Type button. This will bring up the Change Lot Type box.

11) You want to select ‘Community’ and then click on the ‘Change Lot Type’ bar below that.

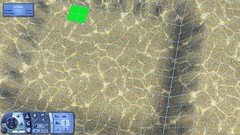
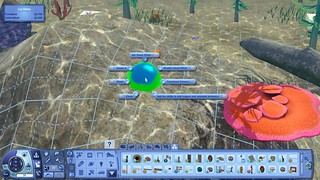
12) This will produce a pull down, scroll menu. Scroll down to the bottom and select ‘Diving Area’ Once you have clicked on that, you will see the following:
13) Click OK. You will then receive a pop up saying:

14) Click OK to make this box go away.
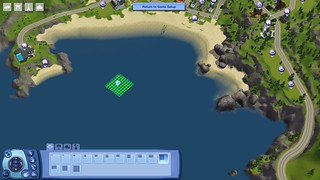
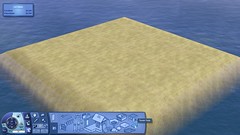
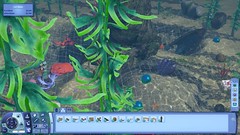
15) You have now turned the lot into a Diving Area. Enter Build/Buy Mode from the Lot Window. It may take a few moments to load, this is completely normal.

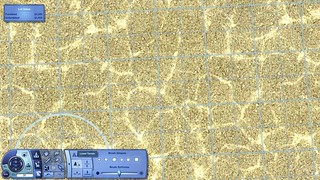
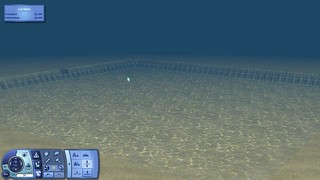
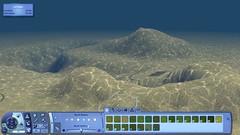
16) When you are in Build/Buy Mode, you will see that what should be the sea bed has turned into a square island

17) To fix this, click on Terrain Tools, and then click Flatten Lot.
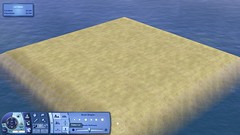
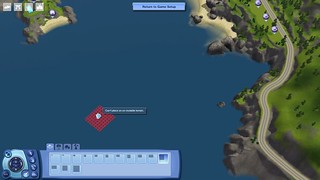
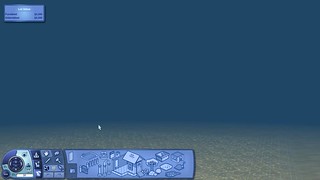
18) Your screen should now look like this. Go down a floor and pan your camera around.
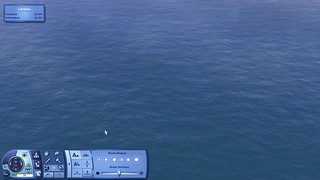
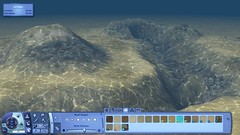
19) There will be a couple of graphical abnormalities. This is normal for what we are doing and is easy to fix. Return to Edit Town and save your game and return to the Main Menu (where you load up a save or start a new game). Load up the save you have just come from.
20) You will arrive back to Edit Town (if it loads your last played family, go to Edit Town now). Go back to the area you placed your Diving Area lot, select it and enter Build/Buy Mode again. Go down a level and pan your camera, you should see something similar to this:
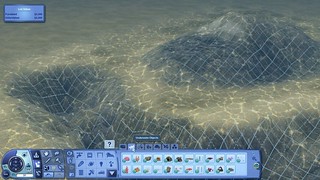
21) Open the cheat console, enter BuyDebug, go into Buy Mode, Sort by Function, then select Debug. If you have never used the Buy Debug cheat before, you will notice that a new tab has been added to your menu, which looks like this:
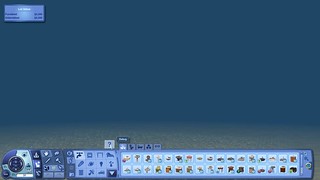
22) Once you enter Debug, go to Filter Content By and scroll down until you reach the icon for The Sims 3 Island Paradise. This will make finding the items you need a lot simpler.

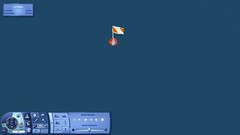
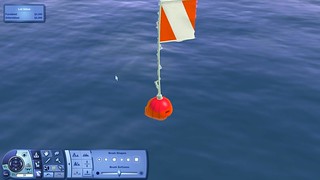
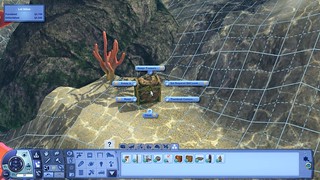
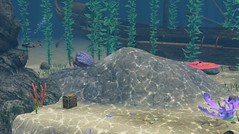
23) You want to go to Misc. Objects (the final tab) and select the Scuba Buoy. Go up a level and place it on the surface of the sea.

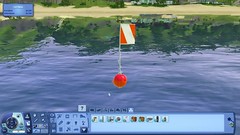
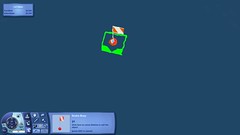
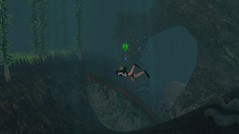
24) You should notice that it appears to be ‘sitting’ on the surface of the water (like placing a basket ball on the floor). For animations to look right, we need the ball section of the buoy to be half submerged in the sea. The easiest way to do this is to pan your camera over the Scuba Buoy so you have a bird’s eye view of it, like so:
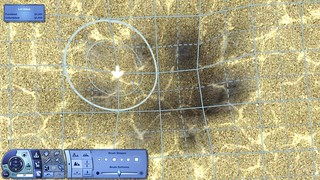
25) Go down a level and you will go almost directly below the Scuba Buoy. You want to go back to Build Mode and then Terrain Tools and select Lower Terrain.
26) Perform a couple of clicks at the area you think is under the buoy. You want to create a relatively shallow ditch like so:
27) You then want to use the Level Terrain tool and create a relatively large, flat ditch, like so:
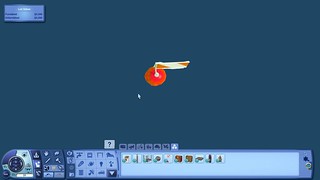
28) Click the Hand Tool and go to the surface of the sea. Grab the Scuba Buoy and move it slightly and release it.
29) You may have noticed that the item ‘dropped’ slightly. To check that the ball section is half submerged, tilt your camera and have a look at the water line. You want your Scuba Buoy to be the same height as below. If it isn’t, go down a level and try lowering your terrain or making the area you lowered larger.
30) If you wish to have some surface sharks swimming around your Diving Area, or even some fish spawners so your Sims can fish above the Diving Lot while they are in their boat. Go down a level and use the Level Terrain tool to bring the whole sea bed down a little. You should have something which looks similar to this:
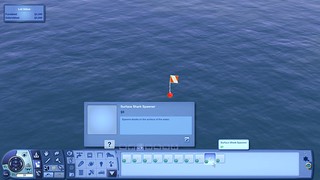
31) Go back up a level and go to Buy Mode, Debug and go to the Fish Spawners tab. You will notice some large white boxes. The boxes to the right of the highlighted one below are meant to be placed in Ocean water (like what you are building in now). The animations of the fish react the same way to the Scuba Buoy to the water level, which is why you lowered the entire lot. This will allow you to spread your desired fish around the lot without the animations playing higher than the sea level.
32) If you want to have sharks spawn on the surface of the sea, go to Buy Mode, Debug and go to the Fish Spawners tab. Go to Filter Content and filter it by The Sims 3 Island Paradise. This box is the Surface Shark Spawner. Select this and place it next to the Scuber Buoy. There are two Shark Spawners, one is intended to go on the surface, the other is intended to go under the sea. Take care to read the name before you select it.
33) With your desired spawners in place, you now want to go back down a level, go to Terrain Tools and select Flatten Lot. This will bring the lowered terrain to the same level as the edges of the lot.
Congratulations! You have made it past all the tricky parts! I would recommend at this point that you save your game. You may also wish to check that the animations are all at the correct height, i.e. Sims and boats sit on the surface of the water, as do any spawned fish/sharks and any ripples your Sims and boats make.
If you do check the animations now, it will save you having to mess around with the terrain again after you have decorated your lot. You may notice a slight ‘jump’ as your Sims and boats travel over the lot boarder. This is normal and does NOT have any effect on the game. Sims will function the same after it. As you continue to build your own custom Diving Area’s, you will find that you don’t have to send a Sim to check the height.
*Take care from this point forward! If you go to the surface and move the Scuba Buoy or any of your selected Spawners, you WILL have to change the terrain height again! This is quite troublesome once you have edited the terrain to your desired shape and started placing items. Simply pressing the Undo button will NOT fix the animations. A vague disclaimer is no one’s friend*
34) You will now have a blank canvas like this, with which you can now edit to your heart’s desire! You can sculpt and paint the terrain too! The Terrain Tools will function exactly as they do when you are building on land. All the terrain paints that you can normally use on land are also available to you here. You can be as adventurous as you like with these – hills and ditches will not cause problems for your Sims to move in. They appear to stay a set distance over the sea bed and will follow the contours of the land!

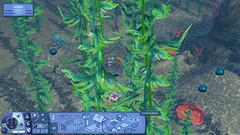
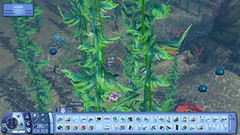
35) So, you’ve sculpted the perfect dive spot? But now you want some fauna to include? You are in the right place! Back in Buy Mode, Debug, and Underwater Objects you will find a while host of maritime objects. At this stage, I would suggest you open your cheat bar and use the Move Objects On (MOO) cheat. This will help you to bunch up some items if you want. Or overlap some.
36) With the exception of the Rocks and Caves, everything is fully customisable using the Create a Style tool! This can be useful if you are trying to obtain a specific look and feel to your lot. For example, if you are building in Bridgeport, you might not want the local fauna to be so bright and colourful.
You will also find more underwater items (such as the sunken boat and anchor) if you go into Build Mode, Community Objects, Misc. Objects and use the filter for The Sims 3 Island Paradise. Again, these are fully customizable too!
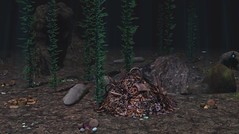
37) The final item that you may wish to include is the Treasure Chest! There are two variations of the Treasure Chest. We want to grab the one called ‘Treasure Chest – Water’. Place it on your lot somewhere (be mindful that you leave enough space so your Sims can get to it and use it). If you want to place caves and treasure chests, we have to set them up. We will focus first on the Treasure Chests, then the caves.

38) f you hold down the Ctrl + Shift keys (simultaneously) on your keyboard and then click on the chest, you will be presented with the following menu interactions. Only two of these interactions are of use to us, the Assign Treasure… and Set Required Skill Level… It doesn’t matter which of these you do first.
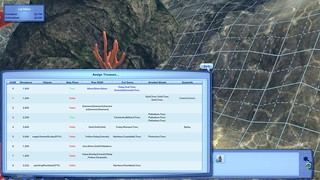
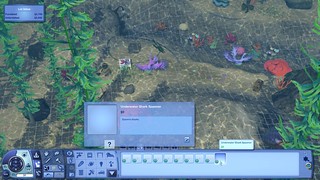
39) If we select the Assign Treasure… interaction, the following box will appear. This will allow you to select which treasure is in the chest. By default, the chest is using the top choice. Feel free to change it to any of the others in the menu. A little note, while it is possible to get the Map Pieces, they will have no use outside of Isla Paradiso. ‘Raw RGM’ simply refers to as raw rocks, gems and metals.
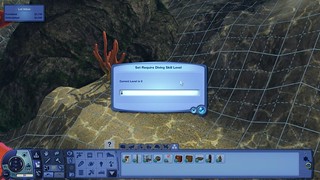
40) Next we want to set a Diving Skill level so your Sims can open it. Open the menu and select the Set Required Skill Level… option. Here we want to insert a value between 0 – 10. Here is where you can be as harsh or as kind to your Sims as possible. While it is completely possible for you to assign the highest value treasure with the lowest required Diving Skill, I would suggest that you make the higher value treasure have a higher requirement. This will keep it balanced and will help you to feel as if your Sims are accomplishing something.
41) Next we are going to discuss the caves. Again, if you Ctrl + Shift + Click on them, you will see the following options. Like the Treasure Chest, we are only interested in a few interactions. These are the Set Travel Destination, Set Scuba Skill Requirement and Set Name. There are two variations of the cave, but they both function the same.
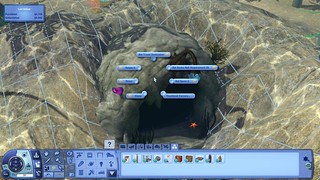
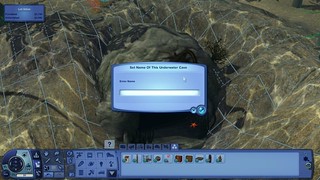
42) First, select the Set Name interaction. This will allow you to set a name for the cave. You won’t see this name in the game, but is instead used for setting up a ‘cave system’ between other caves and Diving Areas. If you are going to be using more than one cave in your World and want to be able to go into other Diving Areas via a cave, give it a name, but make it unique to the others.
43) After you have given it a name, you want to select the Set Scuba Skill Requirement… option. What this does is it sets a Scuba Skill level required for your Sim to be able to find the exit to another cave within your World. Enter a number between 0-10 and that will set this up. You will get messages in the game when you Sims explore that they found a cave entrance, but lack the required skill to go through. Once your Sim is at or over that skill level, they may find the entrance to a connected cave.

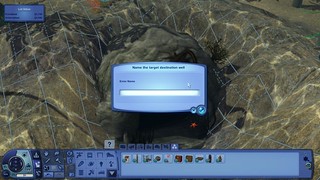
44) Finally, to link the caves, you have to select Set Travel Destination from the menu. In here you want to type in the name of another cave you have in your game. This will then allow Sims to exit out of the linked cave. Easy!
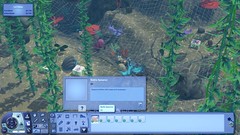
45) OK, so, we’ve created our Diving Area, now it’s time to bring it to life! If you have been scuba diving in Isla Paradiso, you may well have noticed the light rays dancing around, the sharks, schools of fish and collectable fish, shells and other items. This step is going to tell you how to add these little details to your lot too!
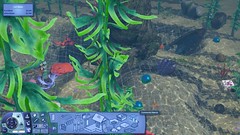
If you go to Buy Mode, Debug and filter the content by The Sims 3 Island Paradise, then go into Fish Spawners and Rock Spawners, you will see a few items in each section.

46) There are several of these spawners, with varying degrees of height. Drop the ones you would like anywhere on your lot. You will see that they look like big boxes with rings. Don’t worry about this, they will not be visible while you are playing in Live Mode. There is also an Underwater Shark Spawner in this section. If you want sharks to swim about in your Diving Area, you can place it. Be mindful though, as there are two Shark Spawners. One is for the Surface, one is for underwater. You want the underwater one:
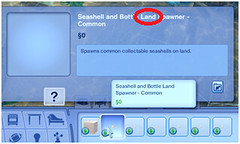
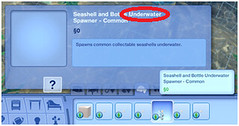
47) With the fish spawners placed, you want to head into the Rock, Gems and Metal Spawners tab. In this section you will find the Bottle Spawner, Seashell and Bottle Spawner (of different rarities). Like the Treasure Chest, there are two variations of these spawners – some are intended for land, others for under water. You want the underwater ones. Place the ones you want.
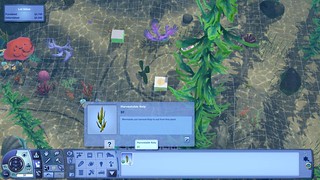
48) An exciting (and much requested) new feature of The Sims 3 Island Paradise is the introduction of the Mermaid/Merman Life State. They require a different diet to Human Sims, so it is only natural that there is a new harvestable available for Diving Lots.
If you go to the Gardening tab of you Buy Debug menu, and filter the content by The Sims 3 Island Paradise, you will find a single new item, the Harvestable Kelp. Place these about and your Sims can harvest them.
49) The final thing that you want to add to you Diving Area is the Fog Emitter item. You can find this in Buy Mode, Debug, Misc. Items. You do NOT want to use the The Sims 3 Island Paradise filter this time. It isn’t there. The item itself just looks like a shiny green ball.
50) Once you place the fog emitter on your lot and then Ctrl + Shift + Click on it. You will be presented with the following options:
51) We are only interested in the Set Visual Effect… interaction. Click it to bring up the following box:
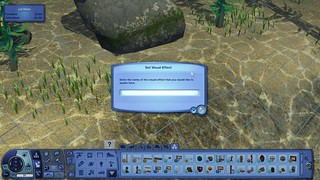
You want to insert the following into this box, EXACTLY as I have typed it:
EP10OceanLightRays
Place another Fog Emitter on the lot and type in the following:
ep10FishOceanOuterFC
Place another Fog Emitter on the lot and type in the following:
ep10MinnowSchoolA
Place another Fog Emitter on the lot and type in the following:
ep10MinnowSchoolB
Place another Fog Emitter on the lot and type in the following:
ep10MinnowSchoolC
You should have a total of FIVE Fog Emitters dotted around your lot. You won’t see any of these effects until you are in Live Mode. It may take a few days for a few things to spawn, especially the rarer spawners.
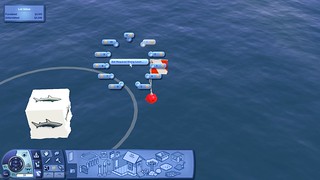
52) You are almost there! Well done! Now we have just one quick and final step to complete and you can go play in your awesome new Diving Area! You want to go up a level to the surface and find your Scuba Buoy and Ctrl +Shift and Click on it, this will present to you the following interactions:

53) Click on the Set Diving Level interaction and you will see the following options. While you can set the required Diving Skill level to 0, you won’t be able to visit it. Instead, select any of them from 1 – 10.
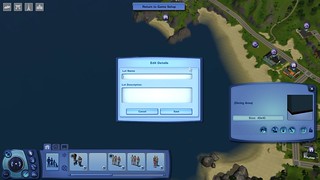
54) Go into Edit Town, and click on the Map Tag. Select Edit Details:
55) Give a name to your lot and a description if you wish! Click Save and you are done! Your Diving Area is now complete! Congratulations, you have done the ‘impossible’ and made a Diving Area outside of Isla Paradiso!
The Advanced Class
1) If you want to give your diving area a truly unique look, you can also mix in items from the base game, expansion packs, stuff packs and The Sims 3 Store. You might be building a Diving Area in Lucky Palms and consider the rocks a bit too dark and out of place for that world. In which case, add in the rocks and boulders which came with that World!
These additional items can be found in Buy Mode, Debug, Misc. Objects. If you would like to place rocks in your Diving Area, you can do so by accessing them via the Rocks section in Build Mode. Even more items can be found in Build Mode, Community Objects, Misc. Objects. You can assess this section through here:
2) To place these items, you will need to use the Move Objects On cheat. There are several items which can give a certain appearance to your Diving Area. While testing this method in different Worlds to find out which Worlds support Diving Area’s, it quickly became apparent that Bridgeport shouldn’t have pristine looking Diving Areas. Throw in a few loose toys, scrap heaps and broken wagons and you have the look of a trash filled river!
A Word of Caution
As expected, there are a few limitations with having Diving Areas in other Worlds. These will be discussed below. While it is possible to place normal, everyday objects such as chairs and beds under the water, there is no way for your Sims to interact with them. But feel free to use them to further build on a particular theme or style.
It is not possible to build any structure on Diving Areas. This includes walls and fences. It is not advised that you save Diving Areas to the Lot Bin to share in other Worlds or with other players. There is a problem with the water level which causes Sims, boats, sharks, fish and the Scuba Buoy to float several stories from the sea.
When Sims and Boats transition over the edge of the Diving Lot, you will notice a ‘jump’ in their animation. They will come out of the water and float for a second or two. This is entirely normal and will not have any negative effects on your game.
Compatible Worlds
Here you will find a list of Worlds that this method has been tested in and where it is or isn’t possible to build Diving Areas.
Base Game and Expansion Pack Worlds
Sunset Valley – Yes
Twinbrook – No
Bridgeport – Yes
Appaloosa Plains – Yes
Starlight Shores – Yes
Moonlight Falls – Yes
Isla Paradiso – Yes
Sims University – Yes
Al Simhara – Yes
Shang Simla – No
Champs Les Sims – Yes
Store Worlds
Riverview – Yes
Barnacle Bay – Yes
Hidden Springs – Yes
Lunar Lakes – No
Lucky Palms – Yes
Sunlit Tides – Yes
Monte Vista – Yes
Aurora Skies – Yes
Dragon Valley – Yes
Midnight Hollow – Yes
Roaring Heights – Yes
Create a World (CAW)
It is fully possible to create Diving Areas in custom Worlds when using Create A World.
")


