")
Ever wondered how to make a bridge in The Sims 4? Wonder no more! There are two ways to go about it and both are actually very simple. In my opinion a bridge will never look as beautiful as it could in The Sims 3 because we do not have the “control floor elevation” cheat, but that does not stop us from trying! Let us look at the two methods of creating bridges in The Sims 4.
Method 1.
This method requires you to use foundations and it is also the easiest to make. First, determine where your bridge will be. For example, if you want to place it across a river, use the pool or fountain tool to create the river first and then leave a small space of 1-2 (or more if you want to) tiles. You may also create half the river and then create the other half once the bridge is built.

Once the river (or part of it) is done, you need to create a room which should be the size that you want your bridge to be. In my case I am making it a 1×3 room. Make sure you remove the walls of course, bridges don’t have walls!

Your next step here is to go into the foundation tool and adjust the foundation height. Here you may choose how tall you want your bridge to be. Feel free to experiment! In my experience the foundation bridges are best for lower bridges, whereas the other method works best for tall bridges. Once you have raised the foundation level, remember to paint the foundation. A good pick would be one of the wooden textures or the full stone texture, but pick whatever you like the best!
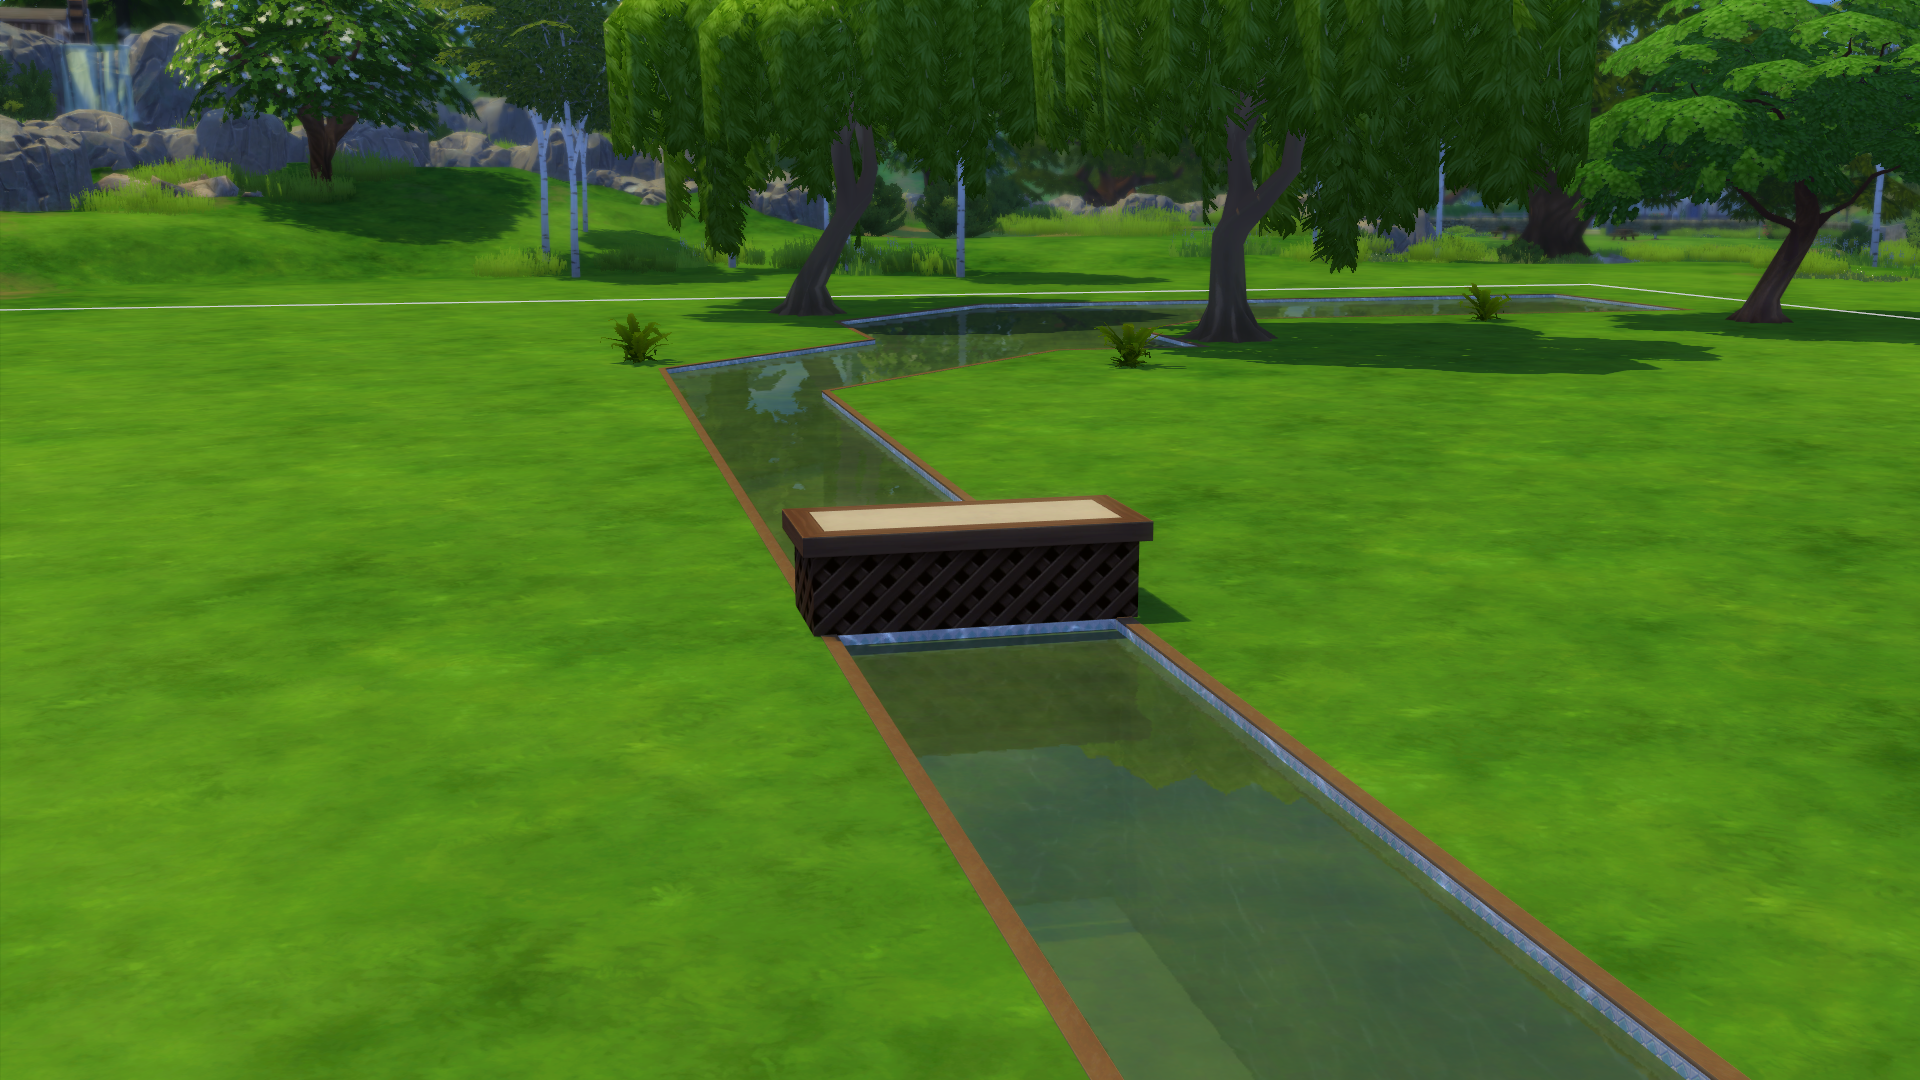
It is already slowly starting to look like a bridge! Note that I placed the other part of the river now so it appears that the river continues after the bridge. Your sims will of course also need to get up on the bridge and down again, so it is time to put the stairs in (also remember to put some flooring onto the bridge!). Pick out some stairs that fit the foundation paint you used. In my case it was a dark wood foundation, so I picked dark wooden stairs!
Once you have picked out your favorite stairs we just have one more task: Railings! Again make sure you try to pick railings that fit the other materials that you used. I went for dark wooden railings as well. Let’s look at the final result:
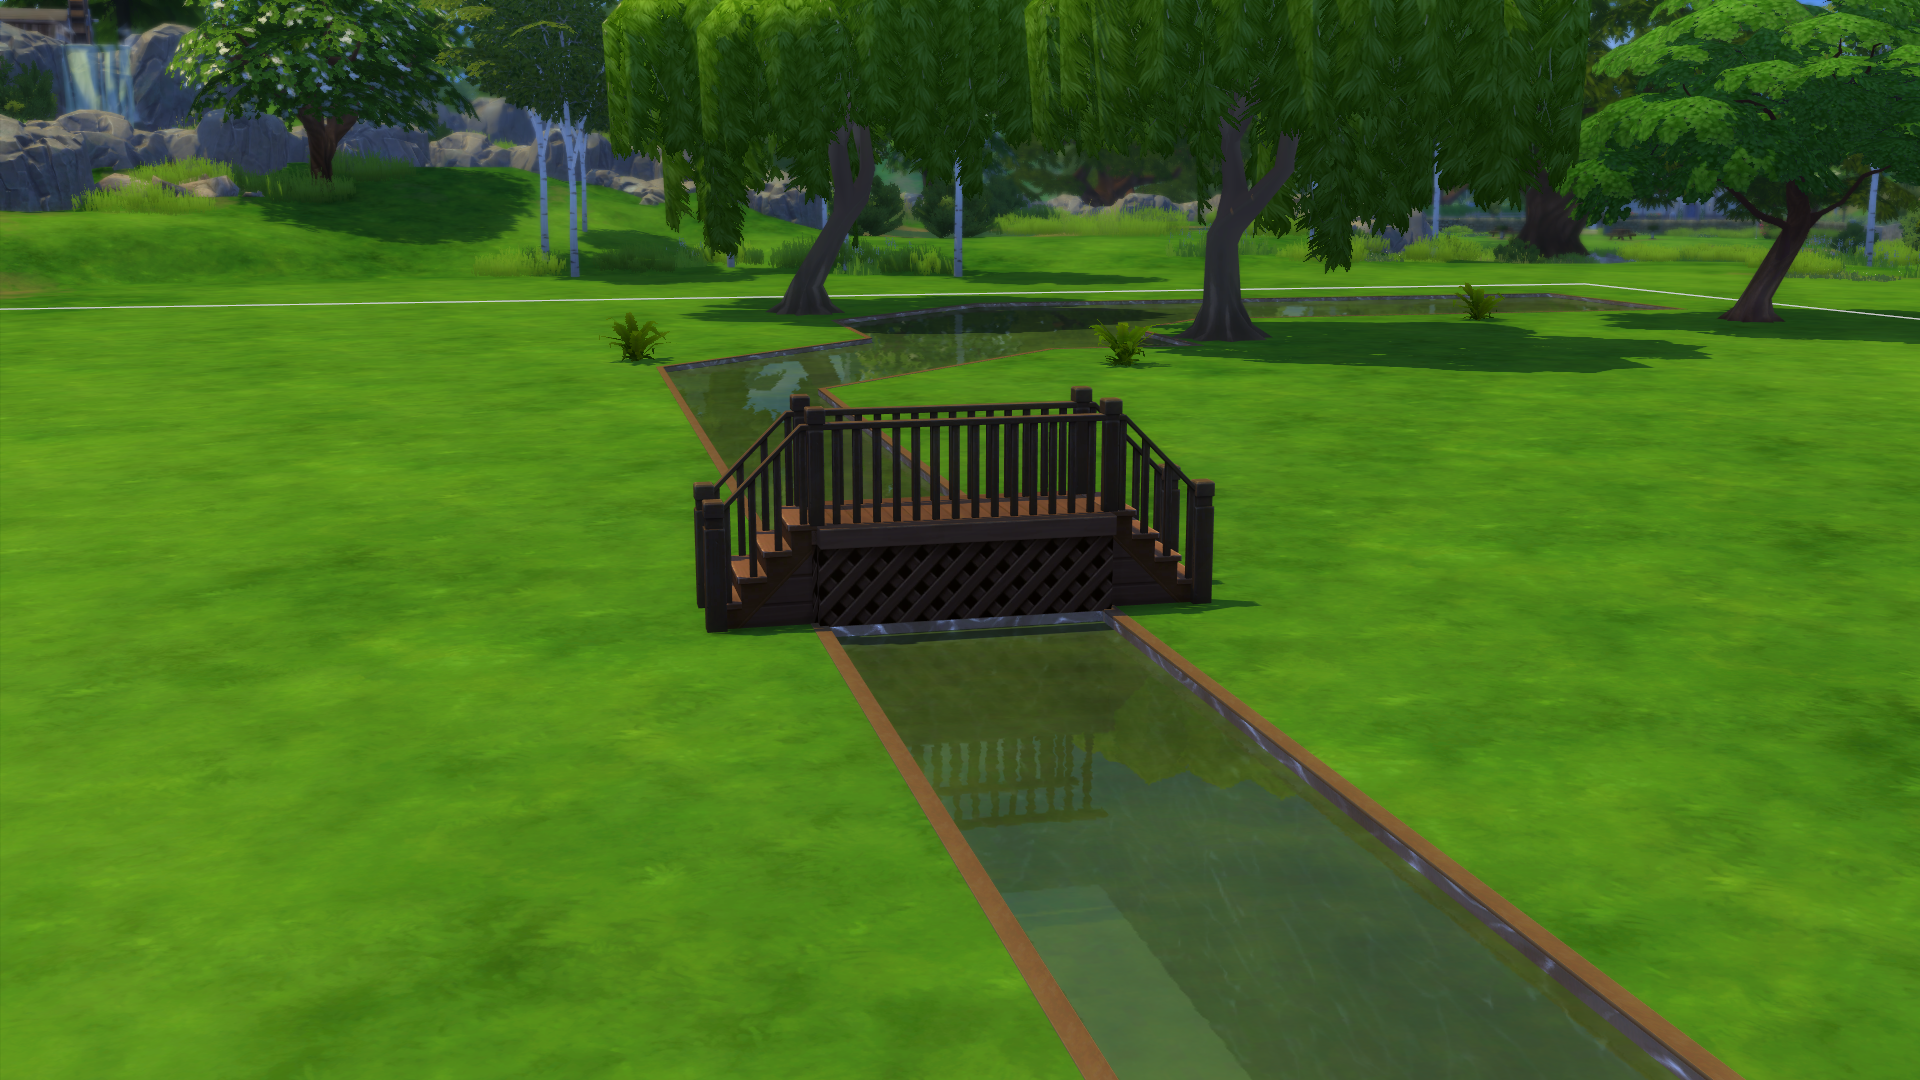
When picking the railings for the bridge and the stairs, try to pick a fence that has a matching staircase railing such as the one I used. That will look neater! You are now done with your foundation bridge. Let’s look at the other method!
Method 2.
You may be put off by the fact that the river stops abruptly where the bridge is placed. If you want to see the water flow below your bridge, look no further!
With this method we will be building the bridge one floor above ground. Here you can start out with one connected river because we will be building the bridge above it. The first thing you should do is to create a room (with walls this time!) on either side of the bridge, like so:
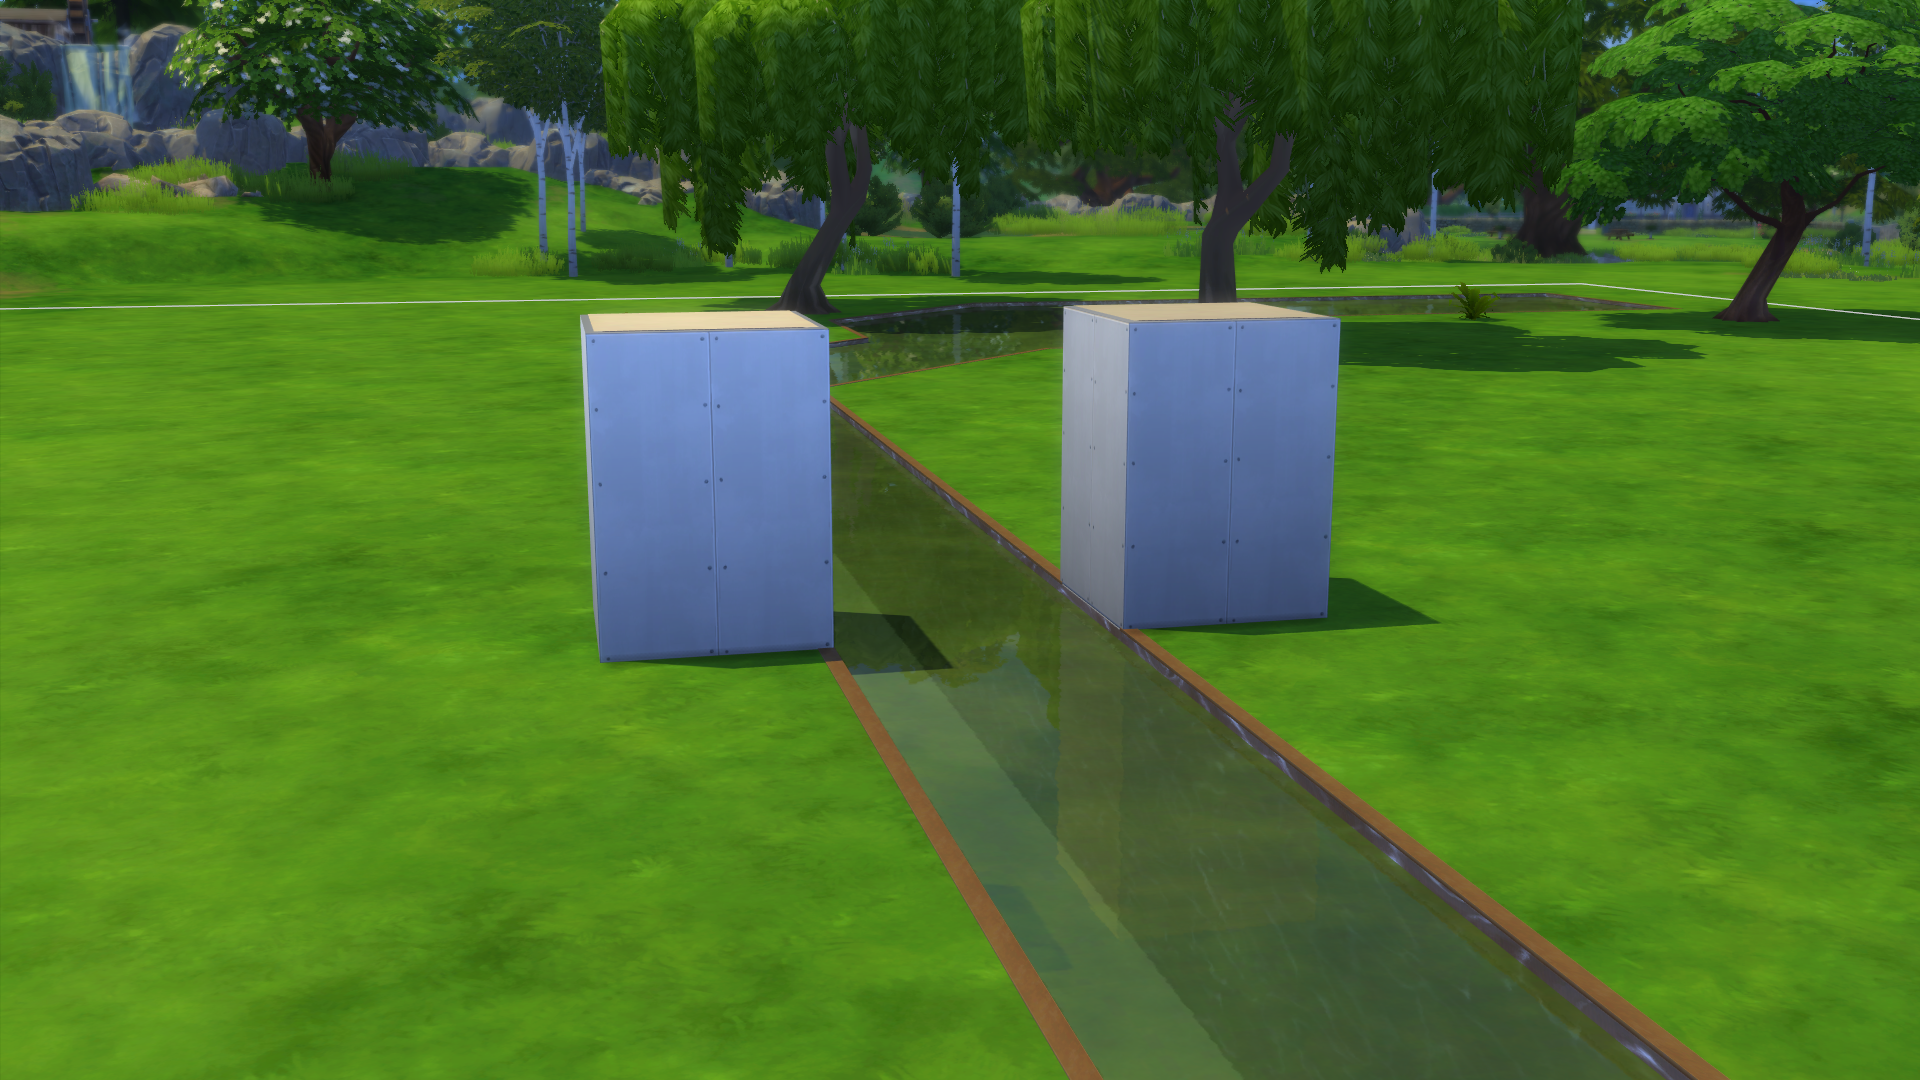
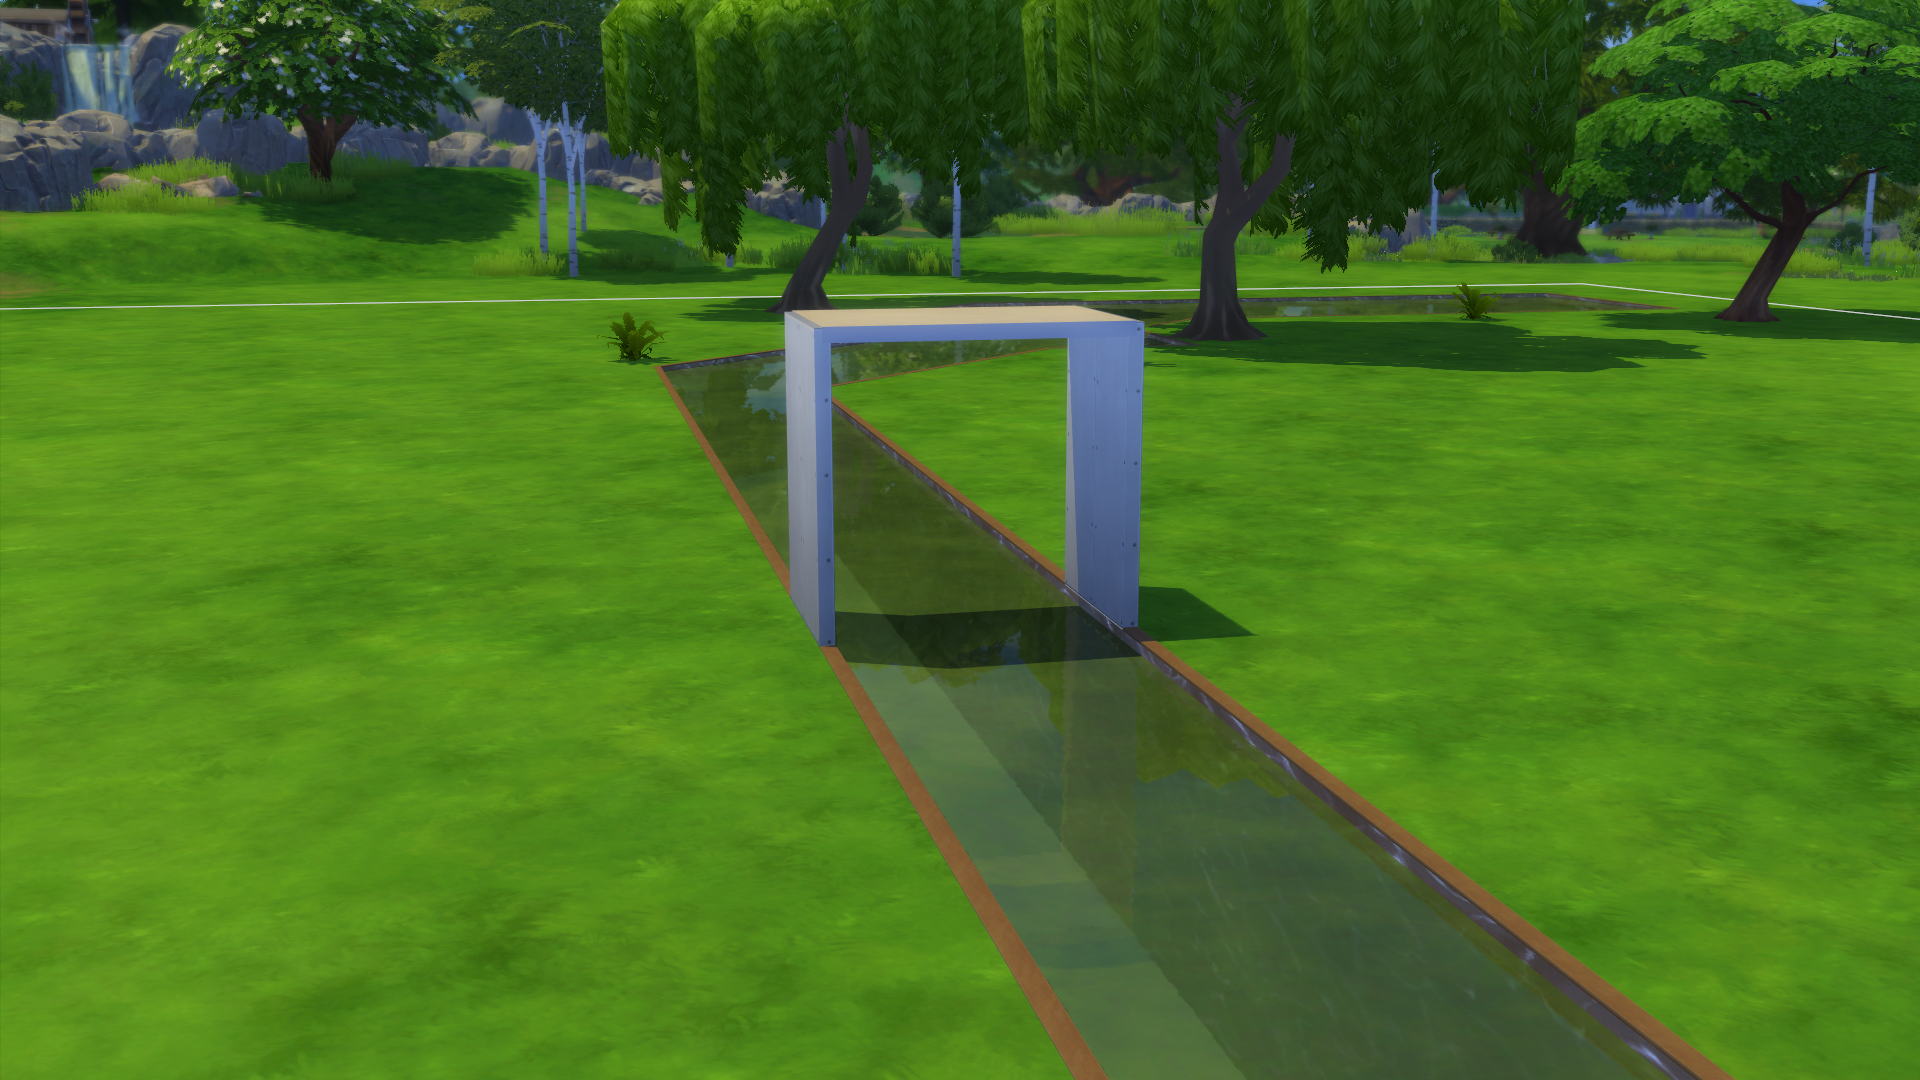
Now that you have two beautiful boxes on either side of the river, go to the room tool and select one of the rooms without walls. Place this room on top of one of these boxes and drag it across the river. The room should have the width of the bridge you wish to create of course. This time I am doing a 2×3 bridge.

Now that you have the room going across the river you do not need the boxes anymore. Leave only the walls facing the river.
From this point on the method is pretty similar to that of the foundation bridge. Pick out the stairs you want and place them on either side. Then pick out a wallpaper you like (I picked a stone wallpaper for this bridge) and paint the stairs and the two walls. Remember to put matching floor tiles on top of the bridge as well.
Once you have passed these steps, add the fencing and railing just as you did with the other bridge. At this point your bridge should resemble the one in the picture below. I would like you to pay attention to the trim on the bridge.
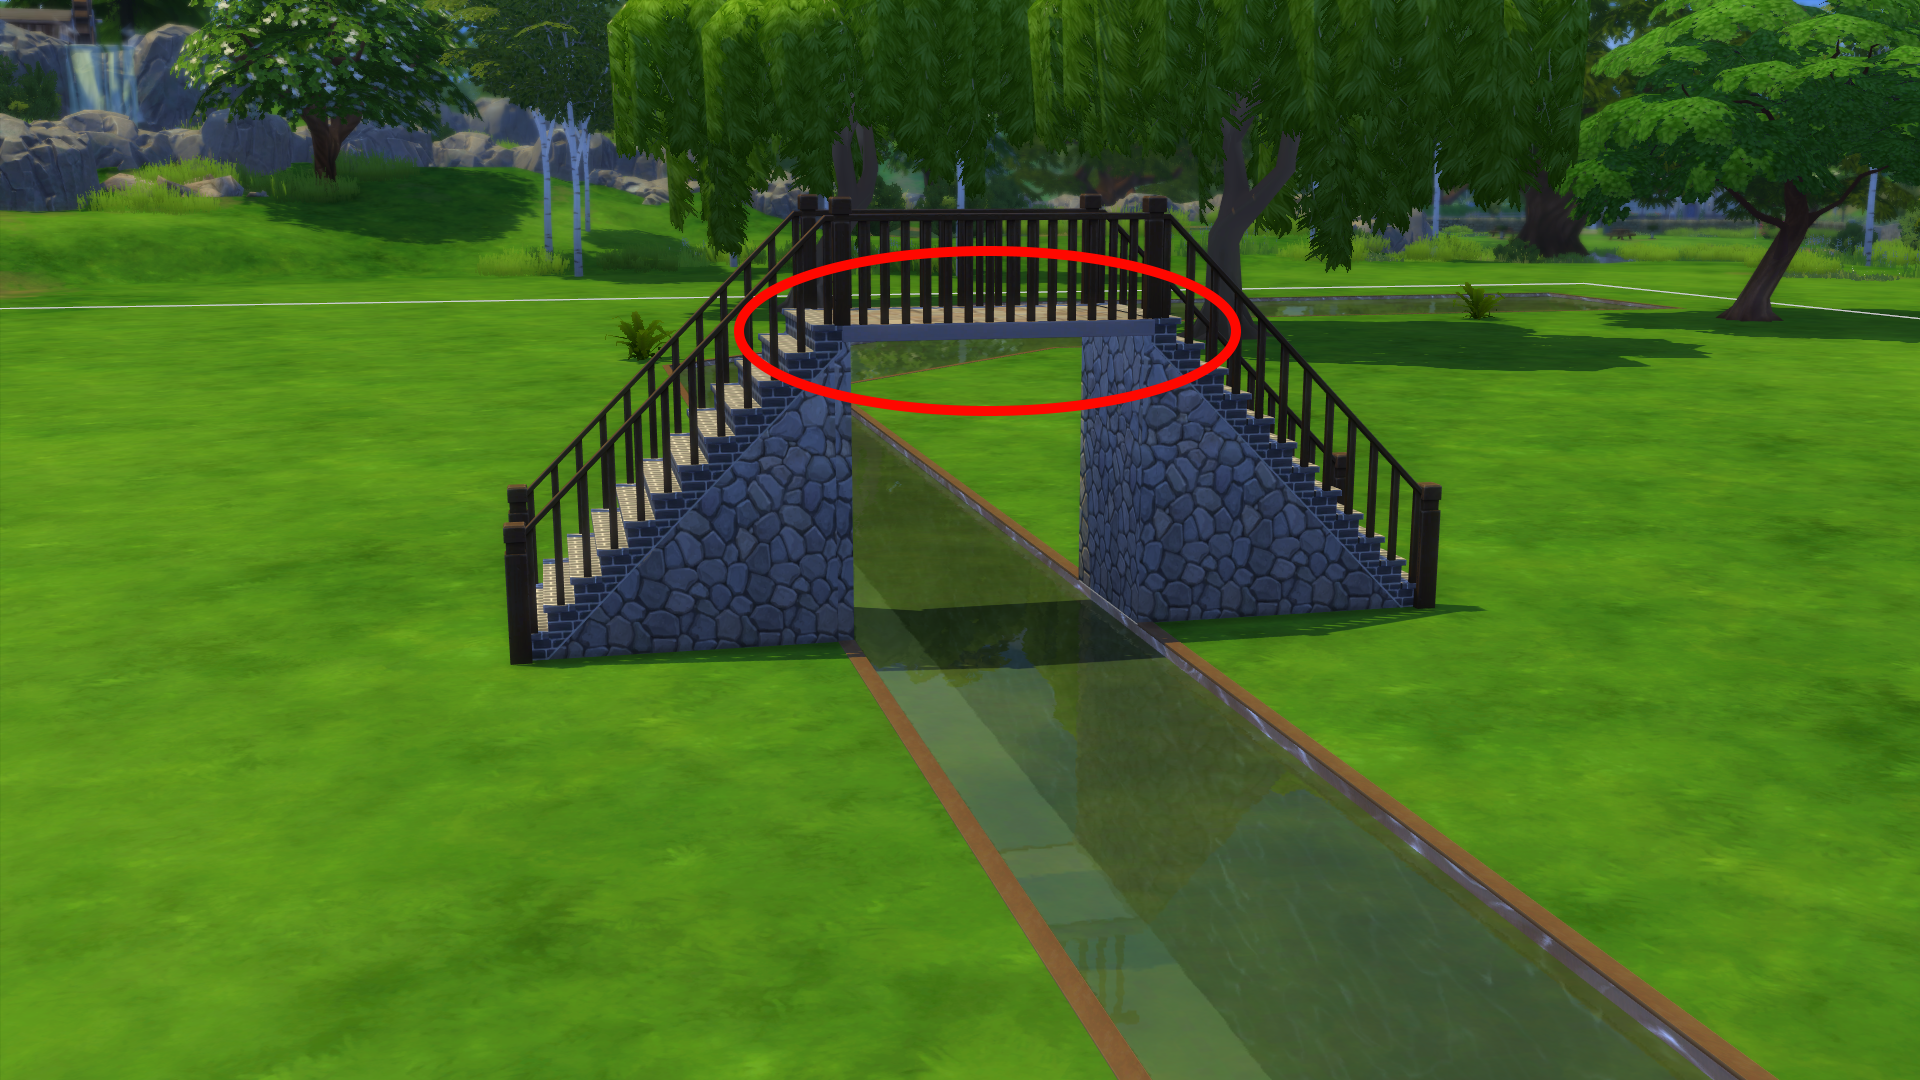
If you look at the picture above this one you will see that this little strip was white before and is now a darker grey color. This is a small thing, but it really helps because it can look very out of place with a big white strip on your stone or wooden bridge. To change the color of this trim go to the “Friezes and Trims” category in build mode. Choose the “Trims” category and pick the “Inlaid Exterior Trim”. You may of course choose any other trim that you like, but this one is the only one that will not be jutting out on either side of the bridge. Pick the inlaid trim in whatever color matches your bridge.
Once you have added the trim we are ready to give our bridge the finishing touch. Right now the bridge has a gaping, square, empty space where the crossing is. It does not look very charming. Often you will see some sort of support on a bridge and you might have an arched shape. We cannot have the bridge be arched in The Sims 4, but we can actually achieve an arched shape below the crossing like so:

To create this effect you will need to find your way to the wall sculptures category in build mode. Here you will find a set of corbels. Pick the first one as that works the best. Now you will want to size it up. To do this you must press Shift + ] (on an English keyboard). To size an object back down you use Shift + [. Size up the corbels one or two times depending on how you want the bridge to look and also depending on how long your bridge is.
Place a corbel on both the walls turning towards each other, which will create an arched shape. Do this on the other side of the bridge as well, and you’re done!
Still feeling uncertain about how to create the bridges? I have also made a tutorial video on my YouTube channel showing you step by step how to create both types of bridges!


")


")