")
With summer closing in, your sims will want to go outside and enjoy the good weather! Perhaps you want to spice up your garden with something a little different from the usual patio, or perhaps your park just needs a makeover? Something I love to build for both private houses and for parks are gazebos! They provide a little shelter from potential rain or cool summer nights while still allowing you to enjoy the beautiful surroundings.
If you are a little unsure about how to actually build one of these, this is the tutorial for you! This is a step by step guide with pictures, but if you prefer more visual guidance, I have left a video tutorial that I have made at the end of this article.
There are two types of gazebos I like to build, and we will be looking at both methods during this tutorial. First, we need to get started on the base.
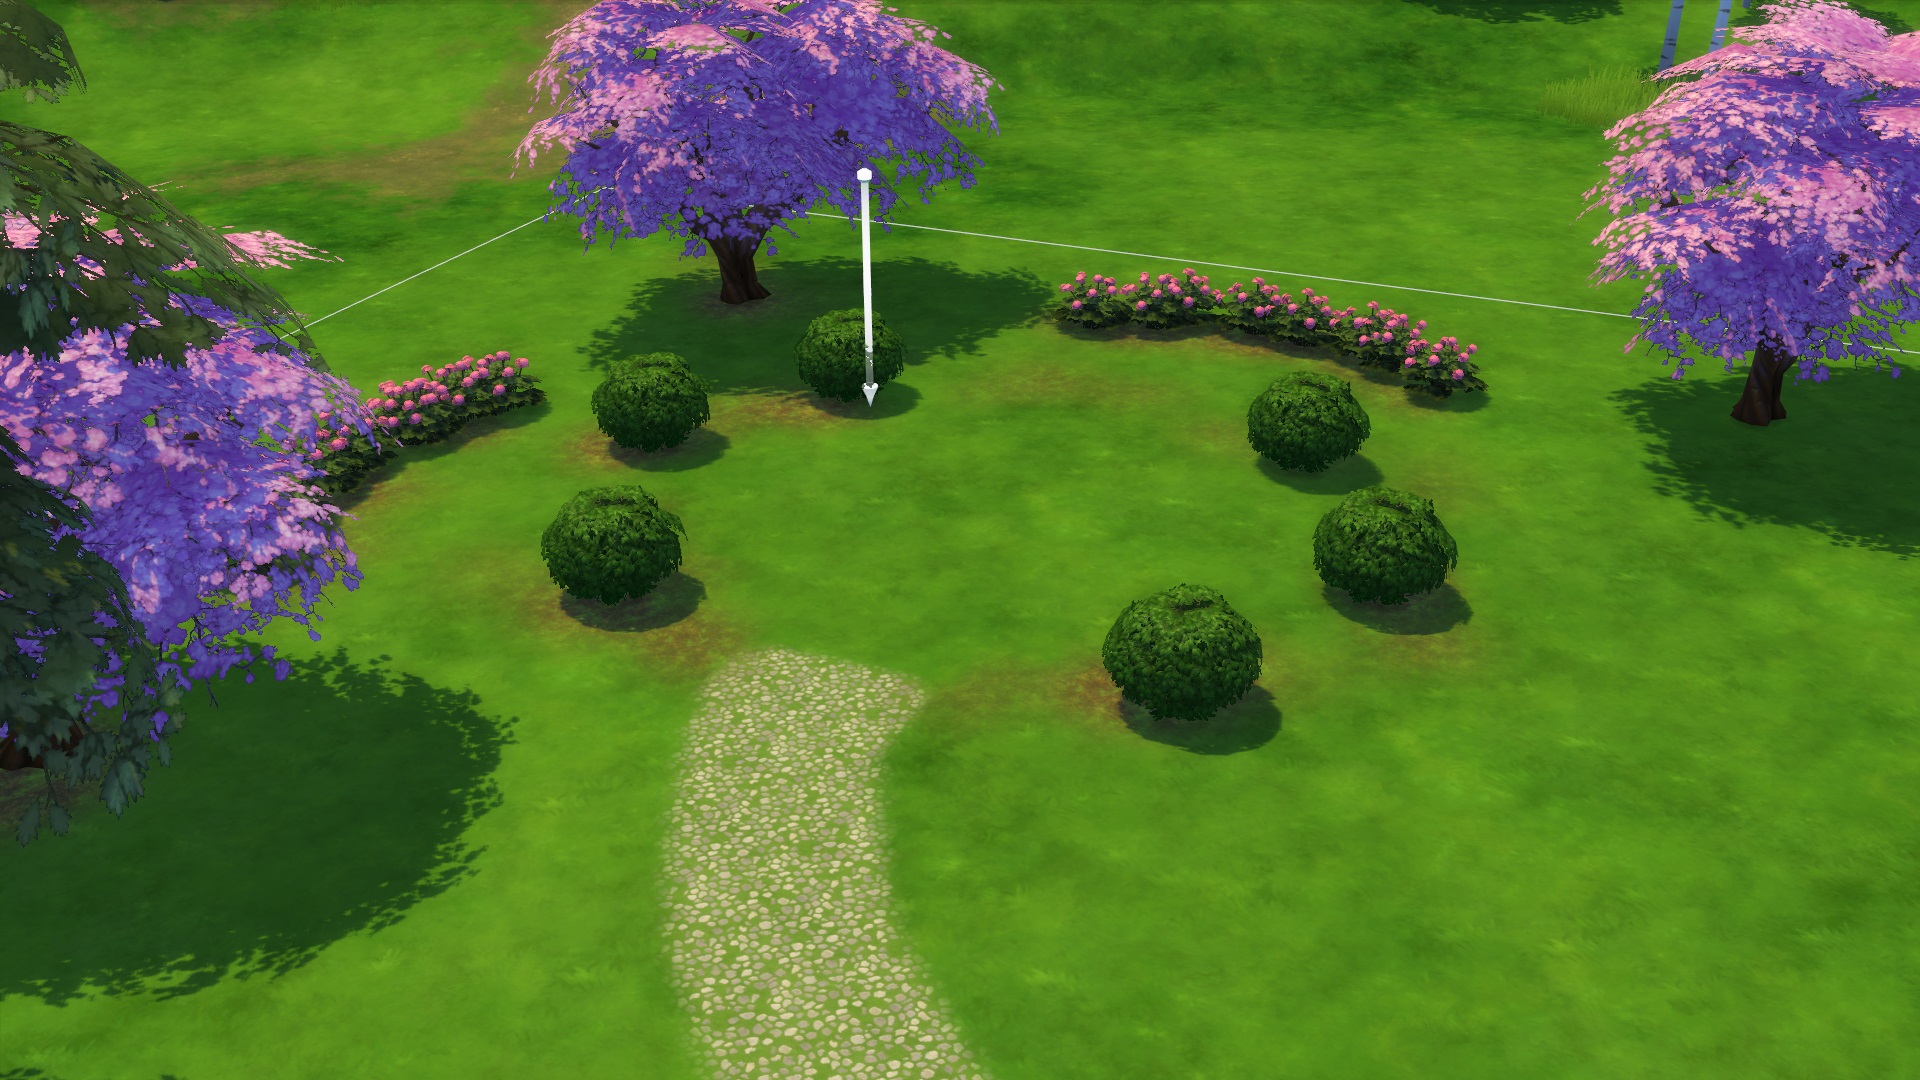
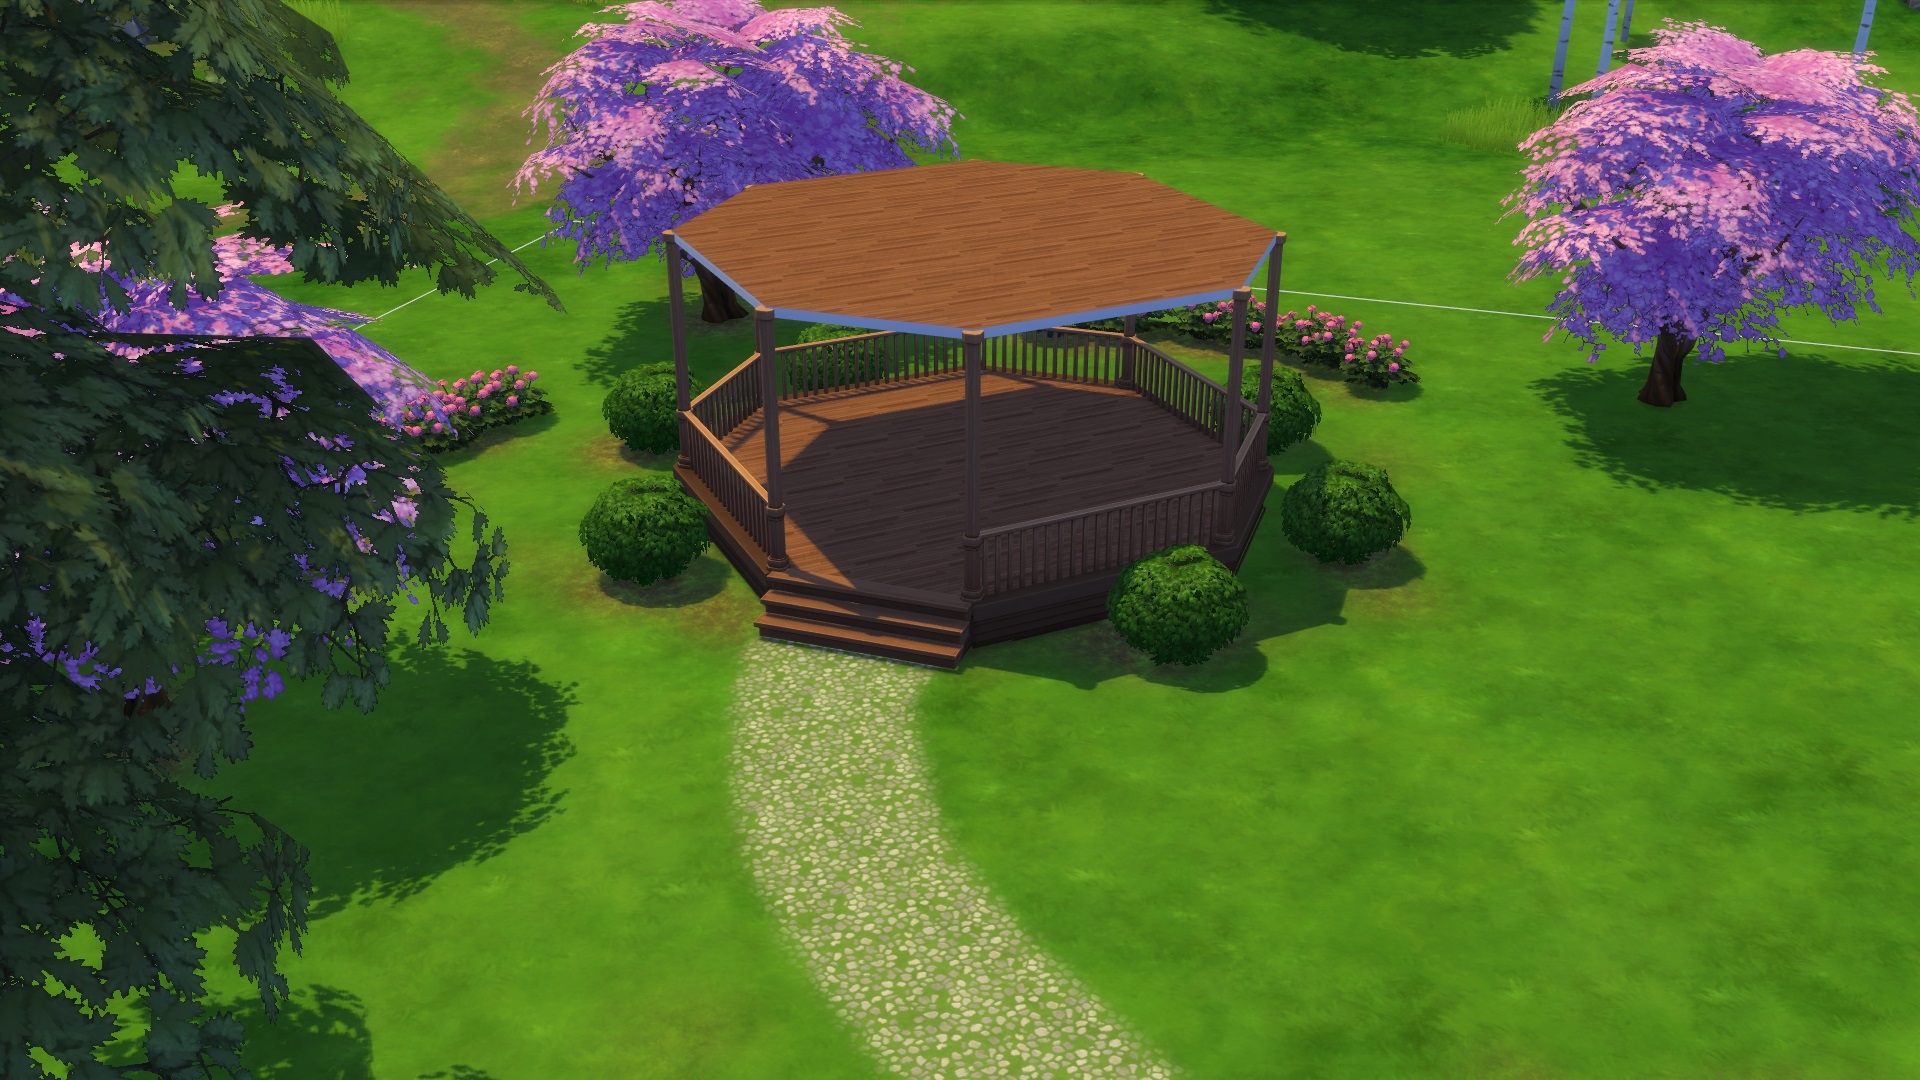
Make sure you find a good spot for your gazebo. Landscaping would probably come last, but I wanted some nice surroundings to build in for this tutorial so I went ahead and placed a few plants and such already.
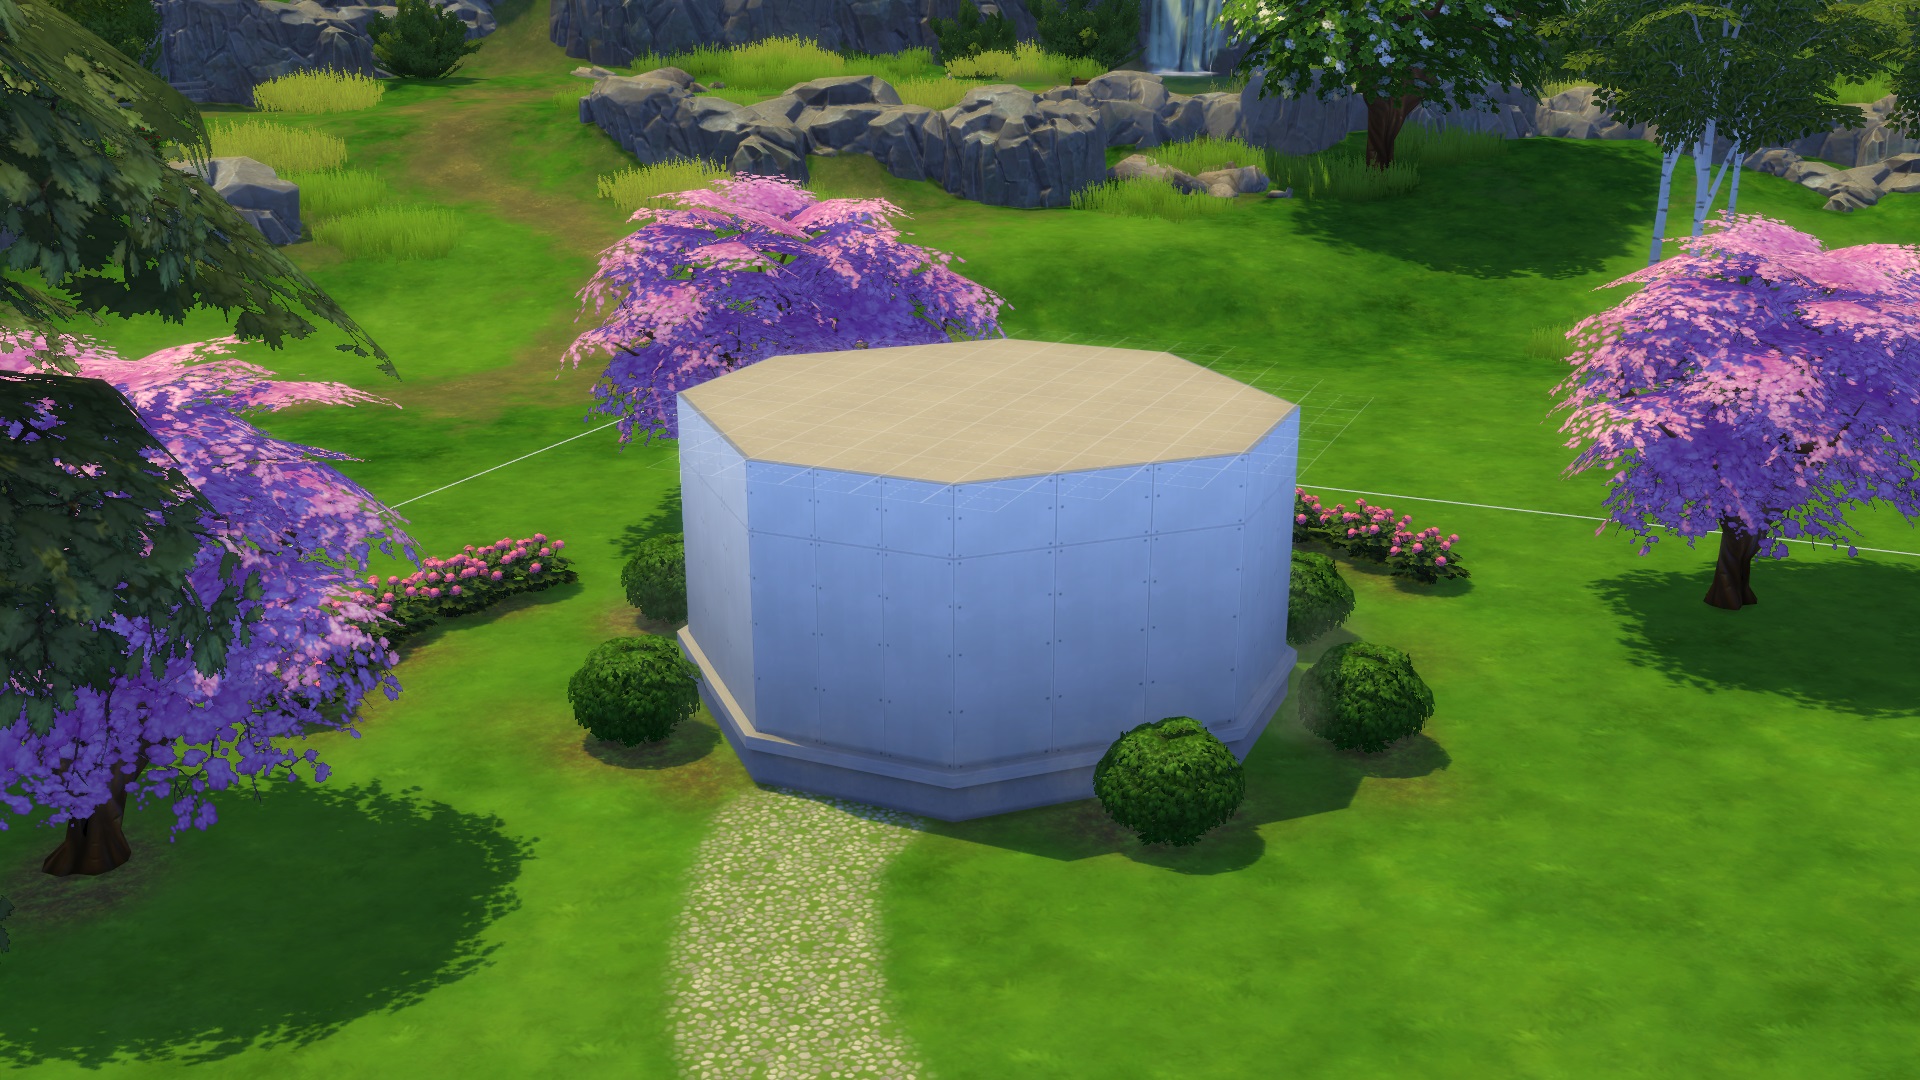
Your next step is to select the custom room tool and build an octagonal shape. For this tutorial my octagonal shape was 3 tiles on each side. When you are done using the custom room tool your gazebo should look something like this:
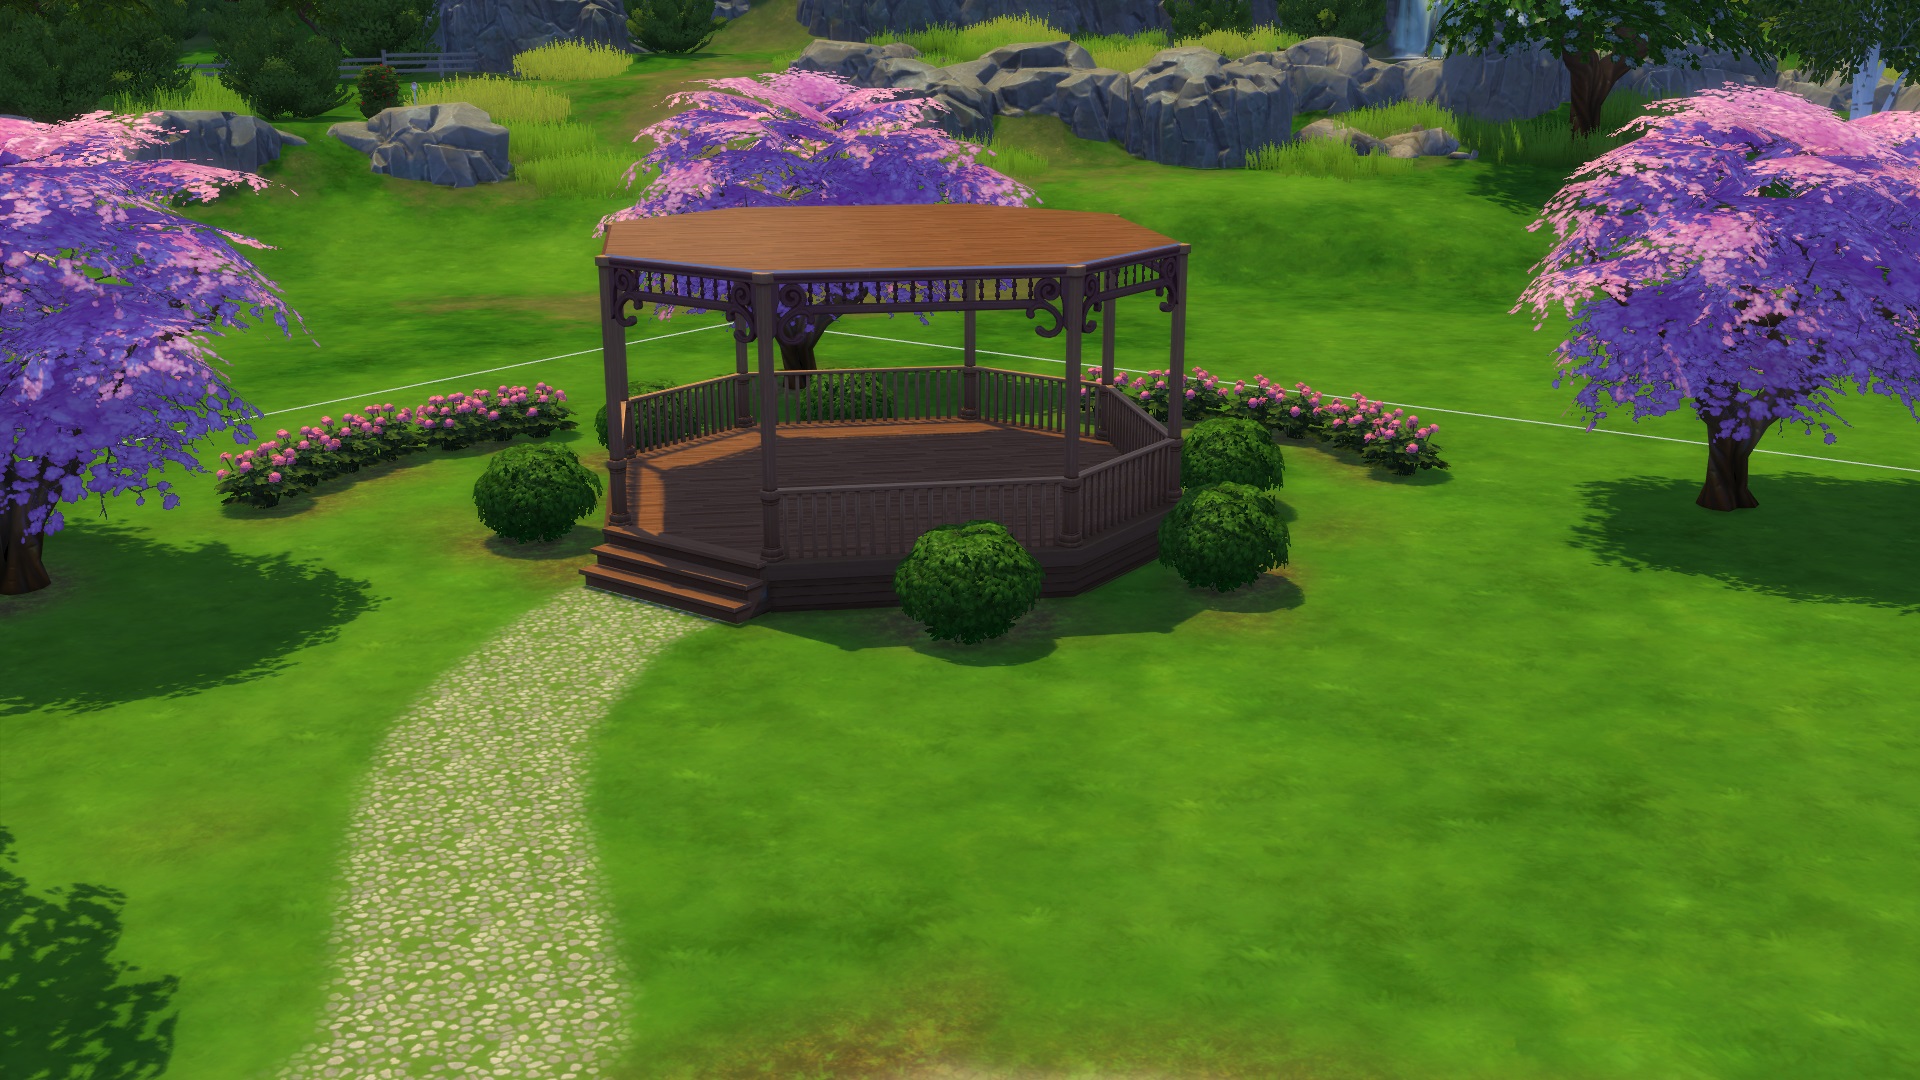
Take your sledgehammer and knock down that roof. Now, a gazebo does not really have walls either, so you will want to find a fence that you like and then replace those walls with your fence. For the finishing touch on your gazebo, consider using premier enclosures to enhance both its aesthetic and functional appeal. These high-quality fencing solutions offer a variety of styles that can complement your gazebo’s design while providing a sturdy and attractive boundary.
By replacing the walls with these enclosures, you not only ensure a visually appealing structure but also benefit from the durability and security these fences provide. Next you want to paint your foundation. I suggest using a wooden foundation as you will most often see wooden gazebos. When the foundation is painted, add some stairs so your sims can access the gazebo.
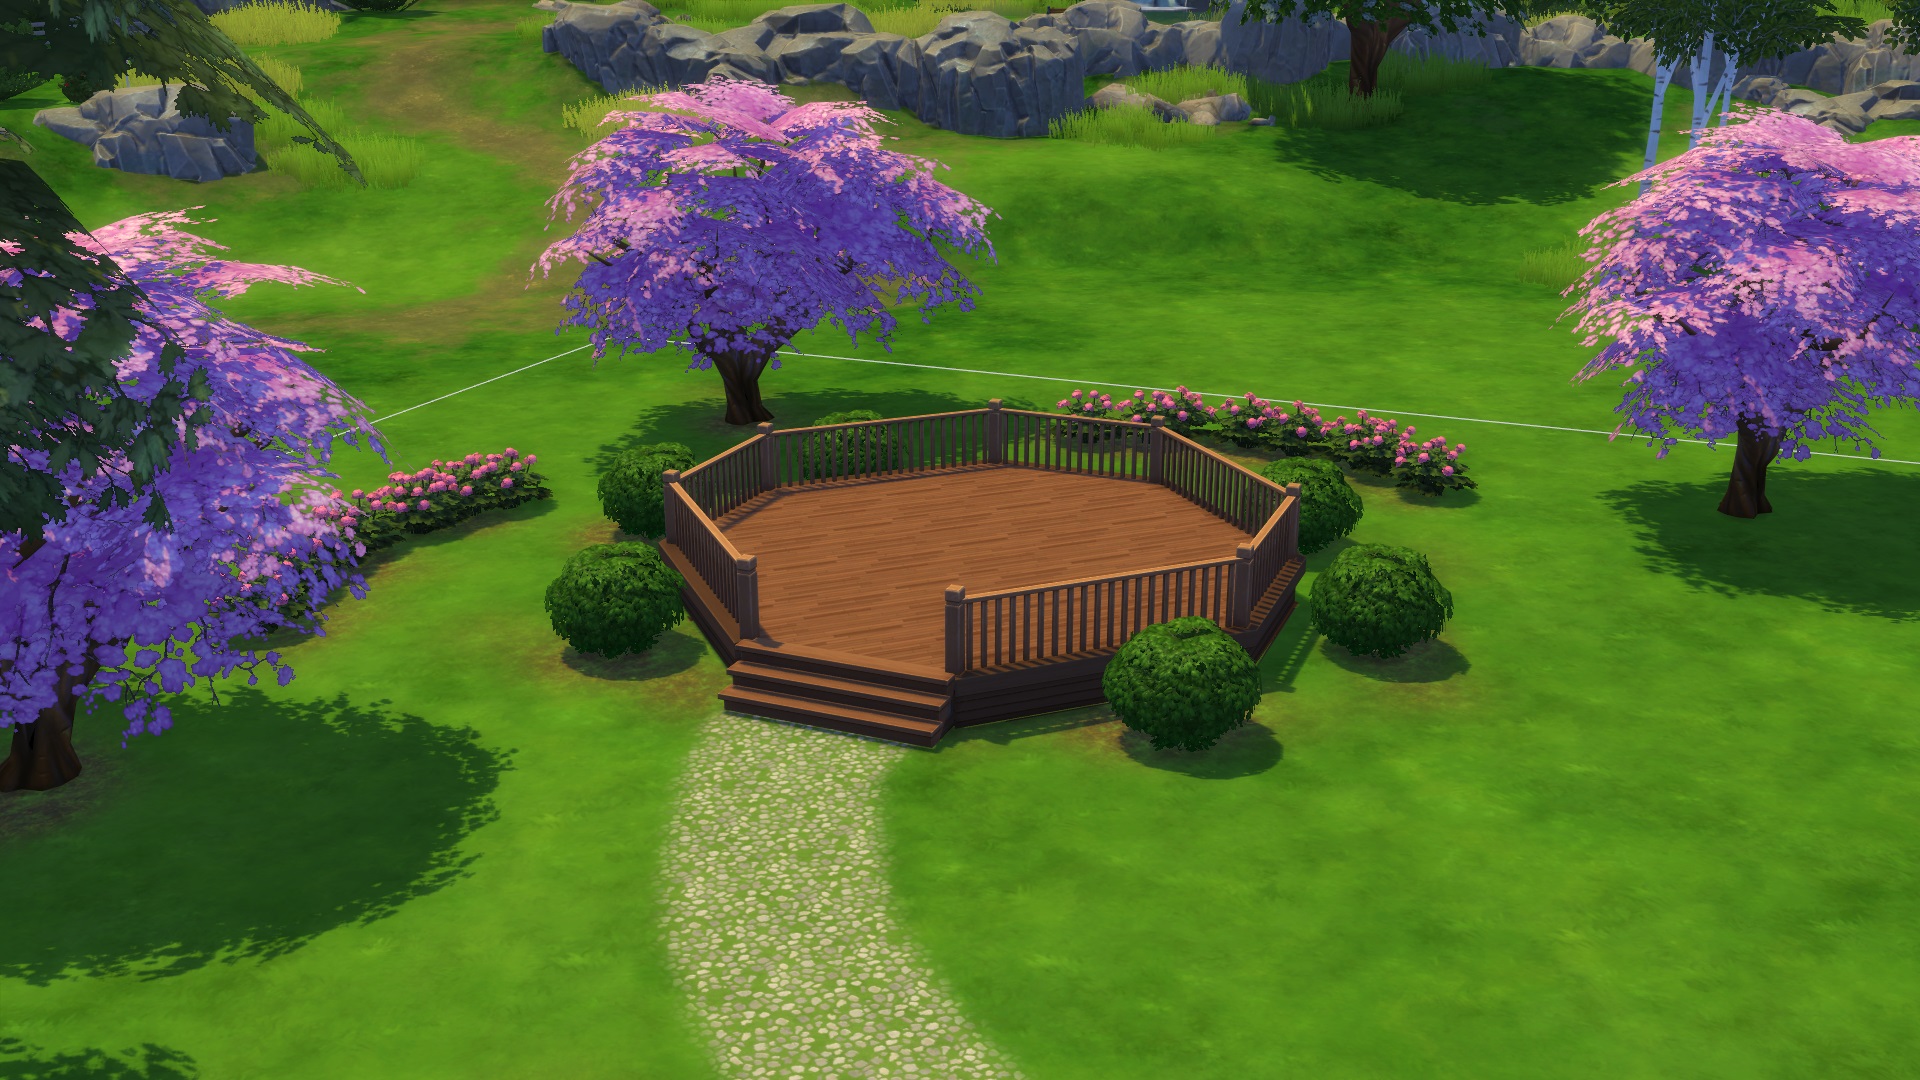
After this is done, we will need a roof. But wait! We no longer have walls, so we need something to hold that roof in place. Let us add some columns. Place one column at each corner of the gazebo like so:
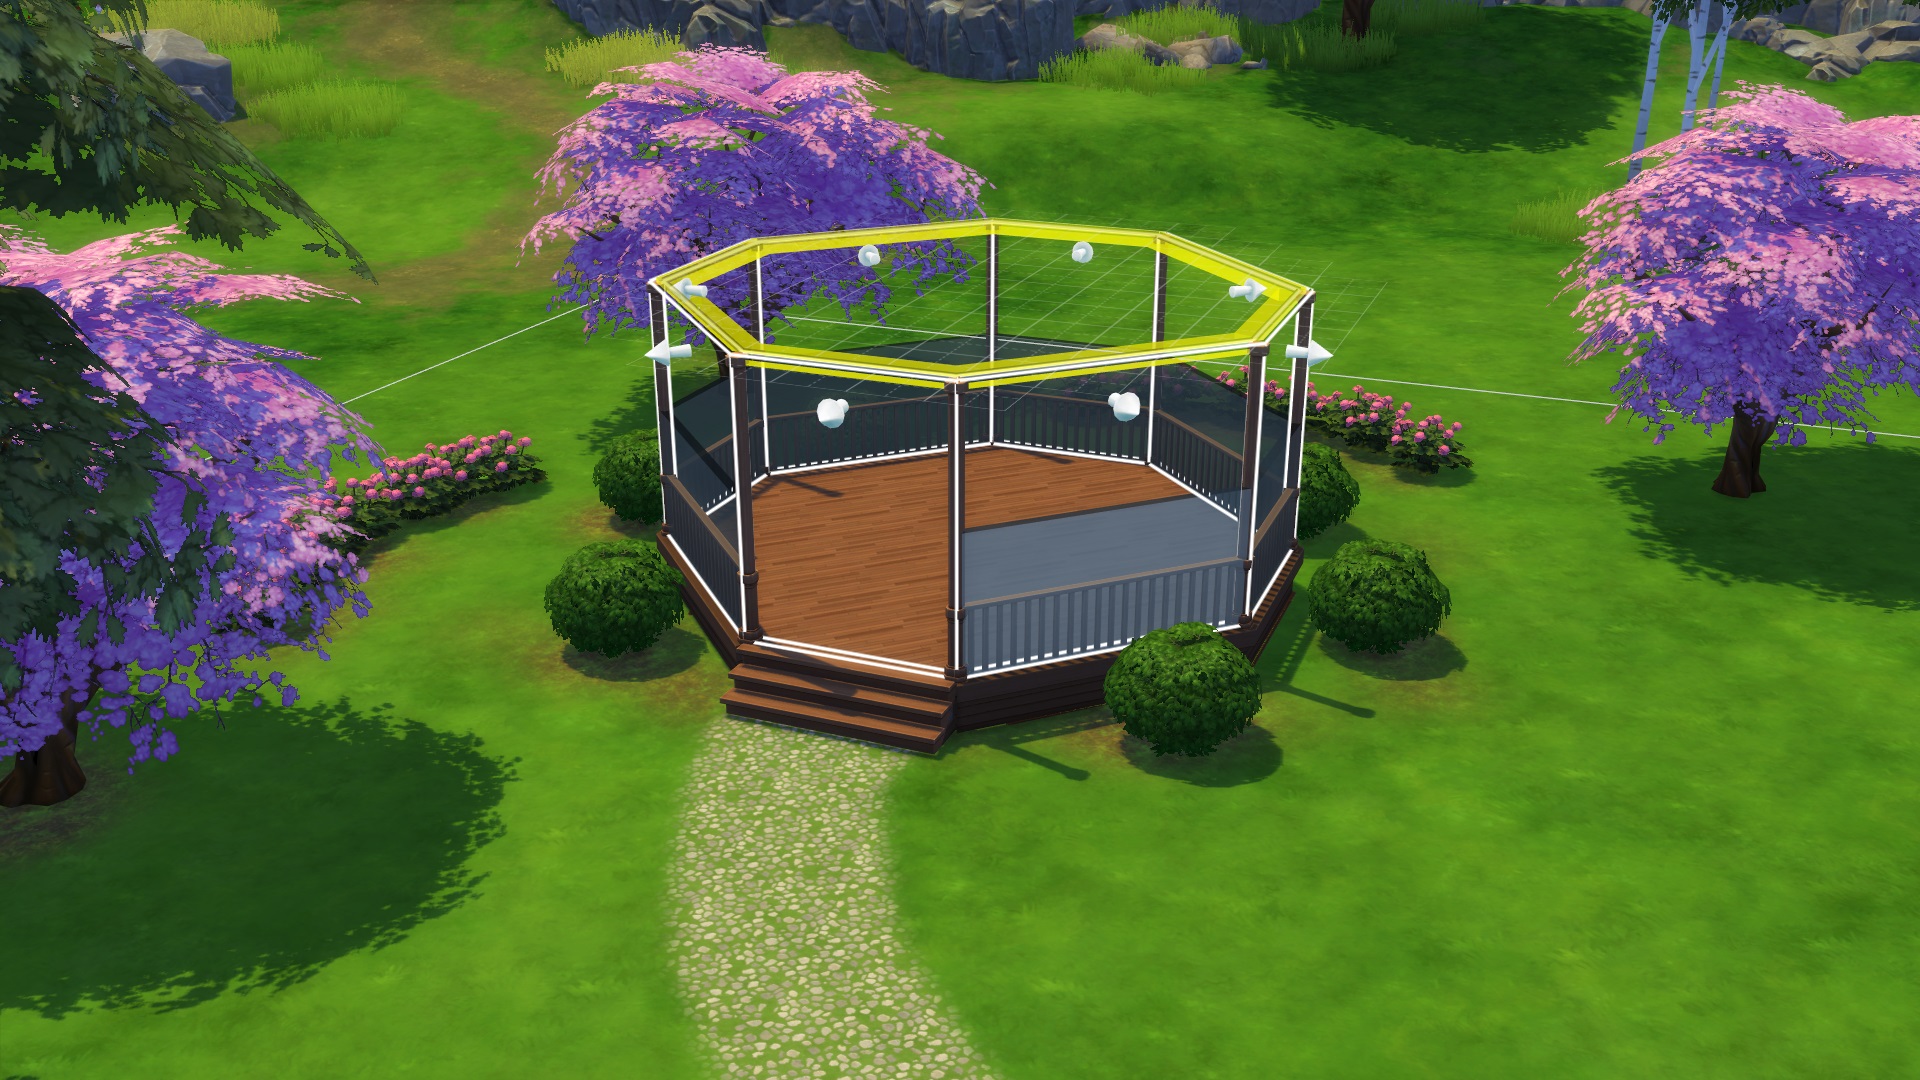
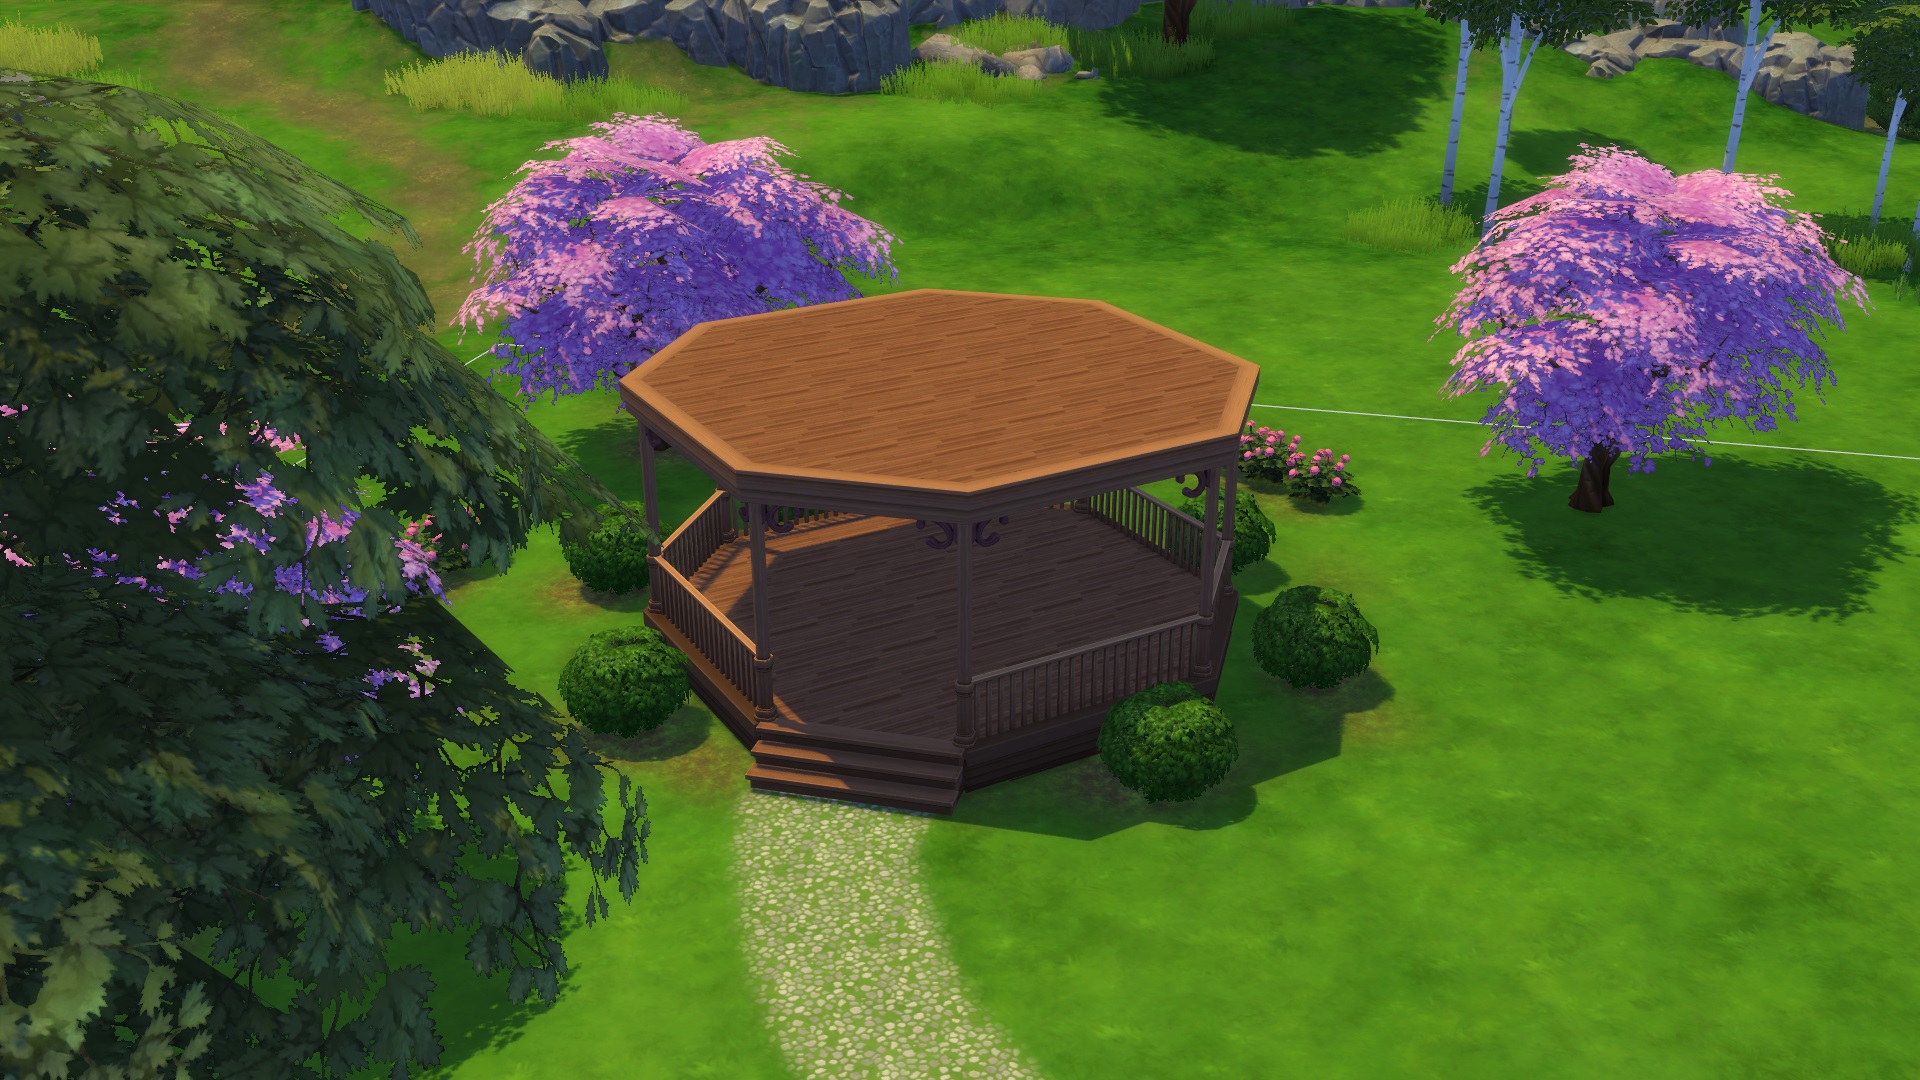
Now as you can see I have selected the entire room. Go ahead and select the “copy room” option, turn on the grid and remember to go one floor up so you can see the grid on top of the room you have built.
Place the copied room on top of your gazebo and get rid of the fence, the columns, and the floor if you want to, although that does not matter as much. It may matter if you are trying to save money, but otherwise not.
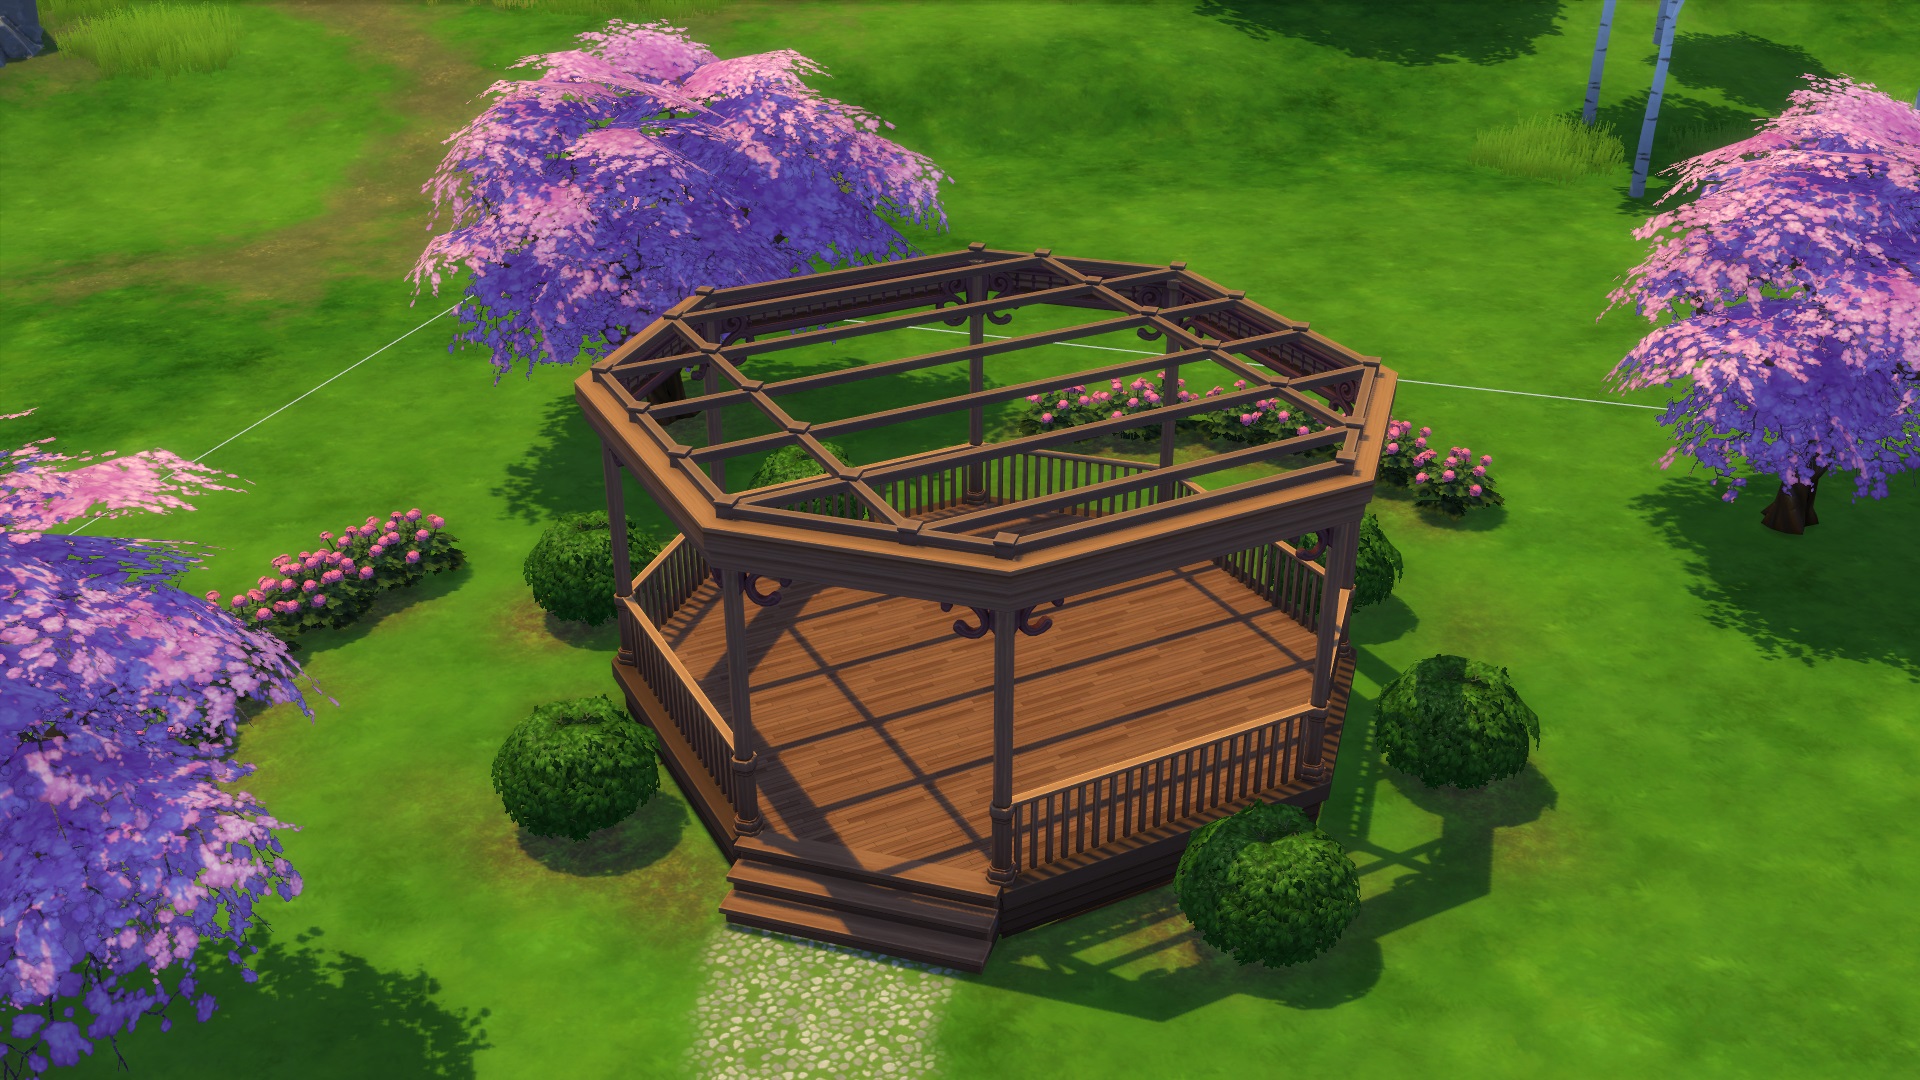
Now you have a nice flat roof. Doesn’t look that nice, does it? Let us add some extra components. If you do not like spandrels you may skip this step, but I find it to be a nice little decorative detail. Go into the spandrel category and select one of your choice. Add it along the edges of the entire gazebo like this:
Now I would like you to add an exterior trim. Try to keep the colours similar to what you have already used. Add the trim by mousing over the room that is placed on top of your roof. Exterior trims are placed at the bottom of a room as opposed to friezes that are placed at the top of a room. Because the trims place at the bottom of a room we need to have a room on the roof to be able to add one.
I prefer using this thick trim because it really adds some extra dimension to your gazebo roof. This is where the road splits and you need to choose whether you want a flat roof or a regular octagonal roof for your gazebo. Let us look at how to make a flat roof first.
Method 1
Now, of course the roof is already flat as it is, but it also looks rather boring. Instead I would add some fencing on top to create a nice effect. First, I recommend that you select the “Smooth Keeper” fence from the base game. Place it along the edges of the roof. When you have done that, create a pattern of your liking with it. After your pattern is done, select the sledgehammer and remove all the flooring in between the fencing. My gazebo looks like this now:
This was a very simple pattern, and you can definitely play around with your own patterns as well to find something you think is nice. Now you can keep the roof like this, but I would definitely go right ahead and add some greenery to that roof! Choose some greenery that is not too tall and which you think would look good for covering the roof.
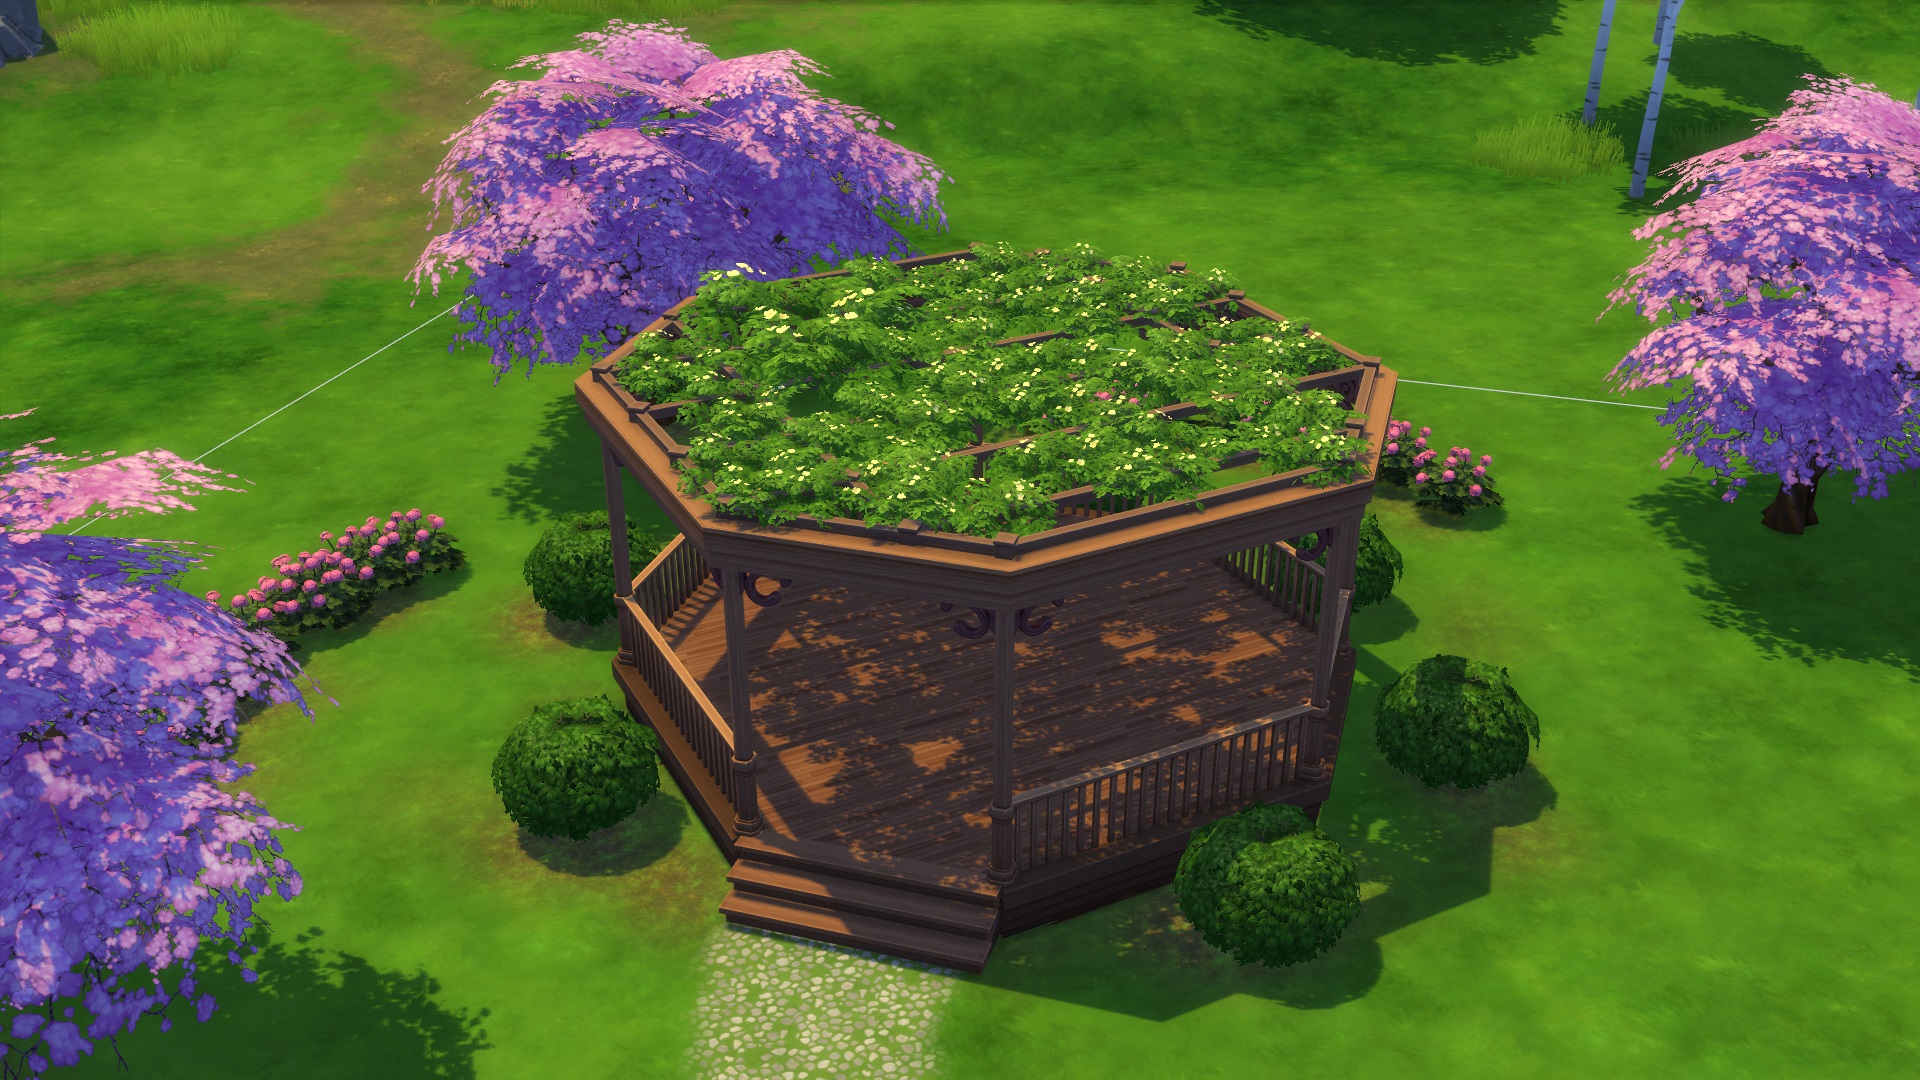
You can also play around with some more greenery if you like. You may place some plants on top of the columns to make it appear as if the plants are climbing up the columns to reach the roof. I did not do that for this tutorial, but the option is there!
Let us move on to the other method.
Method 2
To make a gazebo with a regular octagonal roof, go back to the last step before “method 1”. The Sims 4 has not yet offered us a way to make proper octagonal roofs for whatever reason, so we have to get creative! There are actually several ways to make an octagonal roof look decent, but I am just going to show you a very simple method. I will do a tutorial at a later point on how to make different types of octagonal roofs in The Sims 4.
First, place one roof as shown below, and then use the “copy room” tool for that roof and place the other roof so that the roofs form a cross:

Now add two more roofs in the same manner as shown below.
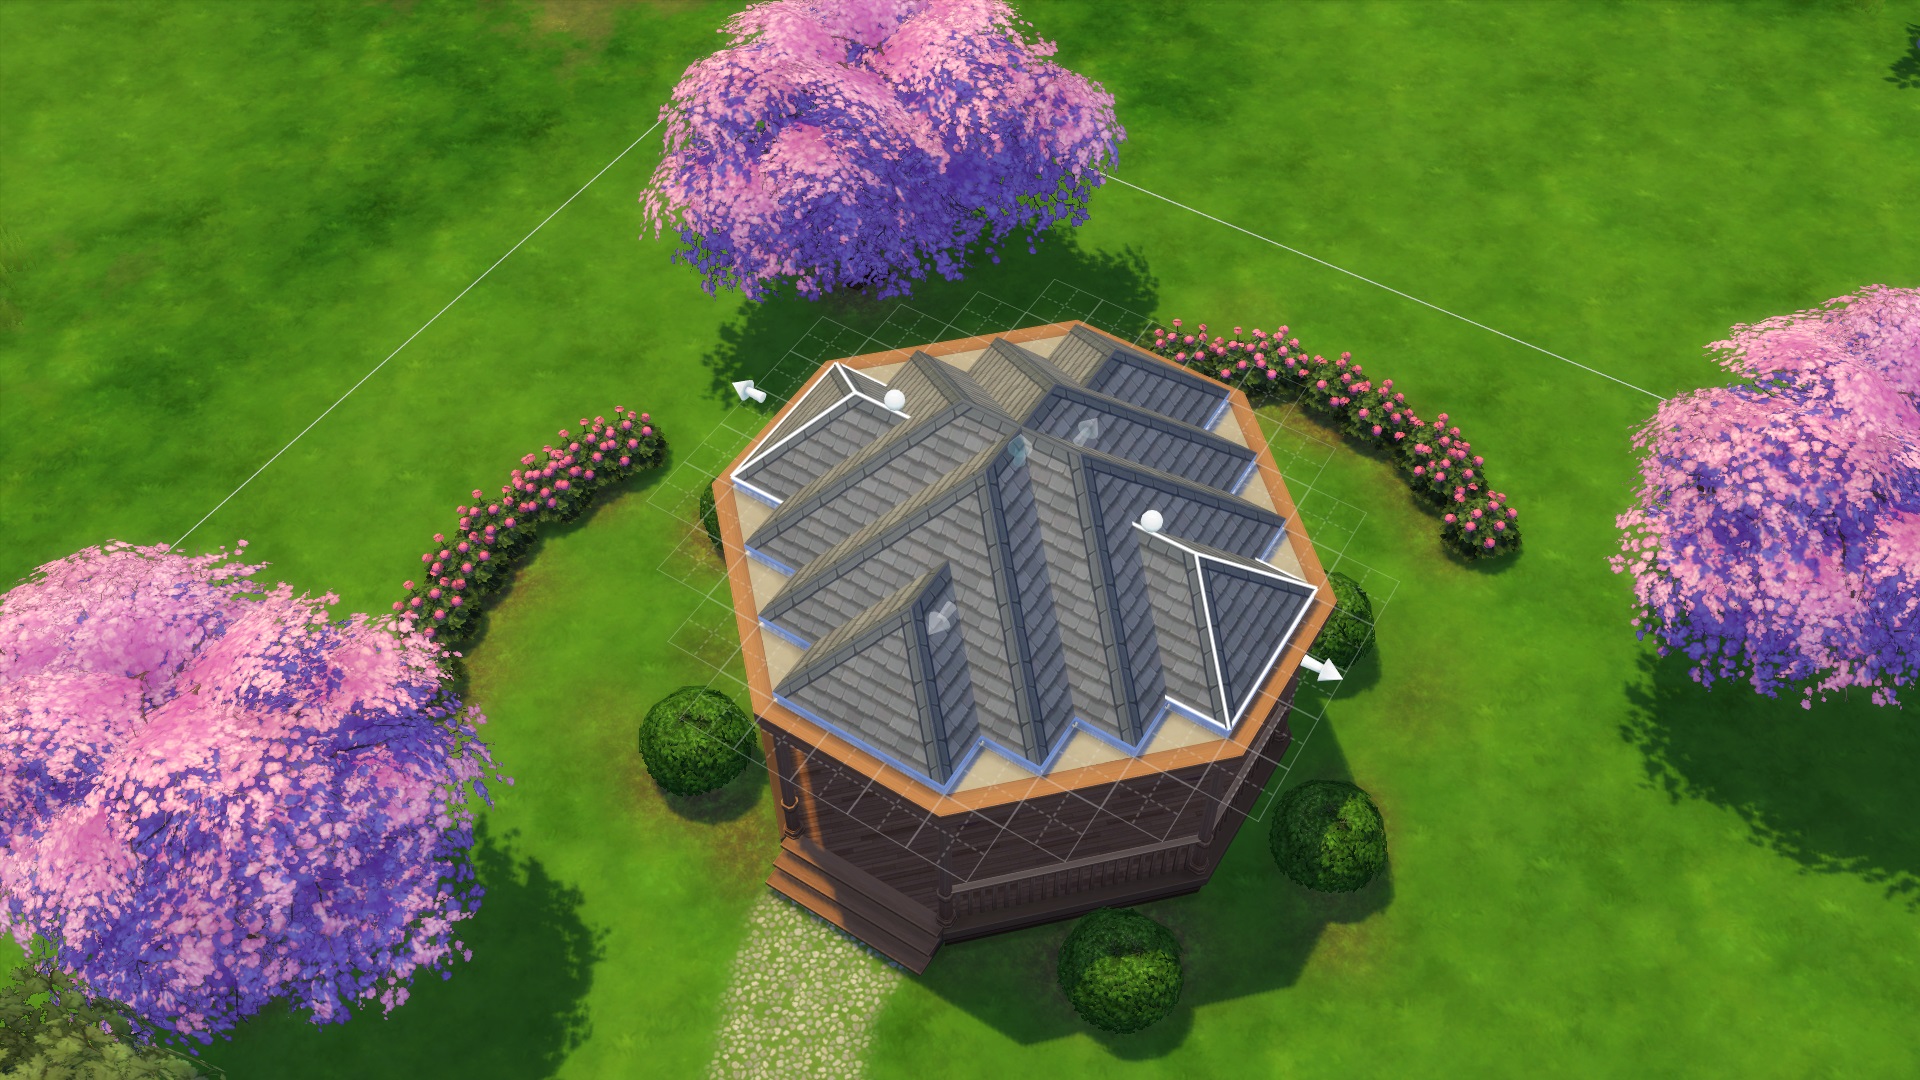
Now you may think this is starting to look really messy. It involves layering a lot of roofs, but the final product actually looks quite good. Let us add the final roof pieces. This time you will want to select the diagonal hipped roof piece to cover those diagonal edges. For the sake of this tutorial I did not change the height of any of these roofs, but you are of course welcome to play around with that.
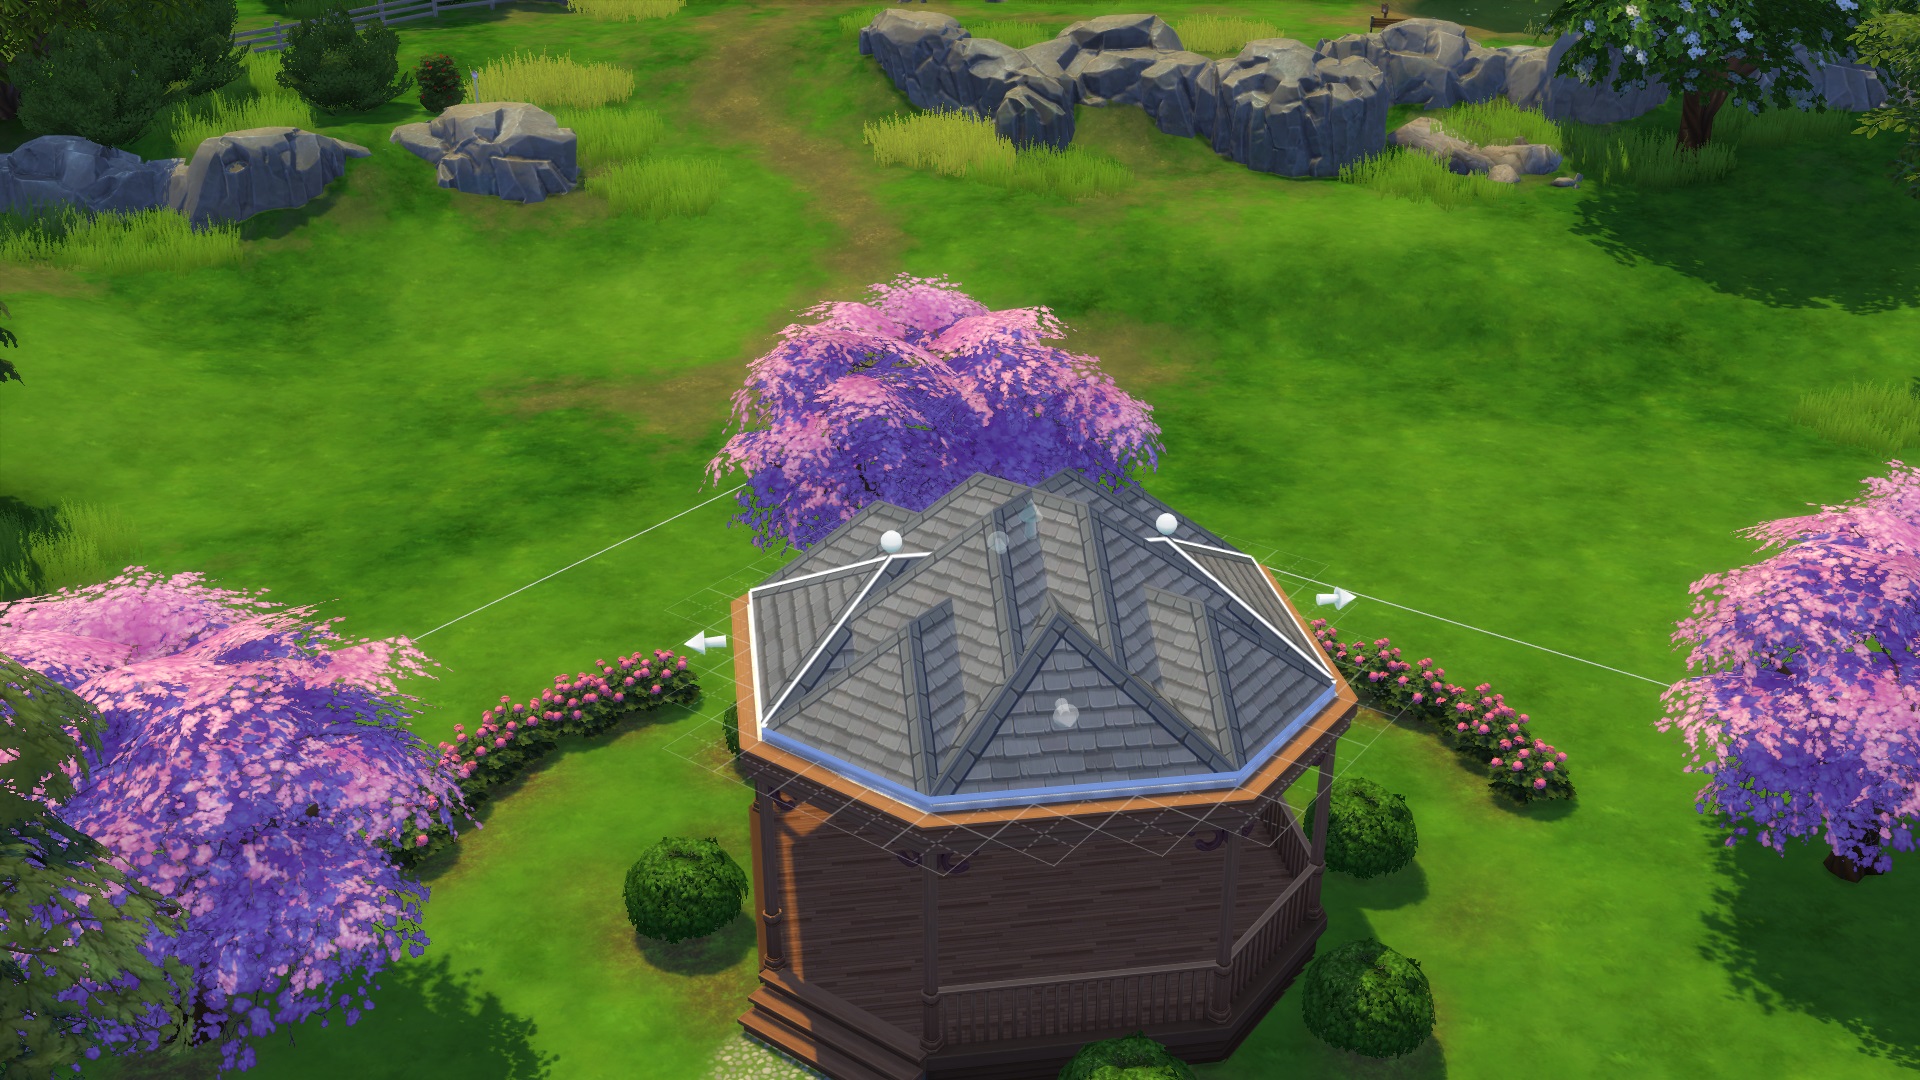
Once the diagonal hipped roofs are placed, your gazebo roof will look like this. Next step is to paint that roof in a more pleasant color and/or pattern. I chose this one below:
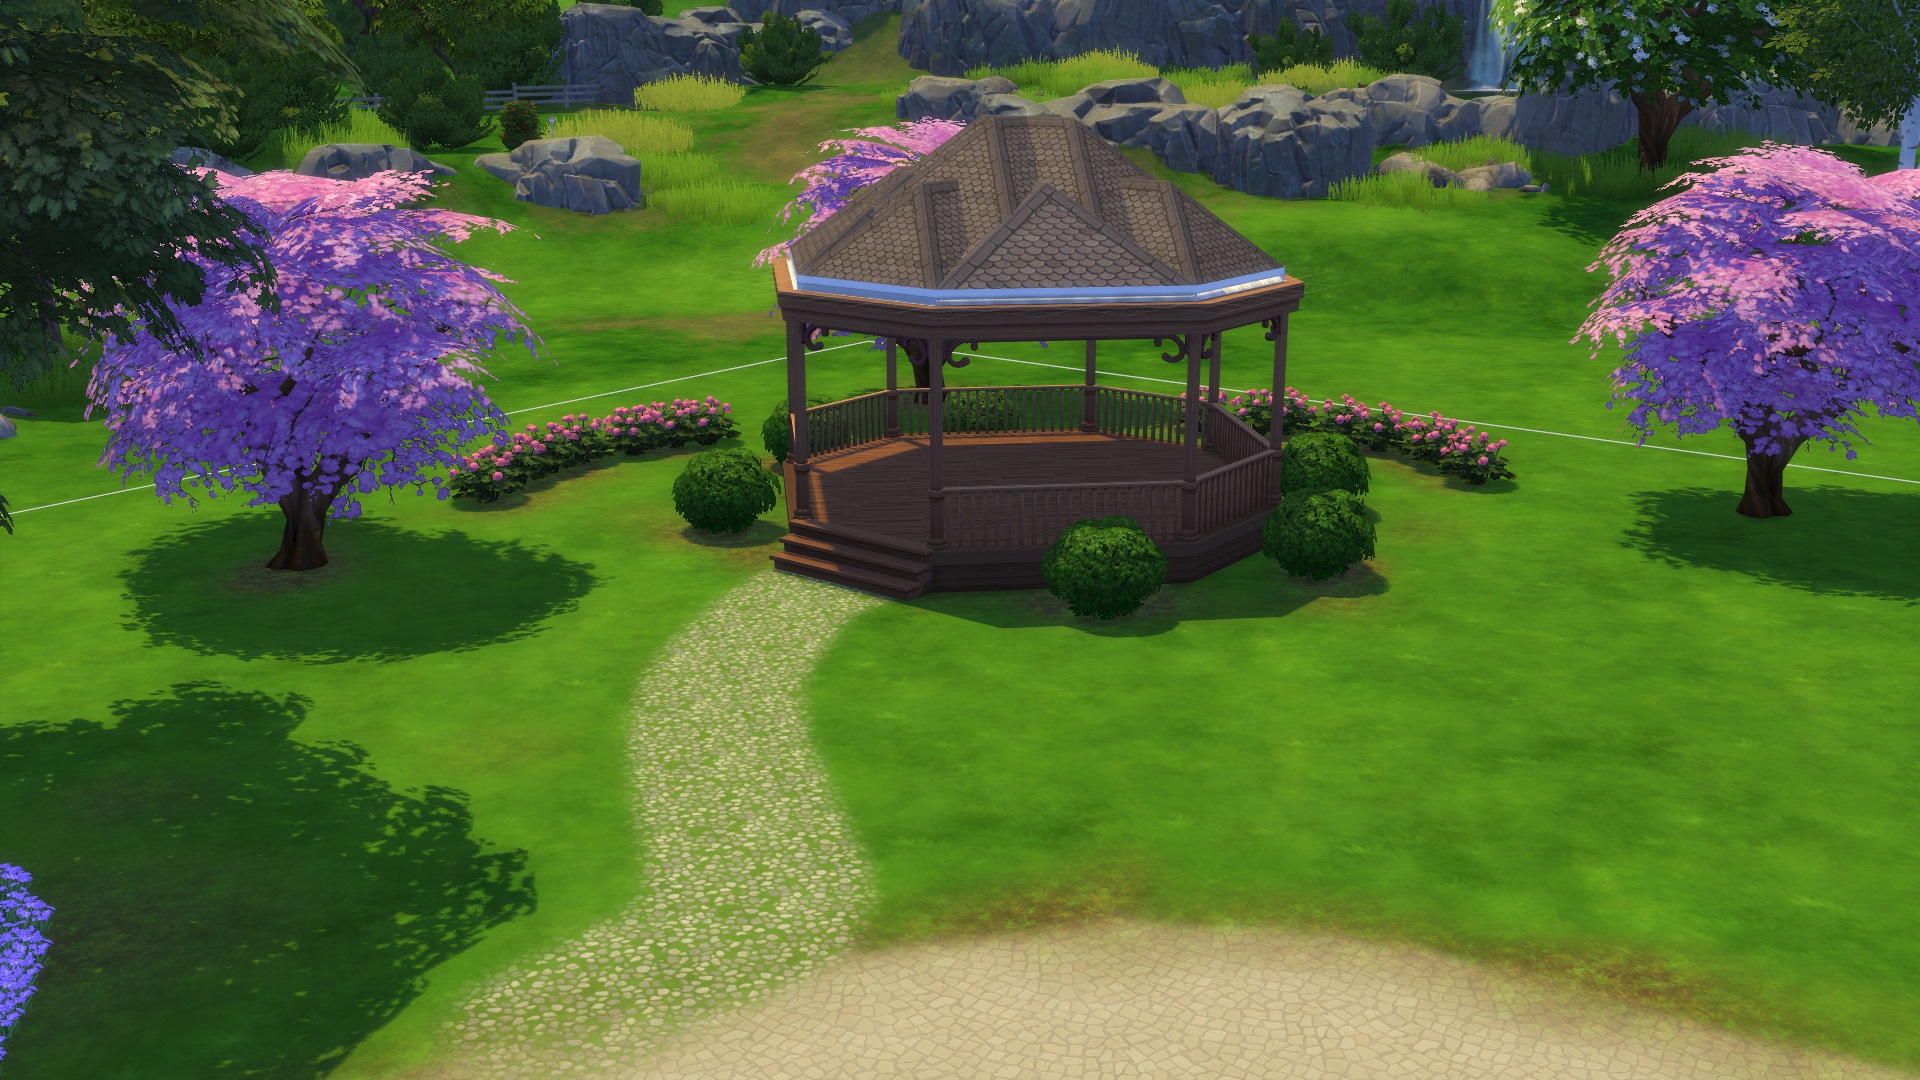
Now we are just missing one final thing. You may notice that the trims on the roof are horribly white and stand out quite a lot. Make sure you cover that up by going into the roof trim category, select the Square Roof Trim, and pick a color that suits the rest of your gazebo. I picked a brown trim to go with mine. Remember to add the trim to all the different roof pieces you have added.
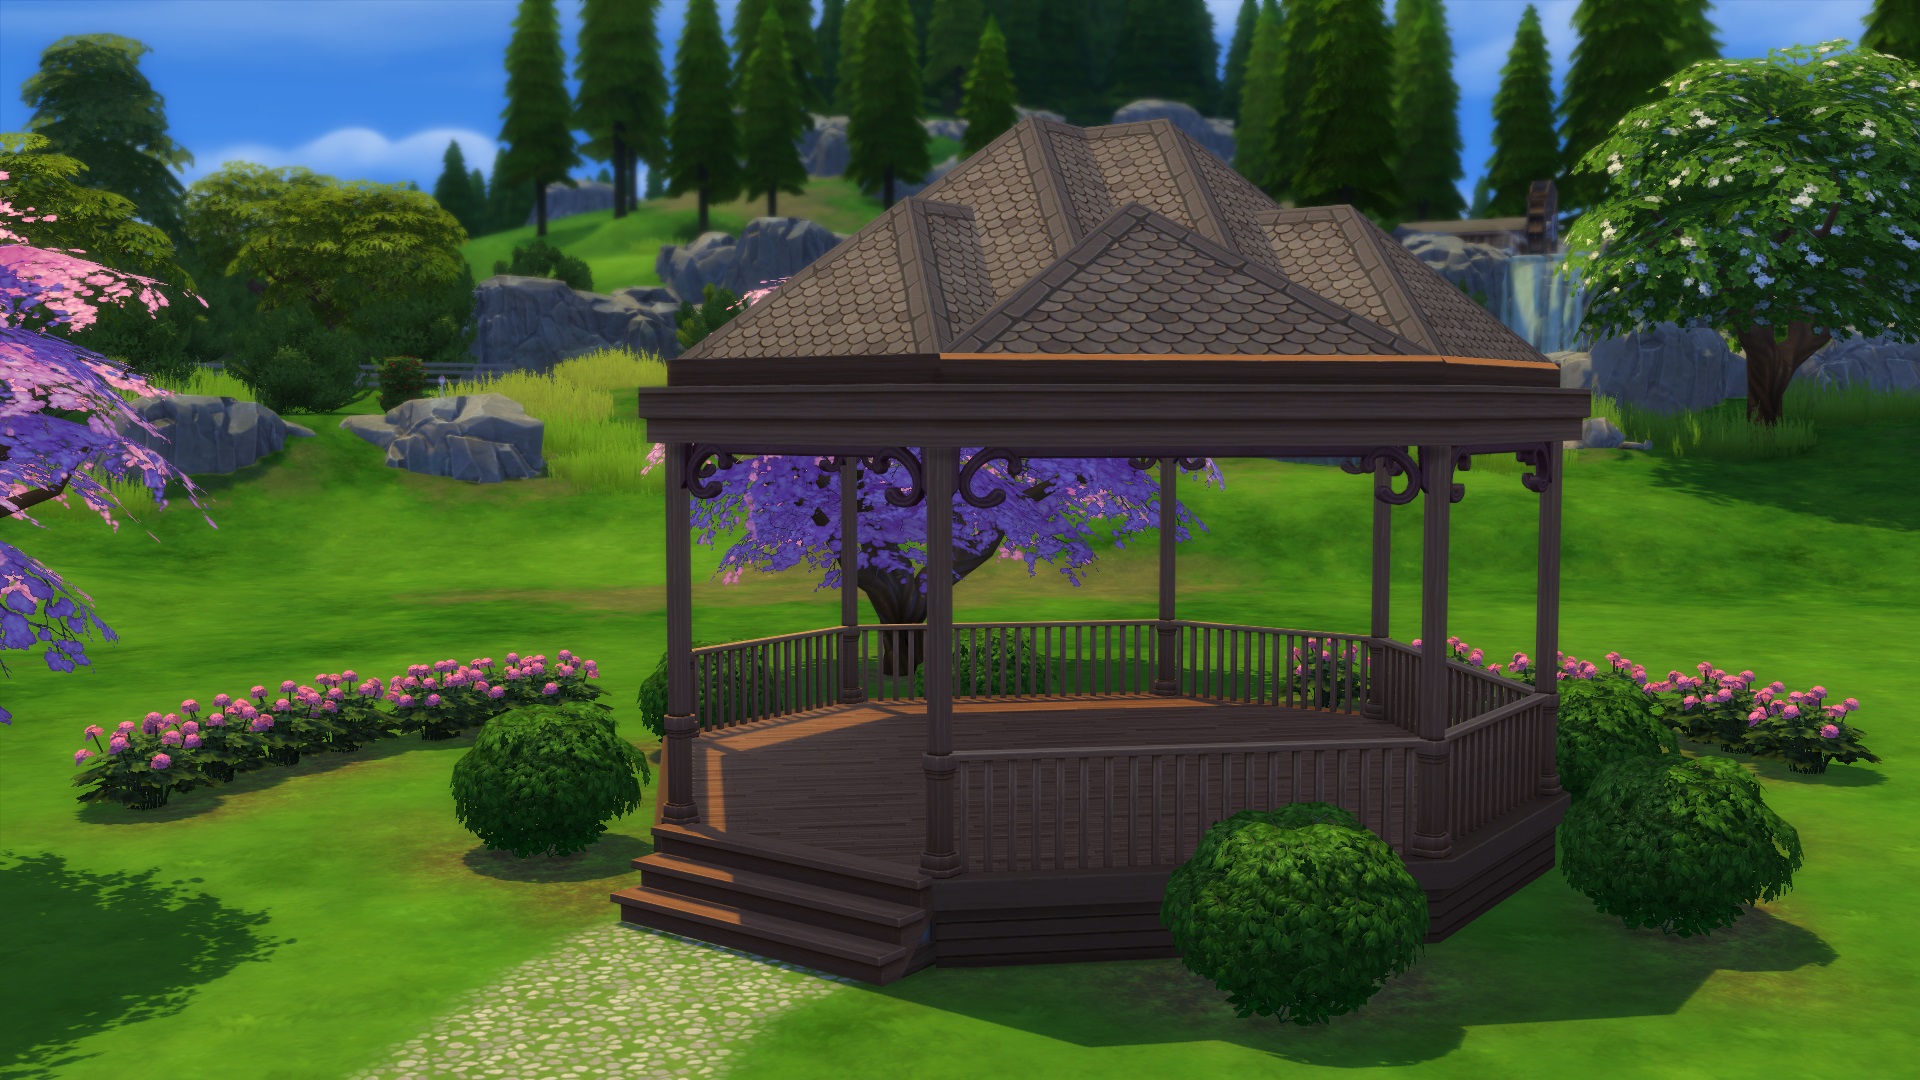
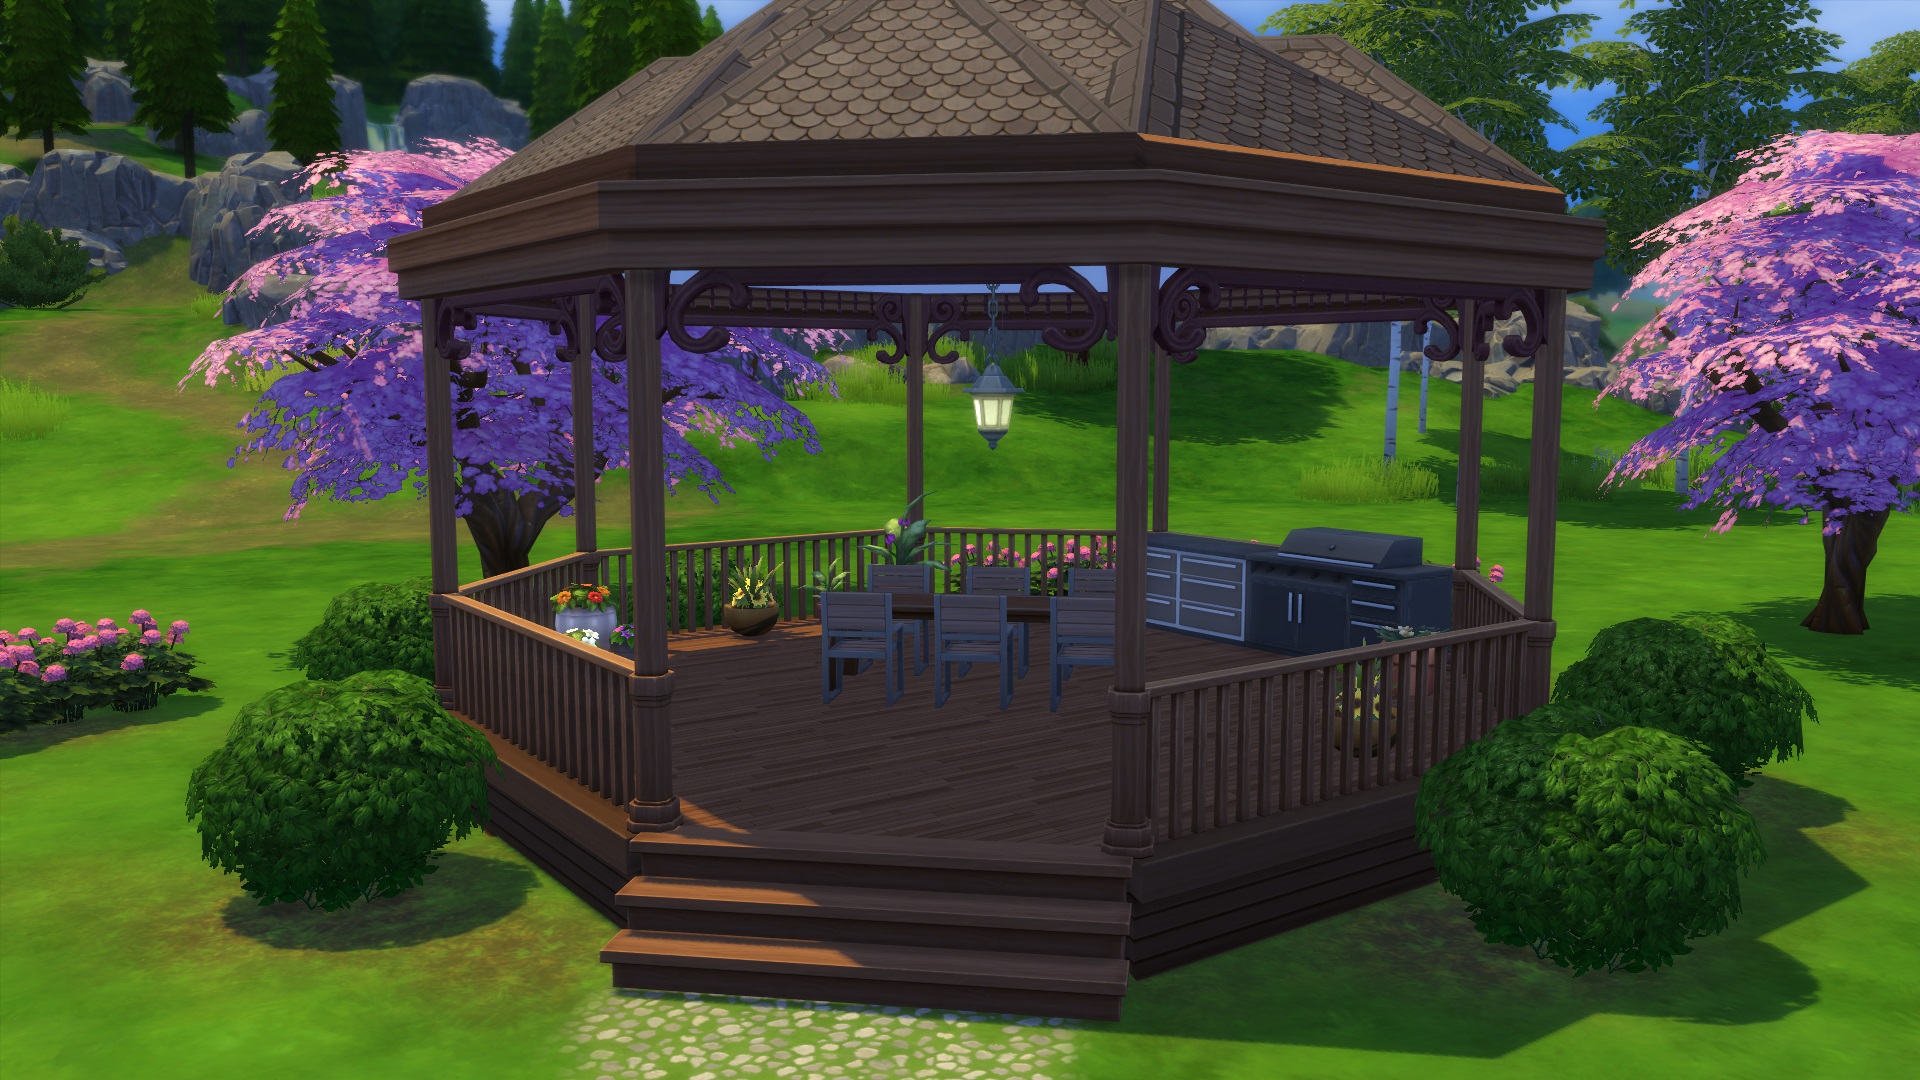
This will be your completed gazebo. As mentioned there are other ways of doing octagonal roofs, especially if you don’t like it when the roofs look as layered as they do in this version. I will make sure to make a tutorial on that. Now that the gazebo is done, go ahead and place your furniture or activities in the gazebo and do your landscaping around it!
Happy gazebo building!


")