")
Ever since the launch of The Sims 4, players have been requesting a Create A World tool much like we’ve had access to in previous Sims instalments, however 3 years down the line and such a tool still doesn’t exist and we’re left waiting anywhere from a few months to a whole year to receive a new world to play in. For creative players like myself, lacking the ability to design my own worlds in the beautiful art style of The Sims 4, is quite upsetting, and it’s one thing I’m really starting to miss out on.
So, being the ambitious guy I am, I wanted to find a way I could shape The Sims 4 into my own image, by creating my own personalised world using props and objects from the game. *Now before I continue, I just want to let you know that what I am creating is pretty much purely an art piece, it’s sadly not something you’ll be able to download and play with… I know, I know, but maybe if the Devs see how players can break out of the box like this and overcome the limitations of the game, they’ll reconsider developing a create a world tool (unless they already are, and just keeping it super secret! Here’s hoping!) Because the demand is certainly there.
Anyway all that aside, let me introduce what I’m going to be working on! Using the wonderfully powerful tools of Blender, over the next few weeks leading up to the holidays I am going to be creating my own Winter-themed alpine village world (name yet to be decided) using props and objects extracted from The Sims 4 with the Sims4Studio! Like I mentioned before, it’s only an art piece, but the aim of this series is to capture the attention of the Devs so they can see what players are capable of, given the right tools, and give you an insight into how I create a lot of my artwork within Blender. But honestly I just love the Winter time and I thought this might get us all in the holiday mood!
So let’s get started shall we? This first part could be a bit wordy, I’ll try to throw in as many pretty pictures as I can, so you have something more enjoyable to look at. Hopefully some build time-lapse videos will come at a later date when I begin to construct more interesting things like houses and decorate the world.
Part One – World Planning

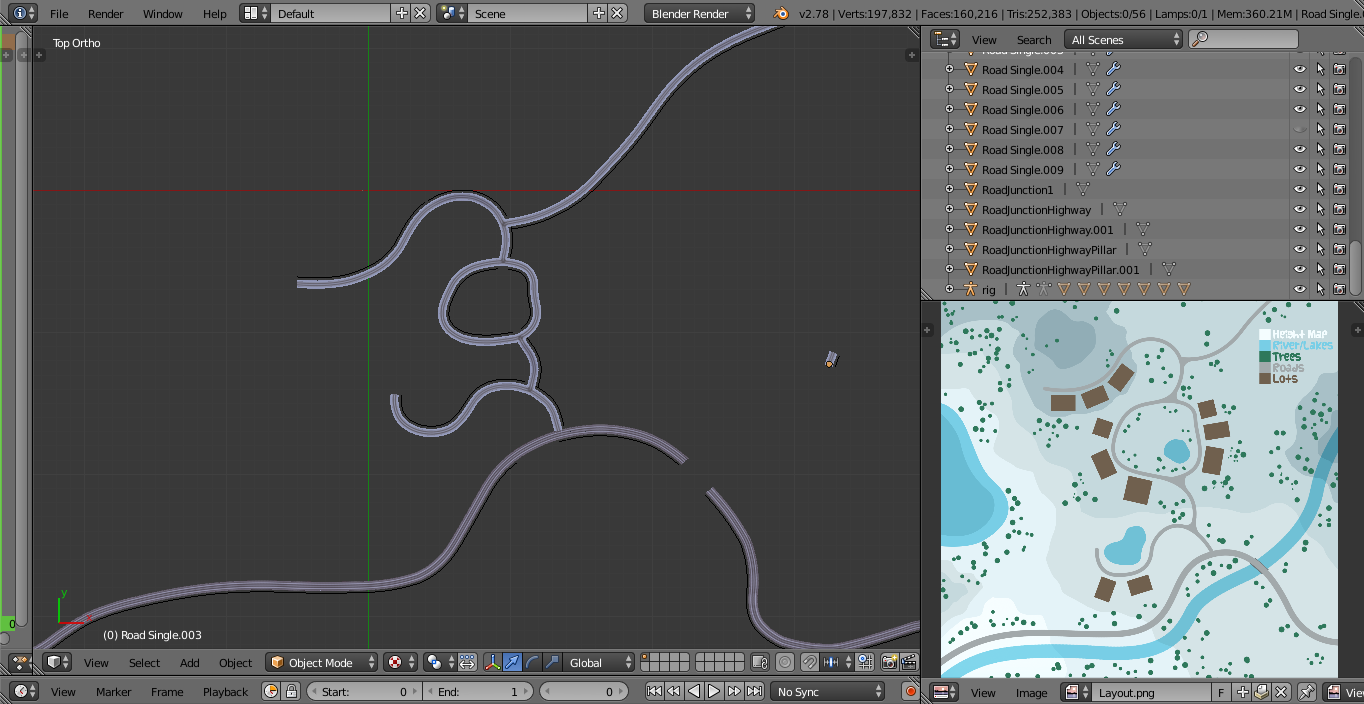
It’s important that before you dive straight into Blender, first you layout what it is you’re planning to create, especially when it’s something as large scale as a world. I’ve drawn up a very simple map of the world shape I am going for, with height maps so I know which areas will be higher or lower. This is going to be important for the first few stages of world building and it’s good to have a reference image to have on hand in case you start building randomly and end up with something that doesn’t fit in with your initial idea. That said, this is just a guide and I won’t be sticking to it wholly.
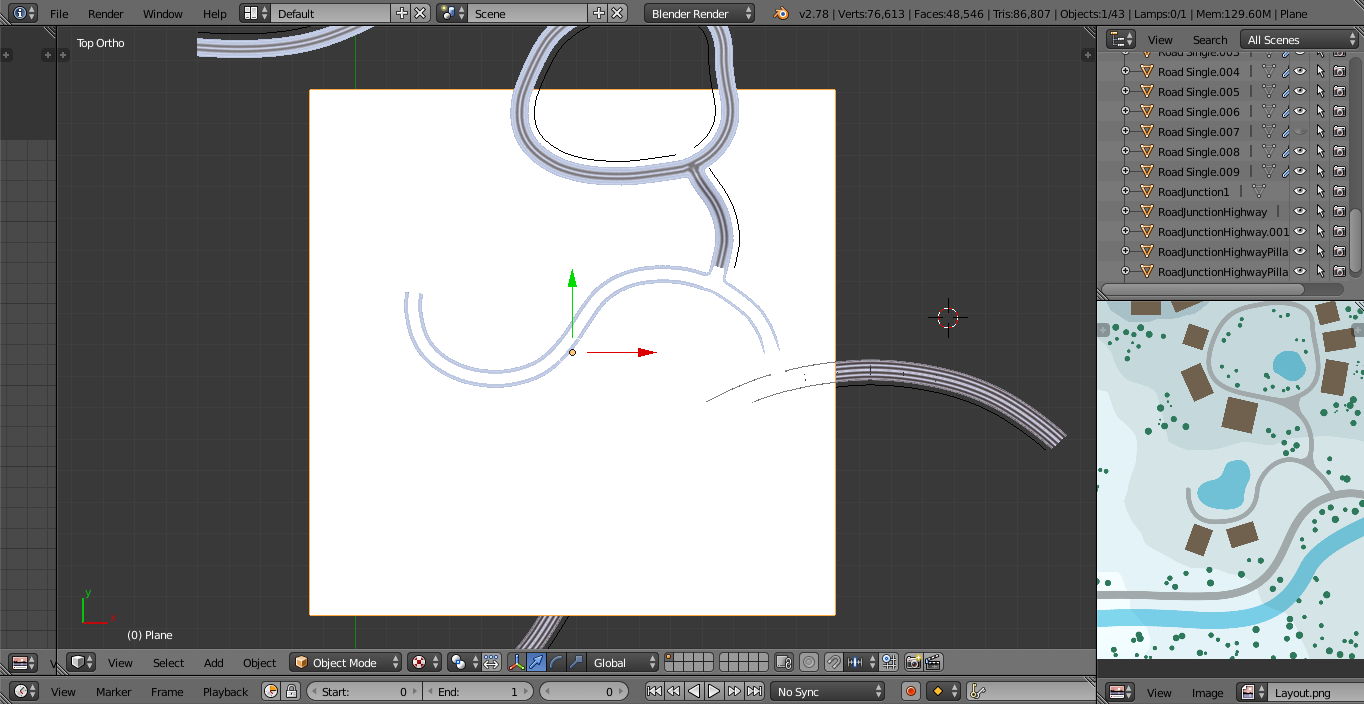
The first thing I did when creating this world, was plan out all the roads, once you’ve done this you know exactly how big your world is going to be and everything else will fall into place. I’m using a Blender modifier called ‘Array’ to quickly stretch out my road mesh which basically means I don’t have to ‘copy+paste’ the mesh over and over, and another modifier called ‘Curve’ so I can then curve the long stretches of road into any shape I like. I suppose it’s not too dissimilar to how roads worked in The Sims 3 CAW, you get a similar result but more control with Blender because the road is separate from the base terrain, not ‘painted on’ as it were. 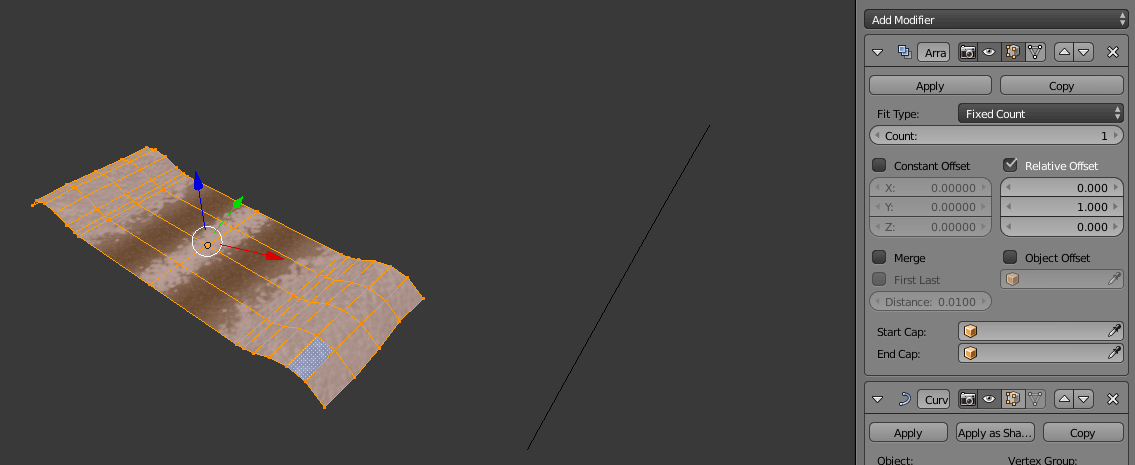 As you can see in the gif, the yellow highlighted area is my road mesh, the Array modifier will then copy that mesh and paste it directly next to the original, creating a seamless road mesh that can stretch as long as I need it to.
Once I was happy with the designs of my road meshes, I began stretching them out,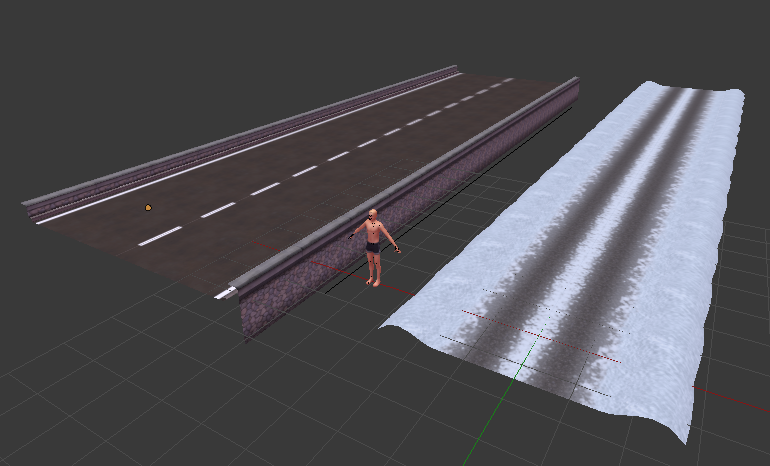 mimicking the road layout in the reference image, then adjusting the road’s height and curvature to match, and leaving space for intersections (we’ll get to those in a minute.) There are two road variants; the highway which runs along the bottom, and the gravel roads which make up the rest of the town (don’t mind the little naked Sim there, he’s for size scale purposes.) I kept the size of the town pretty compact, this way it cuts down on polycount (every object in Blender has a polycount which is the number of polygons or ‘faces’ it consists of, the higher that number is, the unhappier my laptop becomes) and it also keeps everything close together so there aren’t huge gaps between areas.
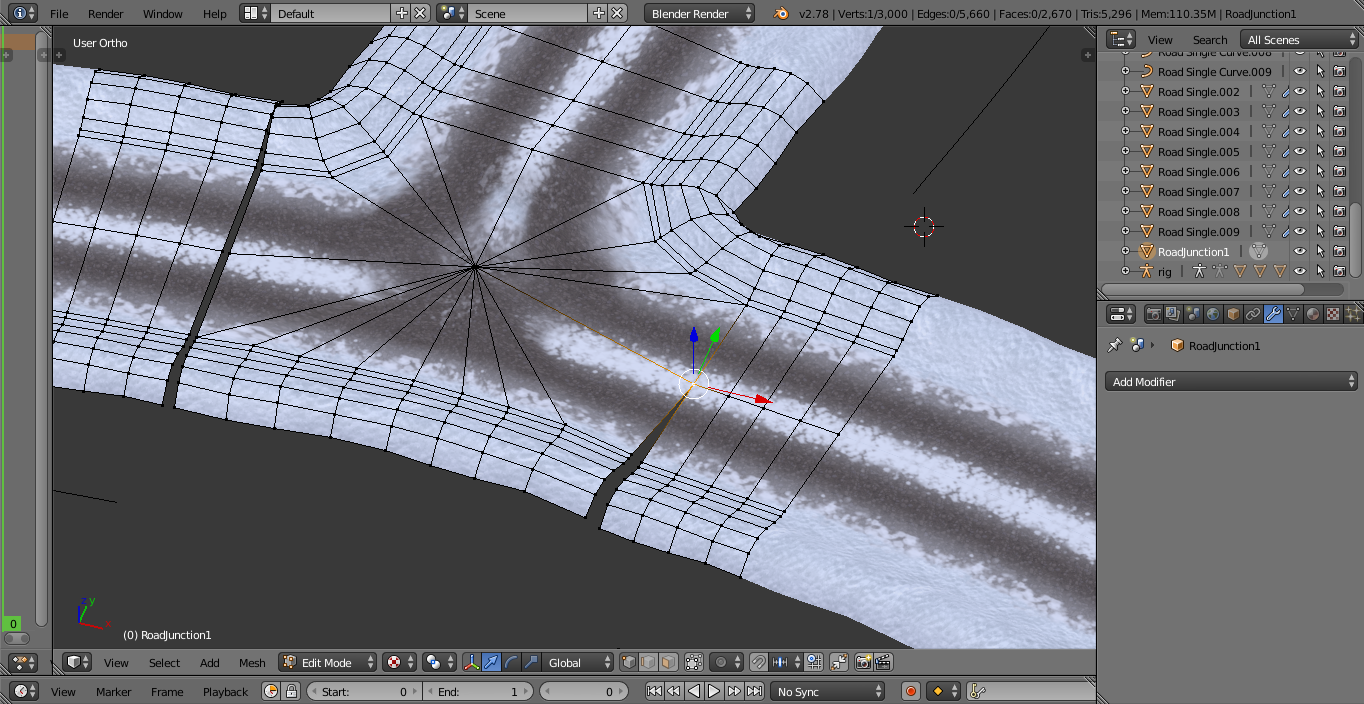
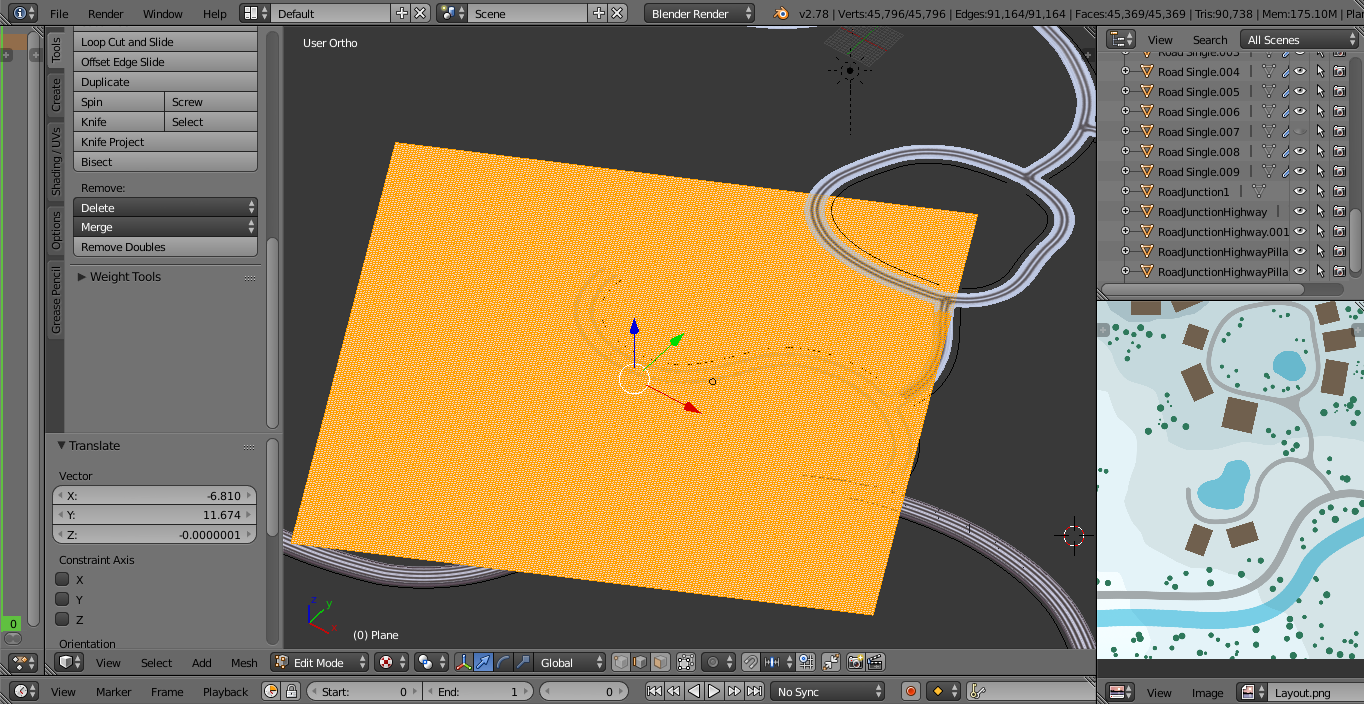
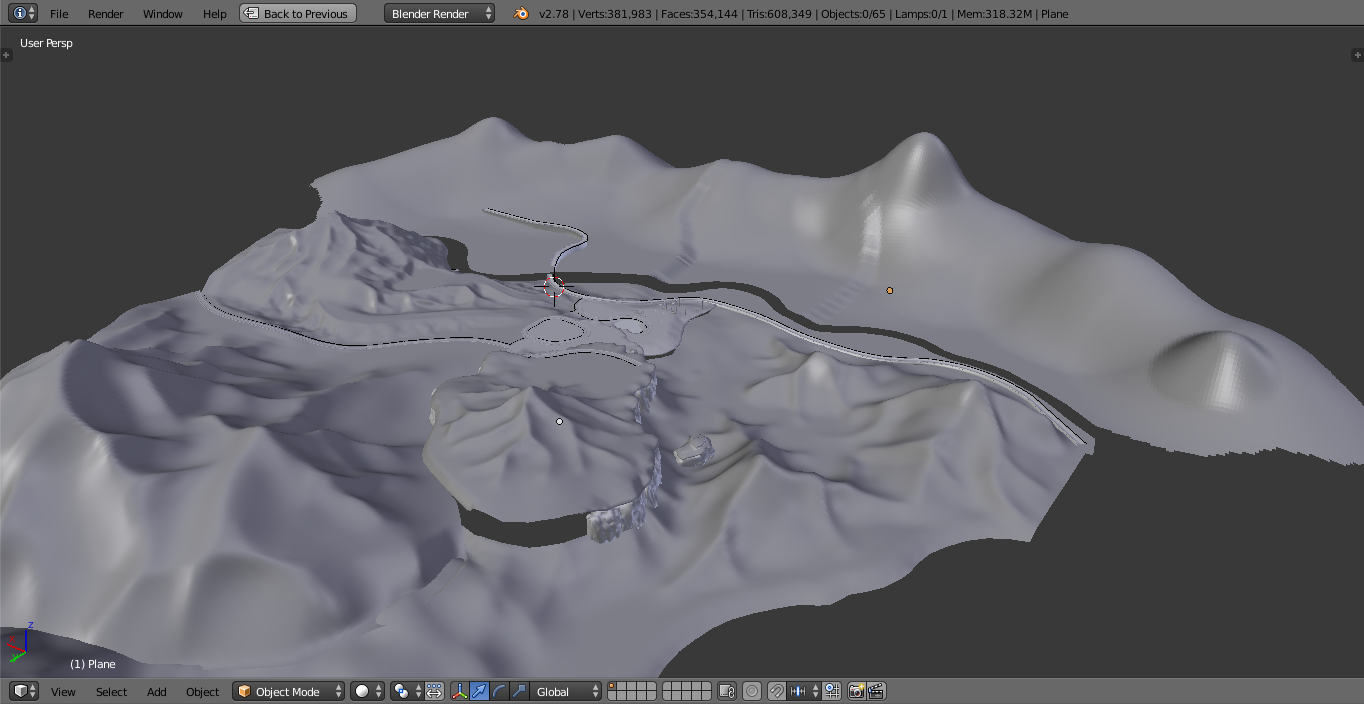
The road layout looks good now, so moving on to the nuisance that is intersections, okay they’re not that bad, just a lot of copy+pasting and merging vertices (those are the little points at the corner of each polygon.) As you can see from the screenshot, I had to create a separate mesh wherever any 3 roads met (an intersection) and stitch it together with the ends of each road to create a seamless finish.
Roads done, it’s onto more fun things. Creating the terrain! This is something I’ve tried and tested and I’ve reached a technique that I’m happy with. Originally I thought making a giant square and dividing it up into lots of smaller squares would be the way to go, this is how it was done in The Sims 3 CAW, you had your big green square and could manipulate it to look like a mountain, or a river, or whatever. Sadly, my poor laptop did not agree, and the lag generated by 300,000+ polygons all trying to render at once put an end to that idea. Then I thought about dividing up the terrain into 4 or 5 smaller areas or ‘Districts’ as I will be calling them (We’ll be naming them something more catchy later!), and brought the polycount down to around 26,000, which drastically reduced the lag I was having.
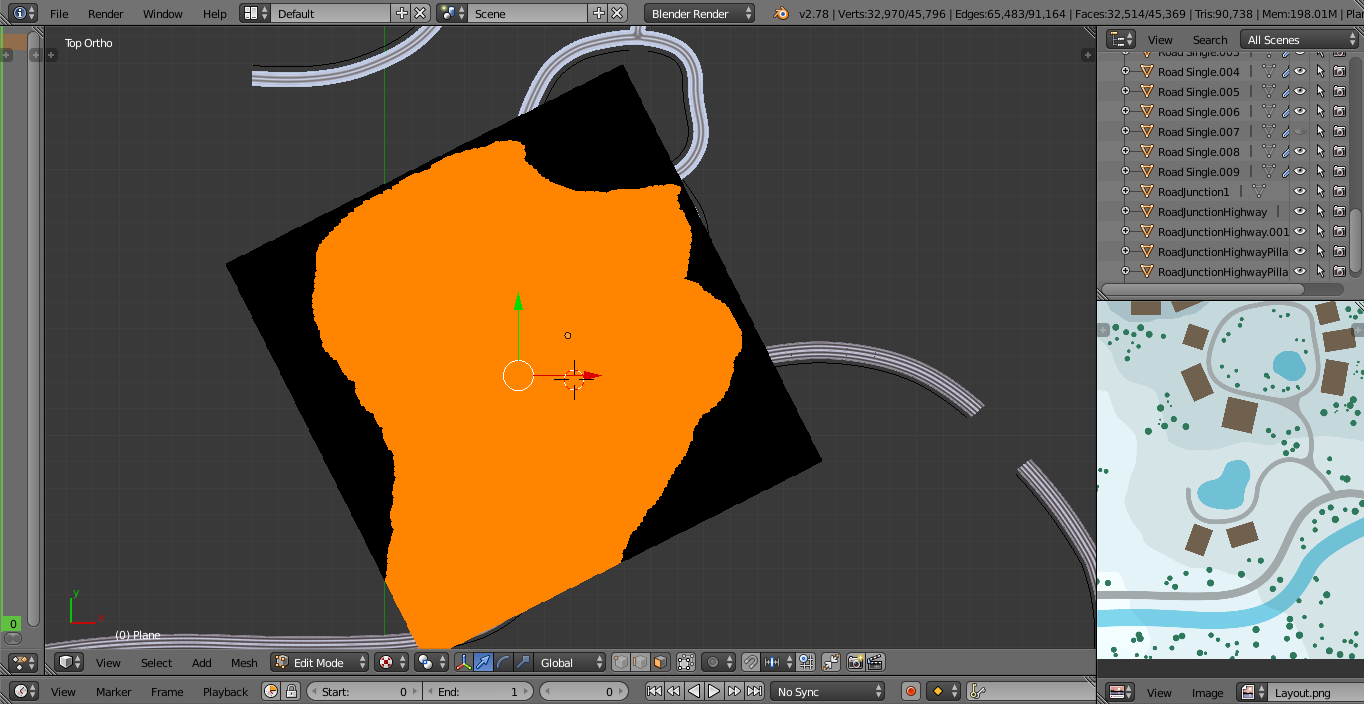
So to create the districts, I first plopped down a big square plane roughly the size I wanted the district to be, then I subdivided it into smaller squares (which means splitting each poly in half, or thirds etc.), this gives me lots of 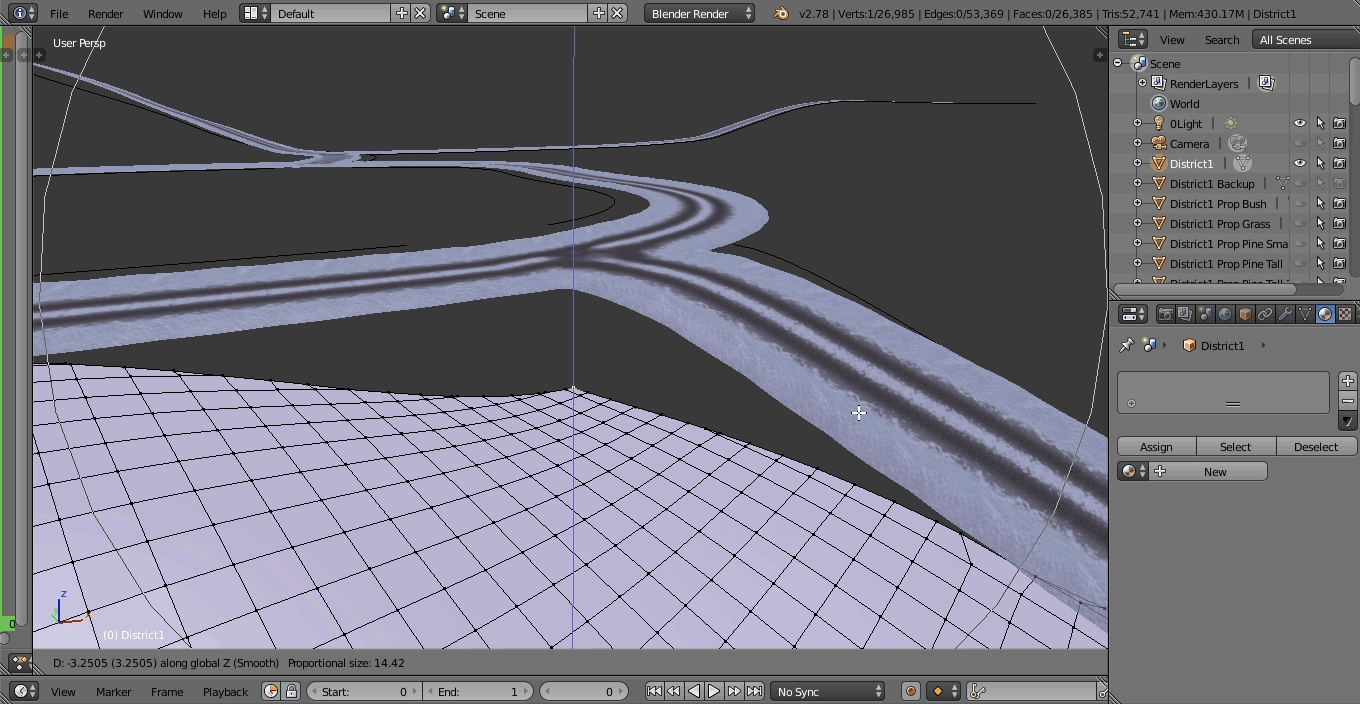 manipulation points so the terrain looks smooth, and finally cut it out into the shape I wanted, using the roads as handy guides for where the district boundaries will be. Next comes the tricky part which is moulding the edges of the flat terrain to fit the height variations of the roads. That little bump on the sides of the roads is to hide any jagged edges of terrain, this way the road will blend seamlessly into the terrain and there won’t be any gaps.
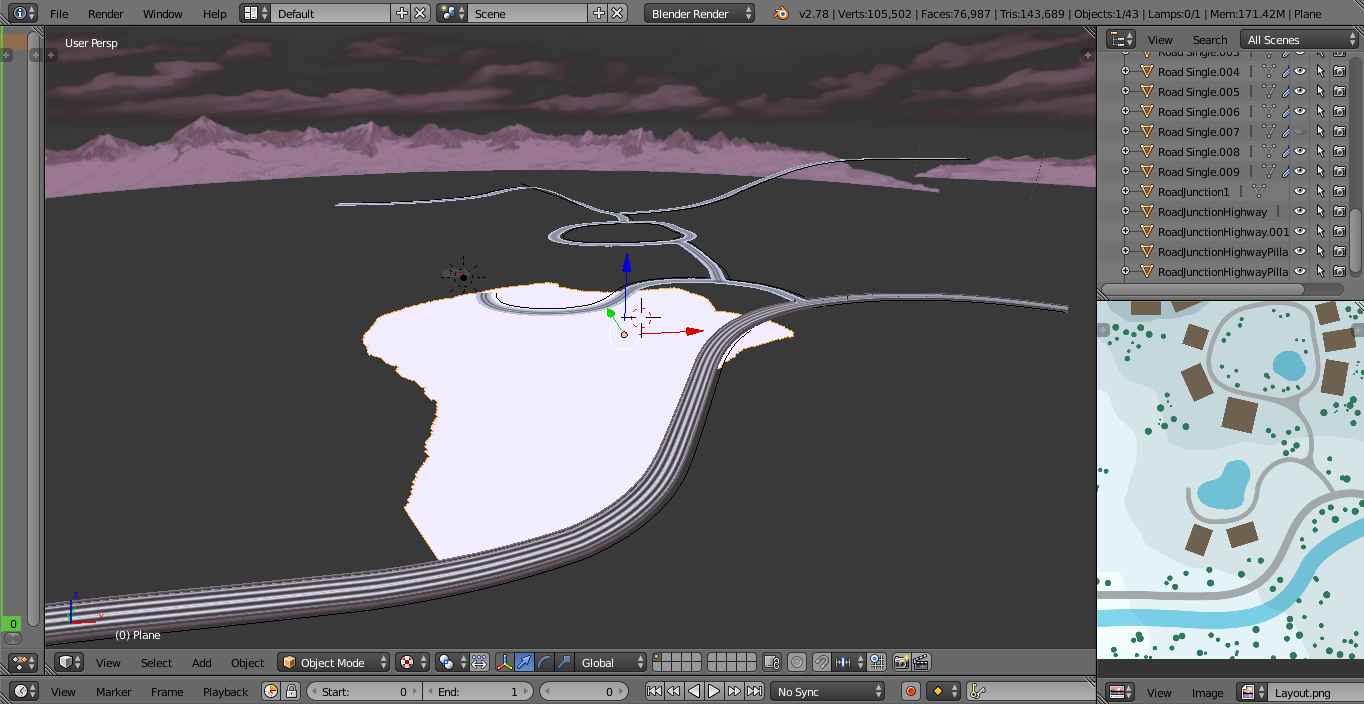
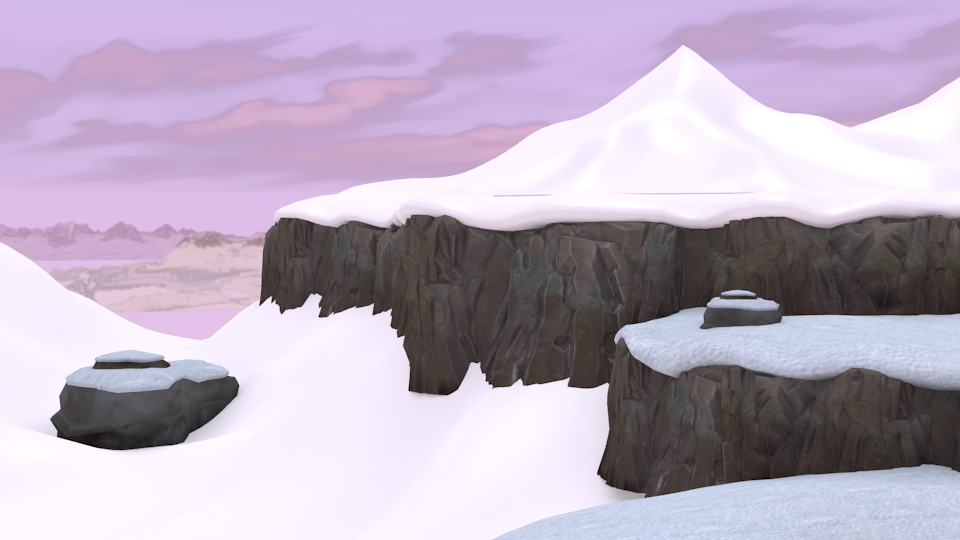
At this stage I also added the infamous backdrops, love ’em or hate ’em they’re a necessary part of The Sims 4 worlds so it seemed only right to include them here as well, they’ll be camouflaged by foreground terrain eventually so you won’t even notice them.
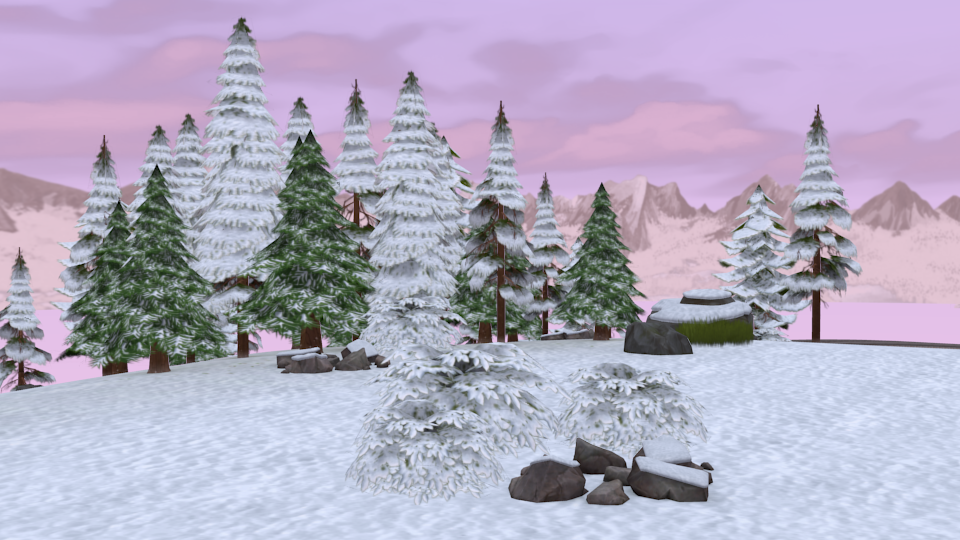
I’m going with a dawn colour scheme with this world, hence why the background is that nice pinky pastel hue. It makes for some really beautiful screenshots and it’s a bit different, and as you can see, the addition of a few rocks and trees really brings the world to life and makes quite a nicely composed scene.
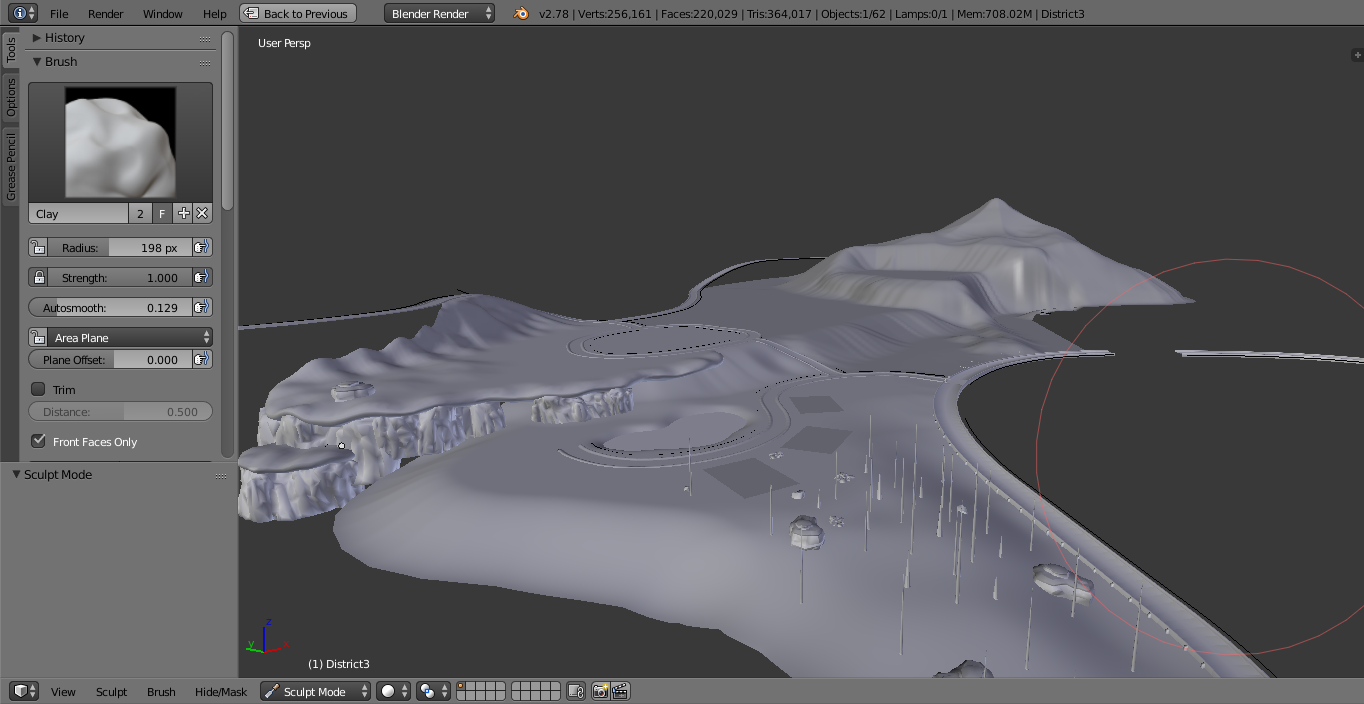
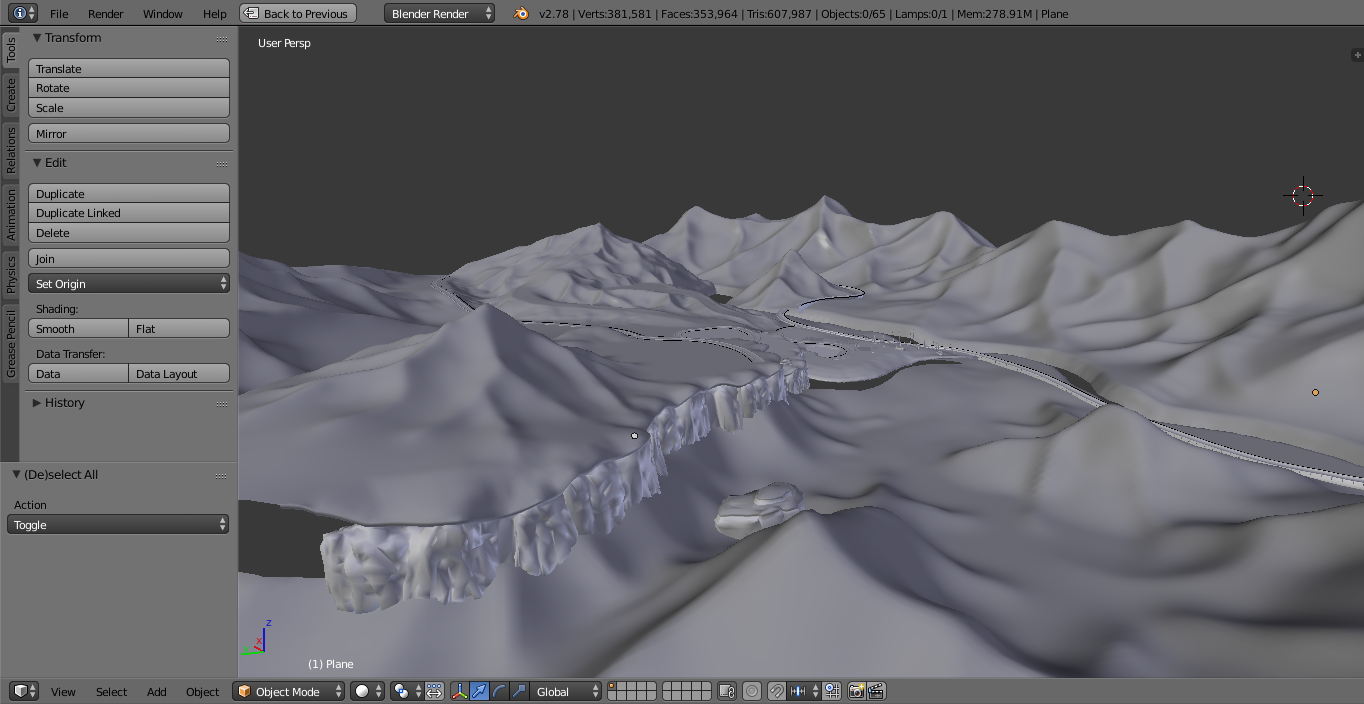
With the first district complete we can get on with the rest, the following screenshots show how the world is slowing coming together as I sculpt mountains into the terrain and give depth to the mounds of snow.


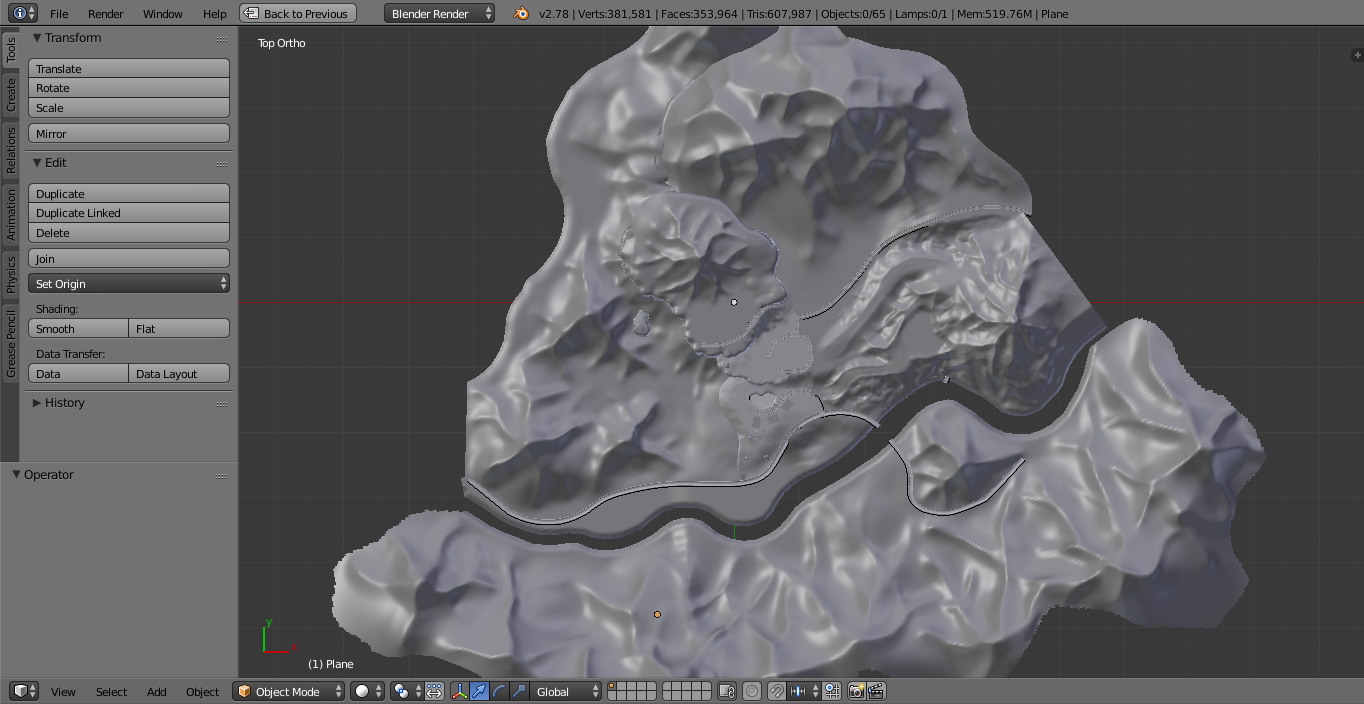
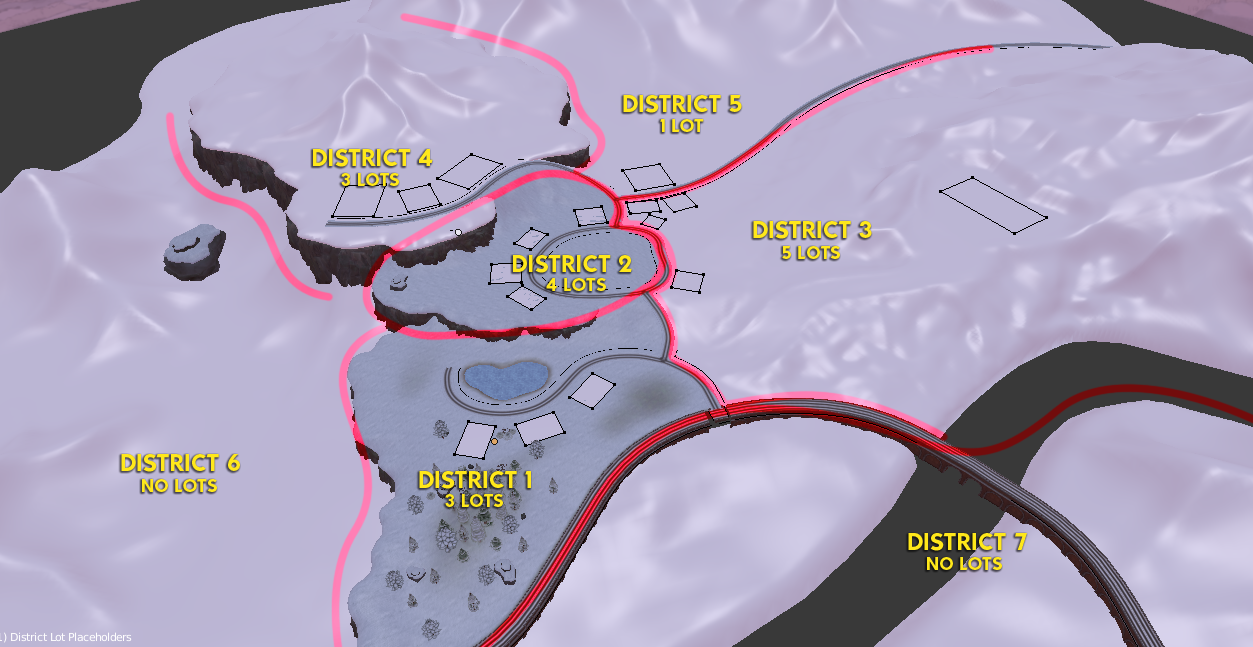 Here is a view of all 7 world districts with red lines indicating the district boundary, some have lot markers where I will be constructing buildings, others do not and are just going to be ‘open space’. District 1 is a cosy campsite nestled in a snowy forest, set apart from the busy town centre. District 2 is a plaza packed full of Winter activities, ice skating, ferris wheel, a Winter market, restaurants, shops etc. District 3 is a rather large area, to the left is the edge of town, lots of small compact log cabin houses, and to the right are the ski slopes, with a rustic ski lodge tucked up against the mountainside. District 4 is atop a hill overlooking the town centre, it has some more expensive residence and a great view of the lake to the left. District 5 is mostly forest, with a few small log cabins located at the edge of the town plaza. District 6 is a big forest clearing at the base of the mountains, with a scenic path leading through the valley to the lake. District 7 is a dense forest covering the mountain foothills, with a stream trickling down from the higher mountains to the lake below.
Currently the world itself does not have a name, nor do any of the districts, but if you have a good idea for a name suggestion then feel free to share it with me and I’ll pick my favourites! Do try to keep the names Winter-themed though.
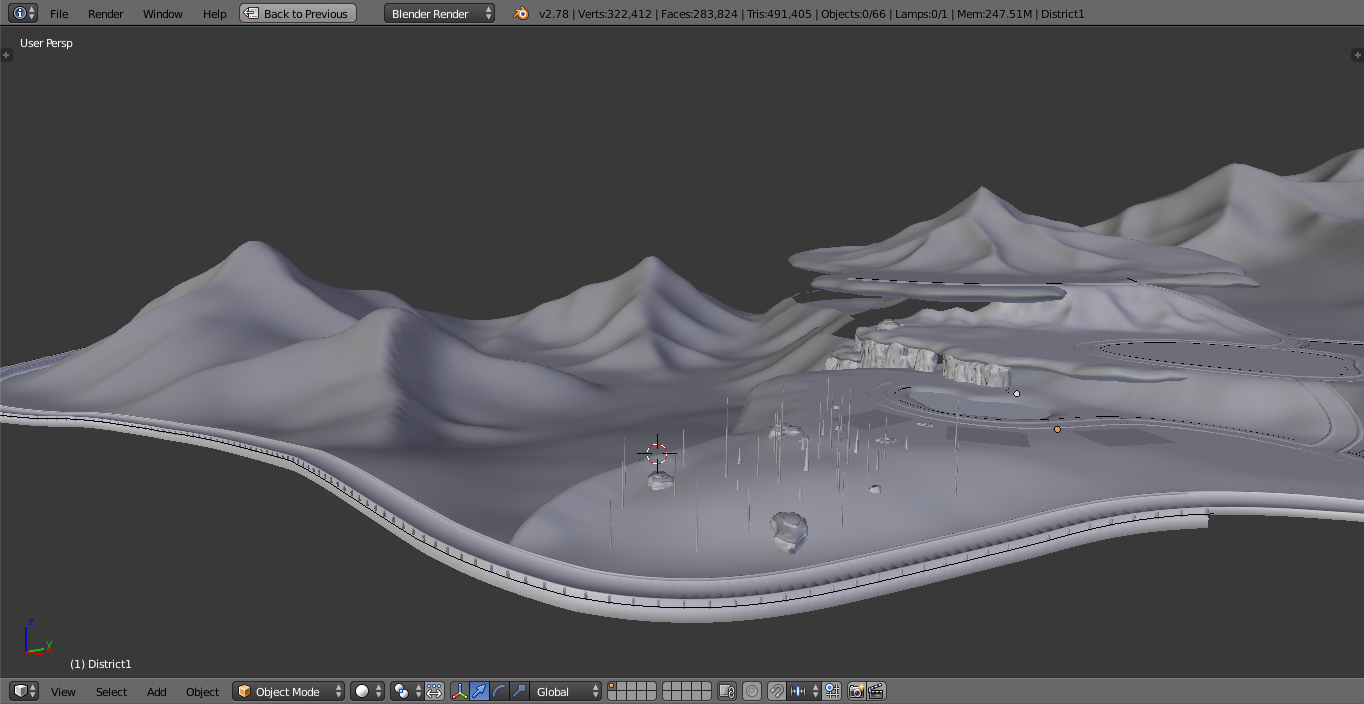
A final overview of the world shows just how much it has grown in size and it’s shaping up nicely! The terrain hasn’t been textured yet which is why everything is very grey, but next time we’ll be painting the mountains with some rocky details to really bring them to life, as well as plopping down some tree decor and generally making the world look more presentable, but I hope you’ve enjoyed what I’ve created so far, I’m very pleased with the direction the world is going and I hope you all agree.
If you would like to help contribute to the world with pictures of house designs for me to build or you’d like to submit a name for the world or any of the districts, feel free to send me your ideas via Twitter @HazzaPlumbob or leave a comment down below!
Thank you so much for reading.


")


")