")
The November Sims 4 Game Patch brought with it an incredibly exciting addition to Build Mode: Terrain Tools! Builders now have the ability to raise, lower and manipulate the terrain on any lot in Game. Being able to edit the terrain in The Sims 4 opens up thousands of new possibilities for builders. You are now able to fill your worlds with mountains, valleys, cliffs and so much more…
The Basics
To start manipulating terrain in The Sims 4, you will need to click on the ‘Terrain Tools’ icon in the bottom left-hand corner of your screen. This will open up a menu where you can select any one of the 6 new tools and begin manipulating terrain.
You will notice that this icon has replaced the ‘Terrain Paint’ icon. Terrain paints can now be found alongside the other terrain tools – they are no longer their own category.


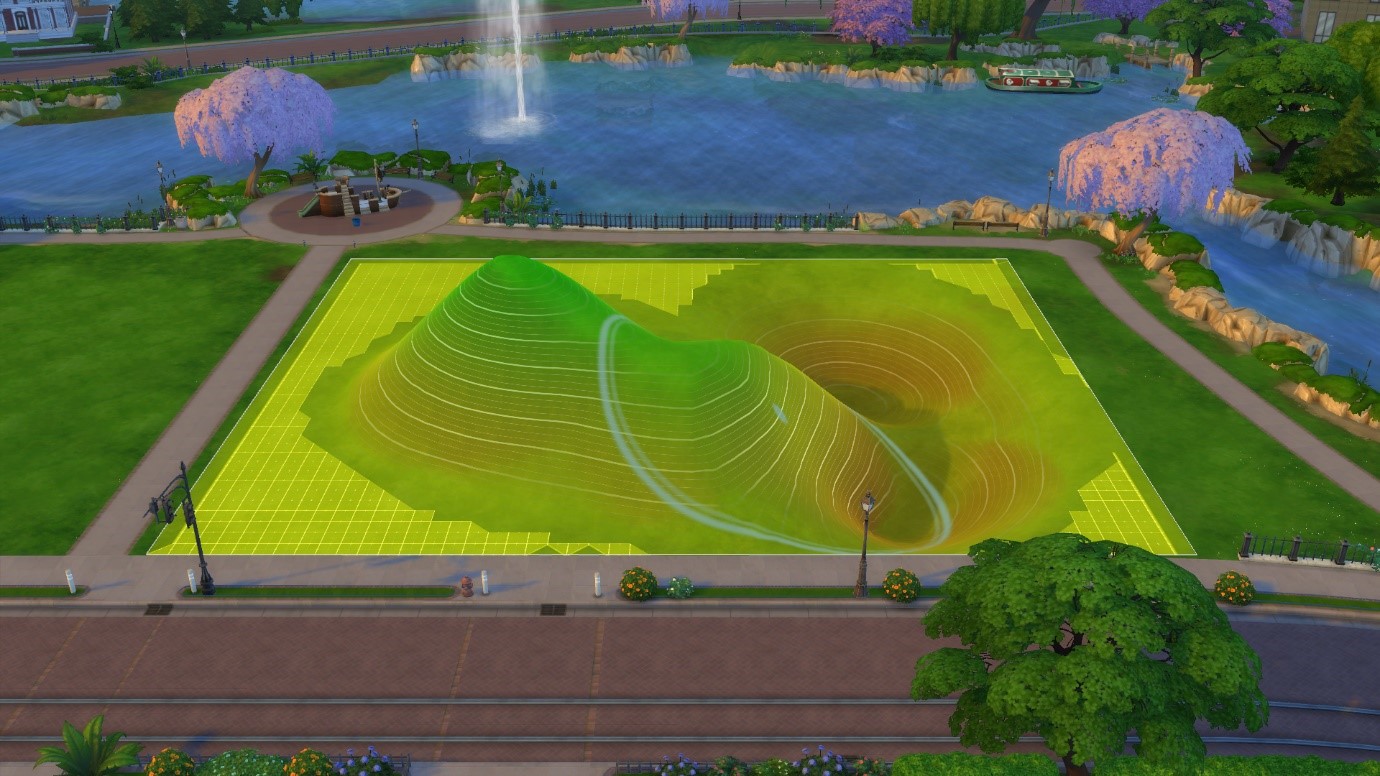
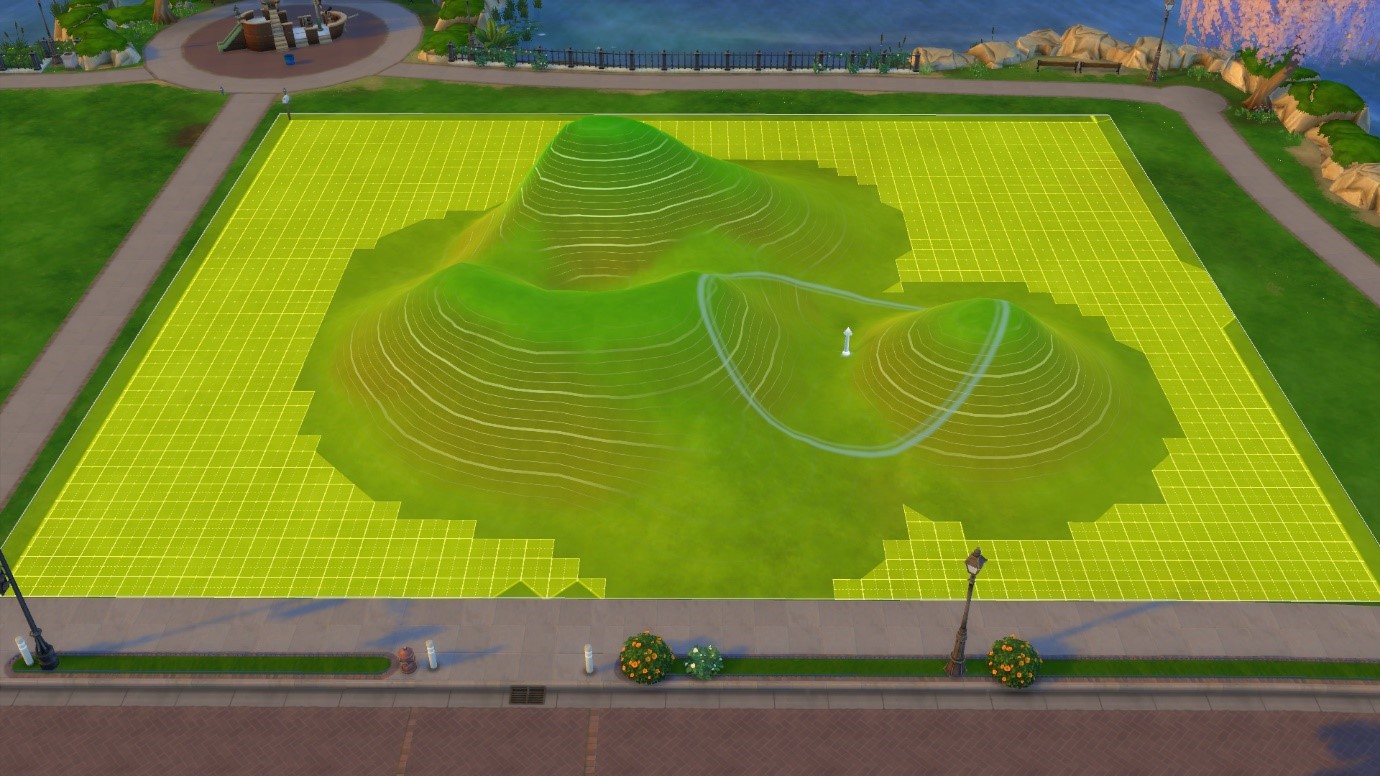
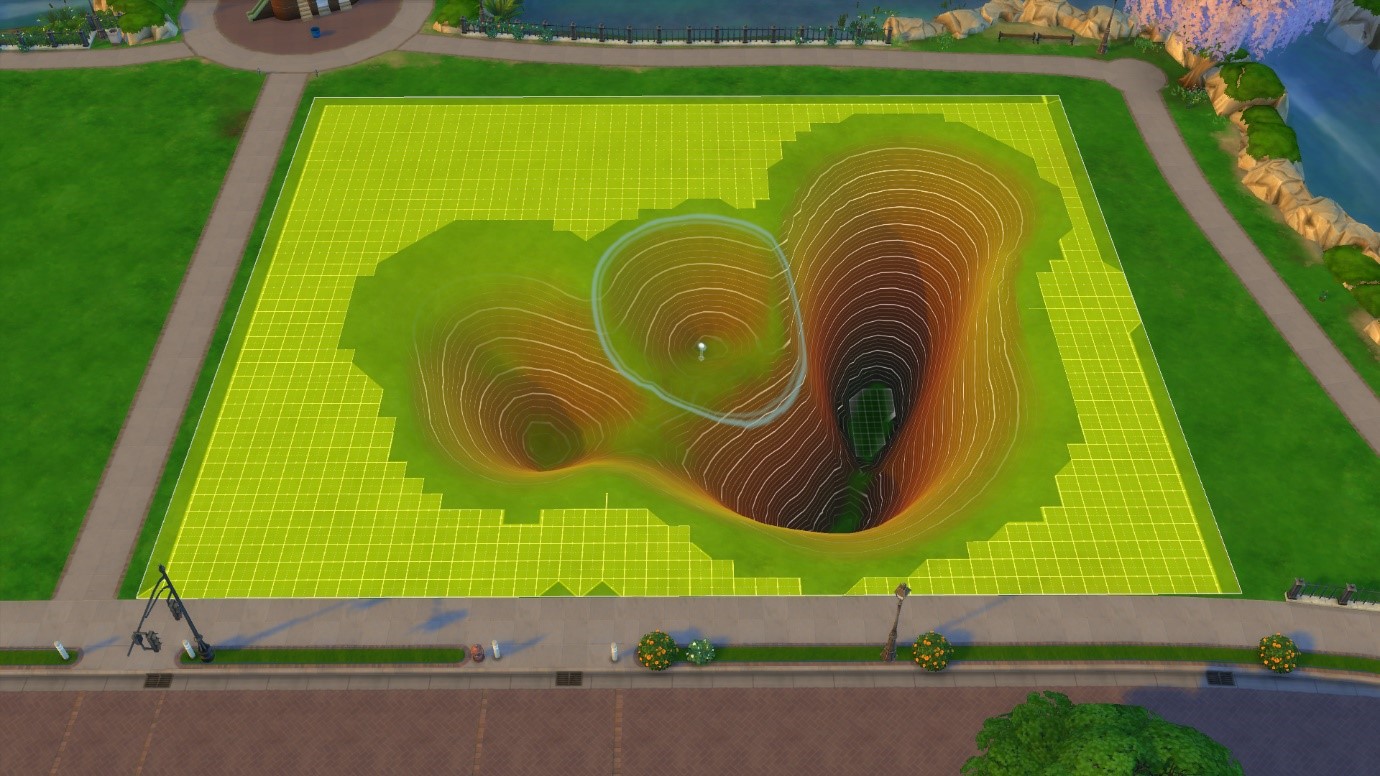
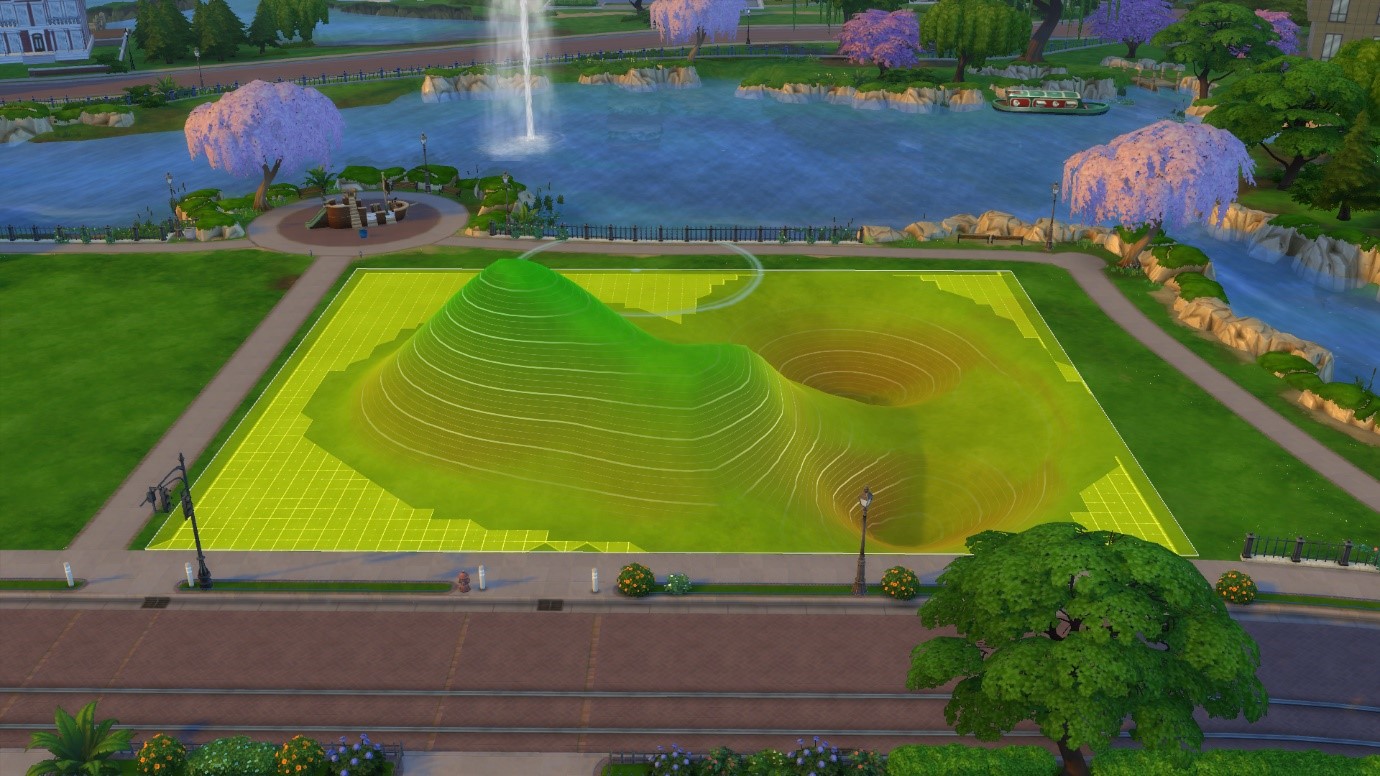
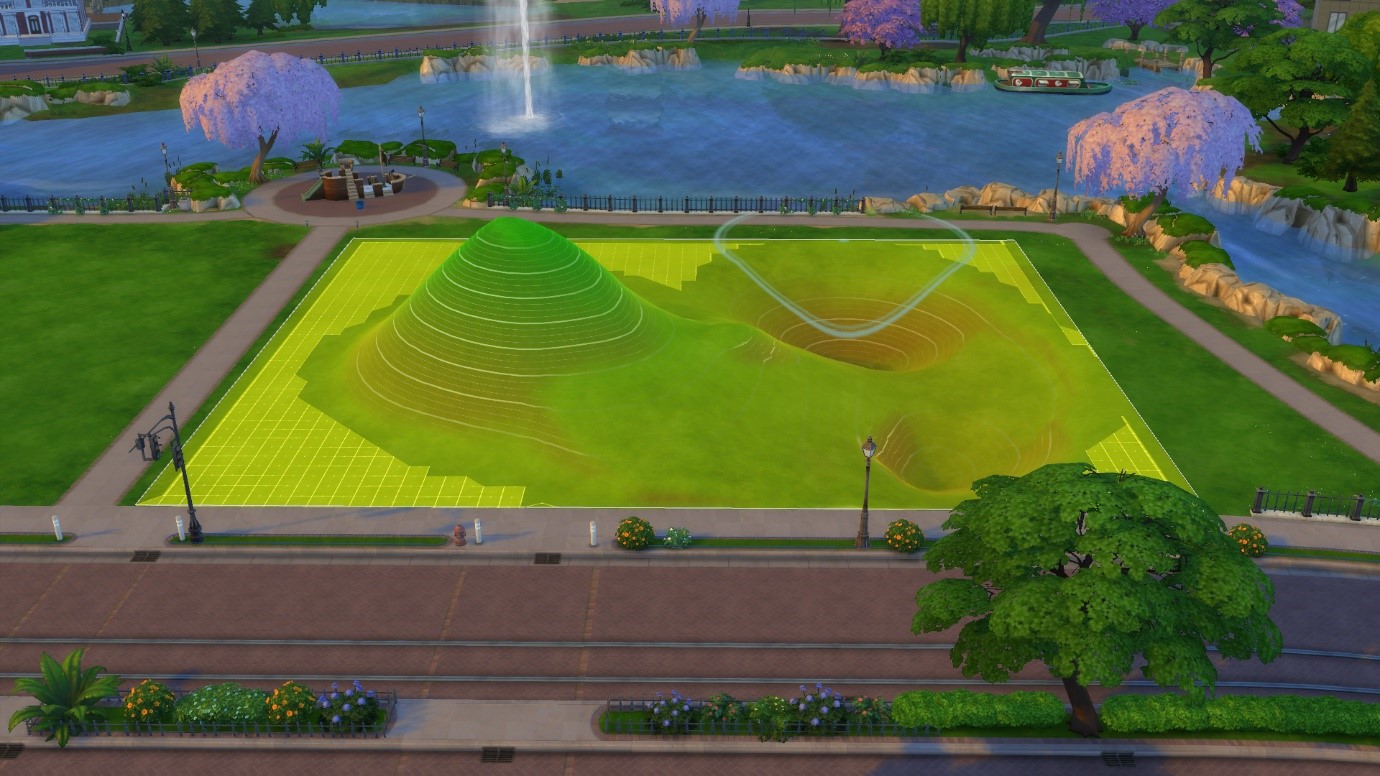
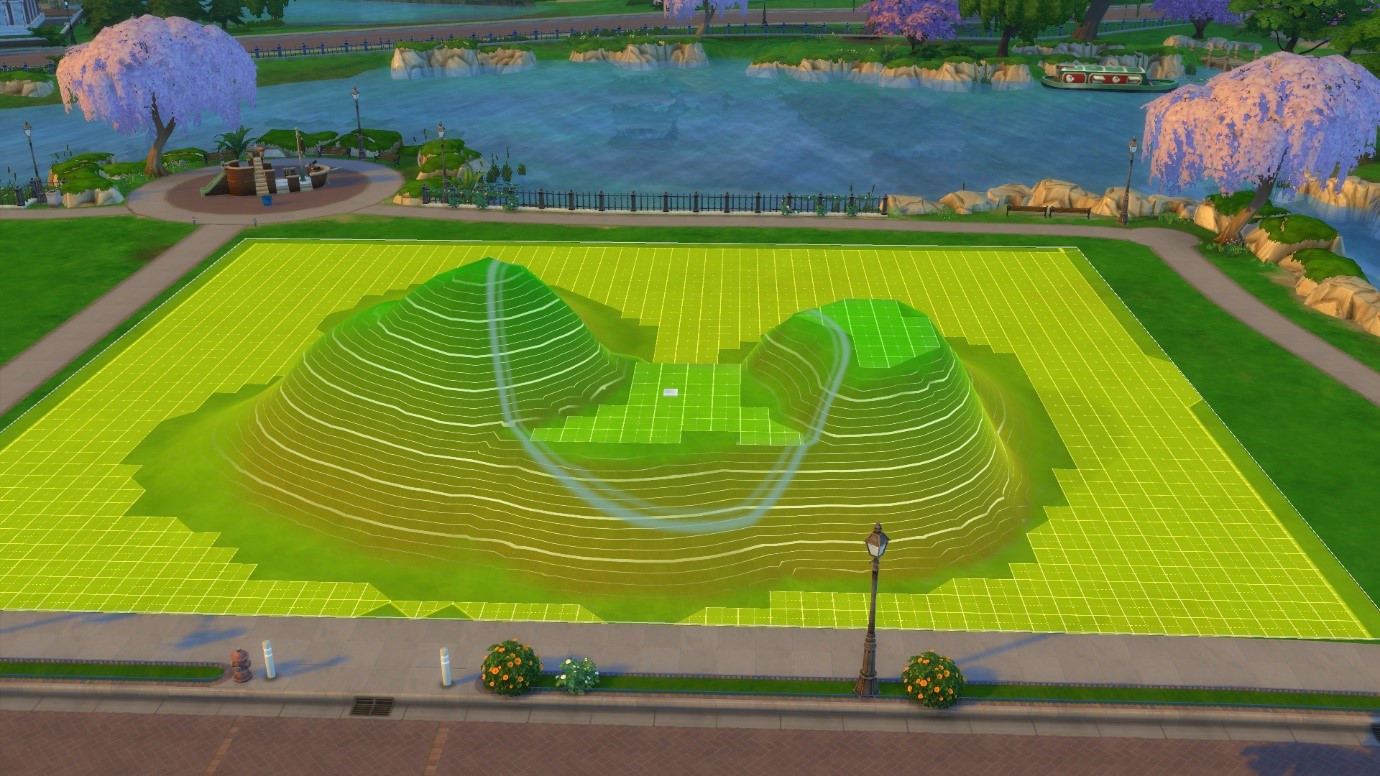
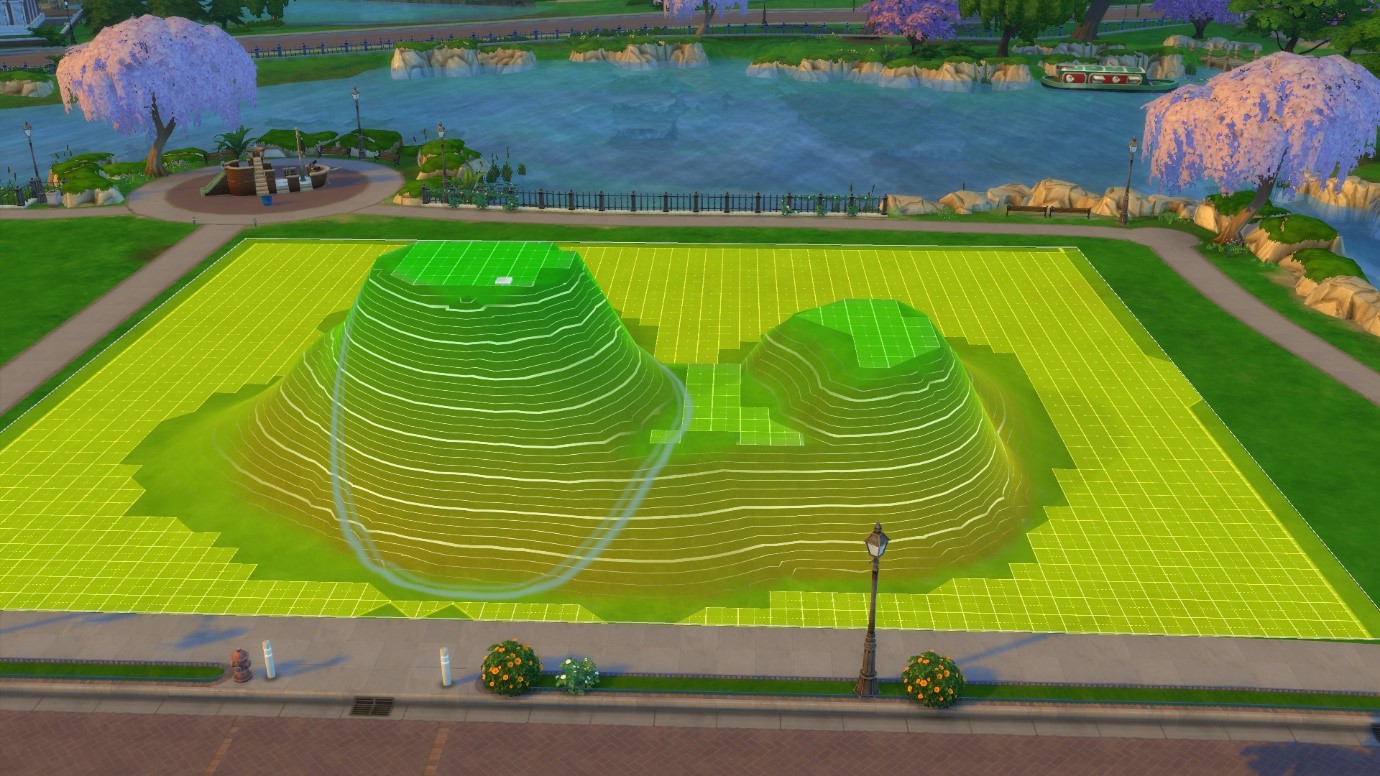
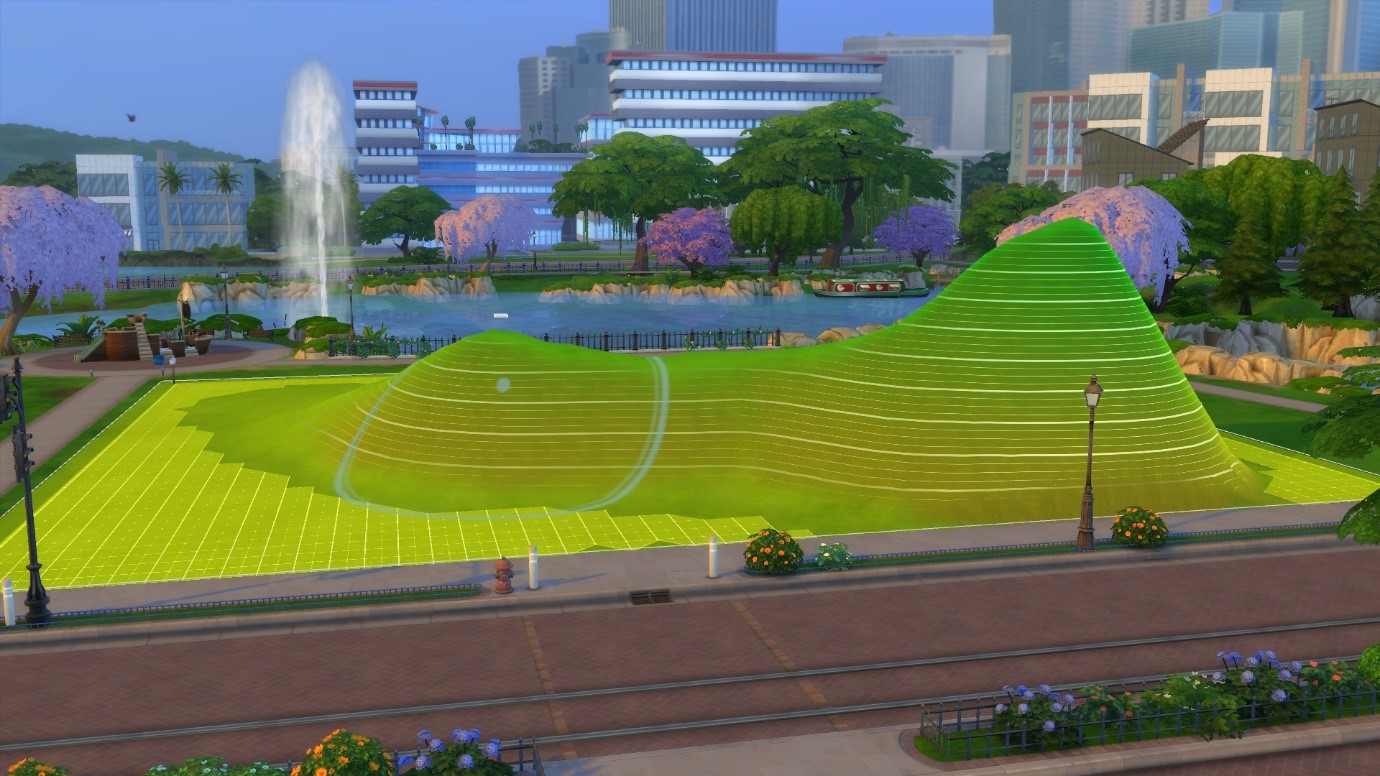
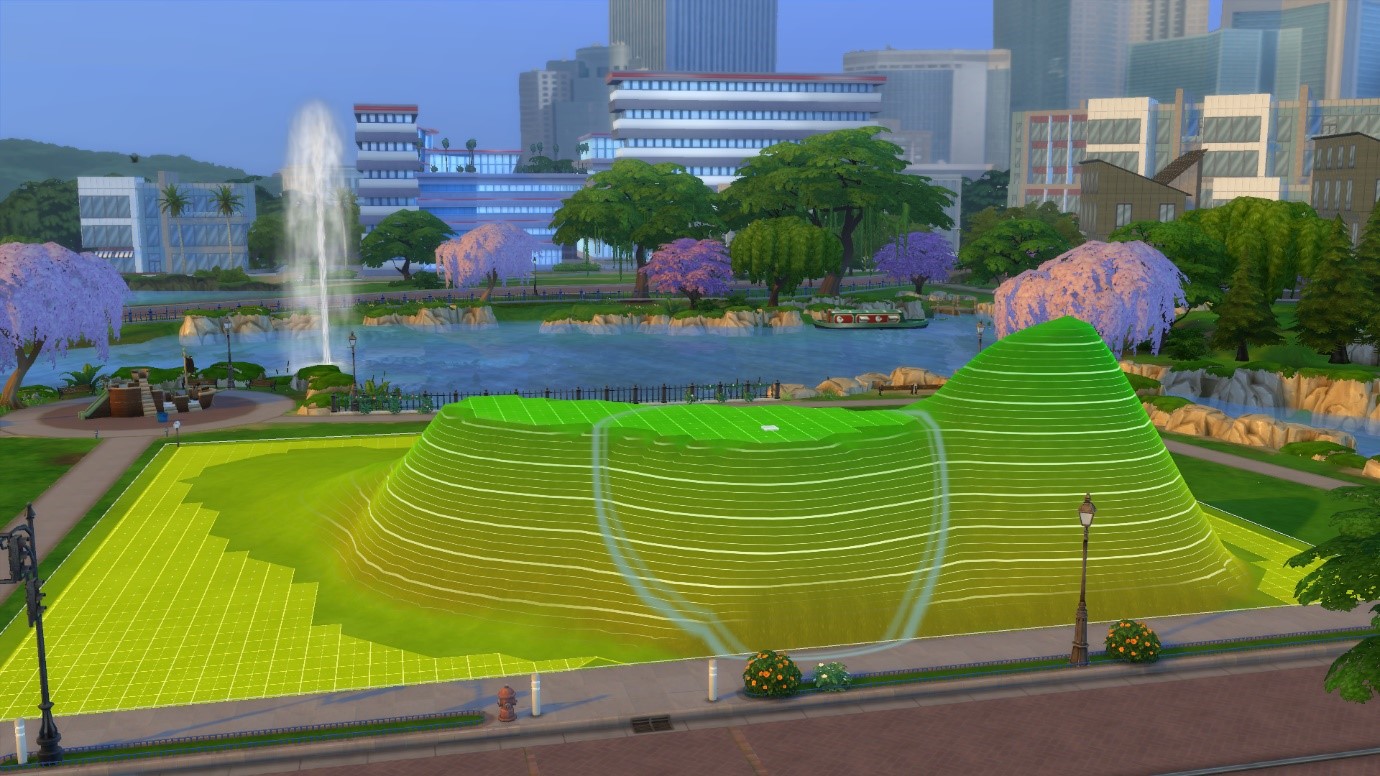
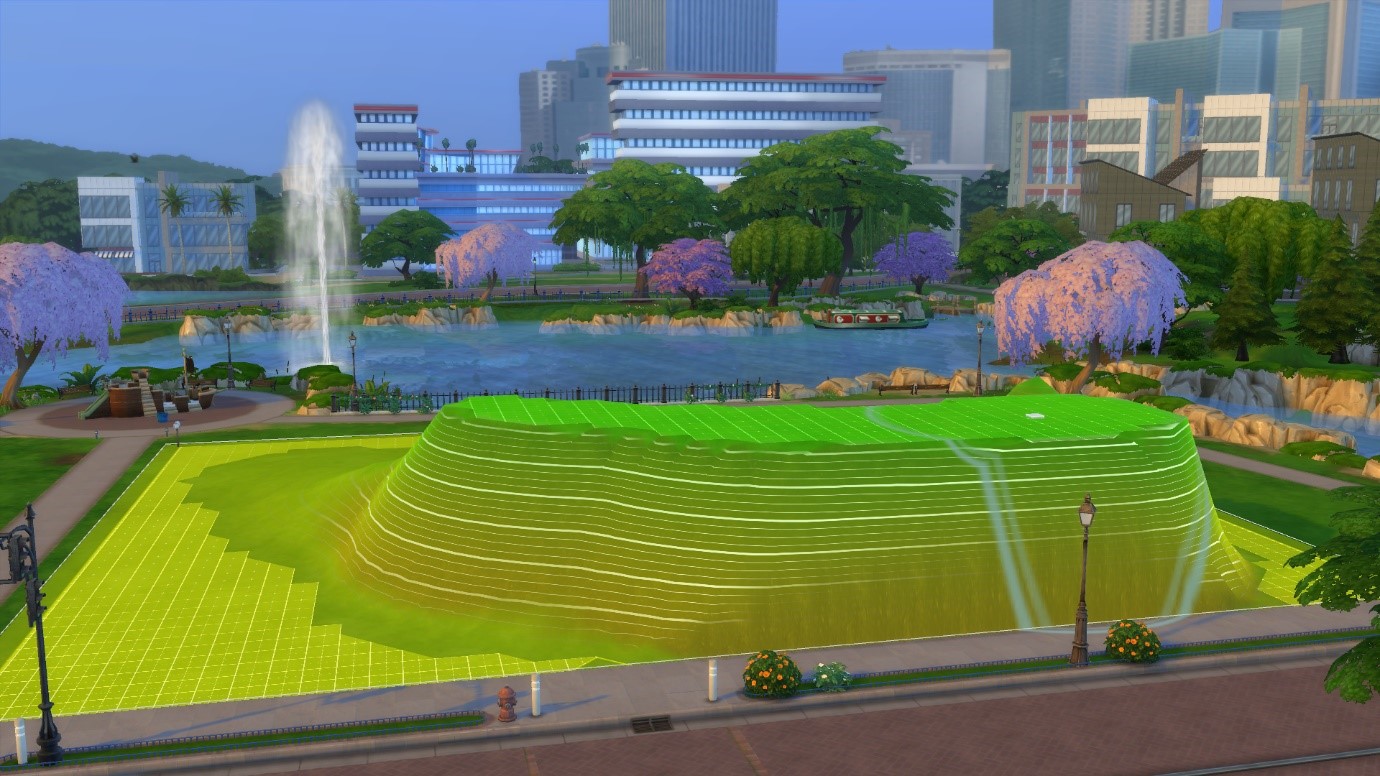
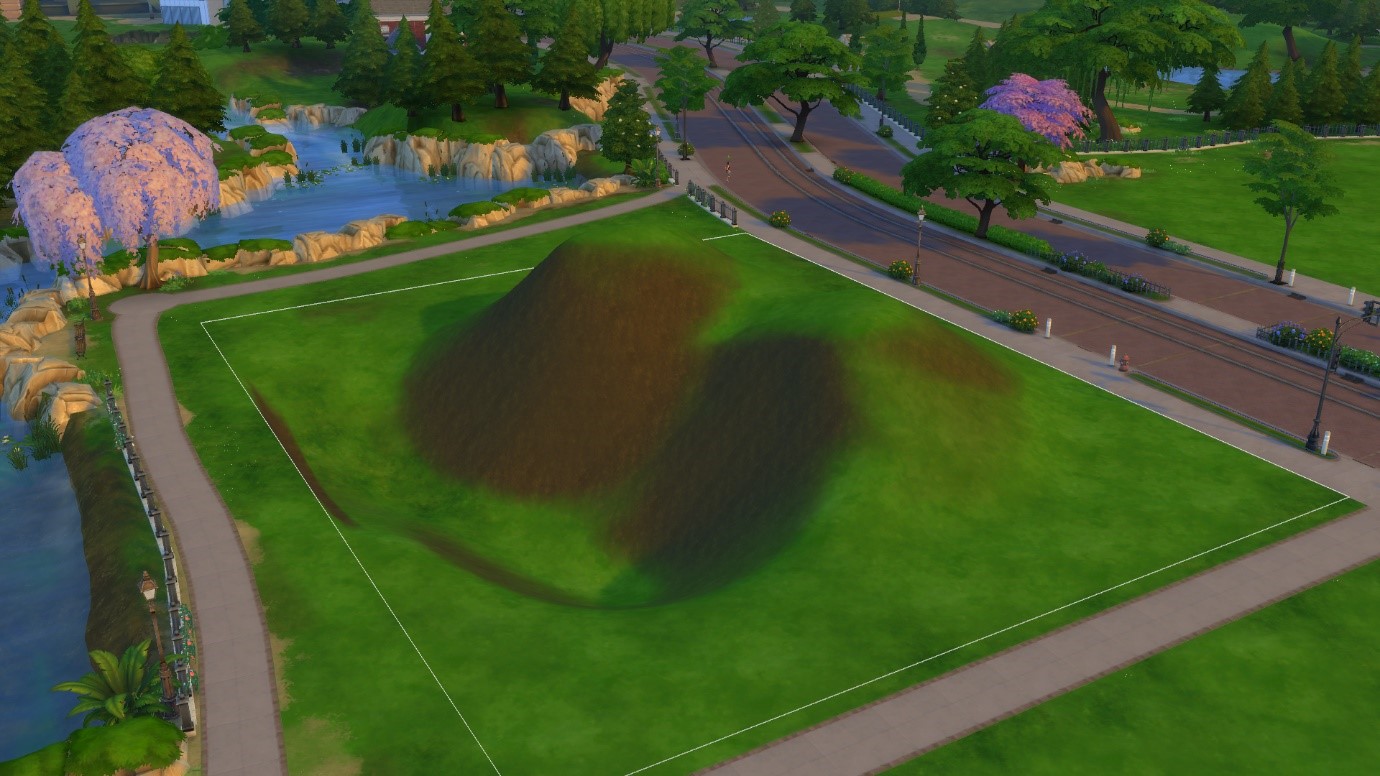
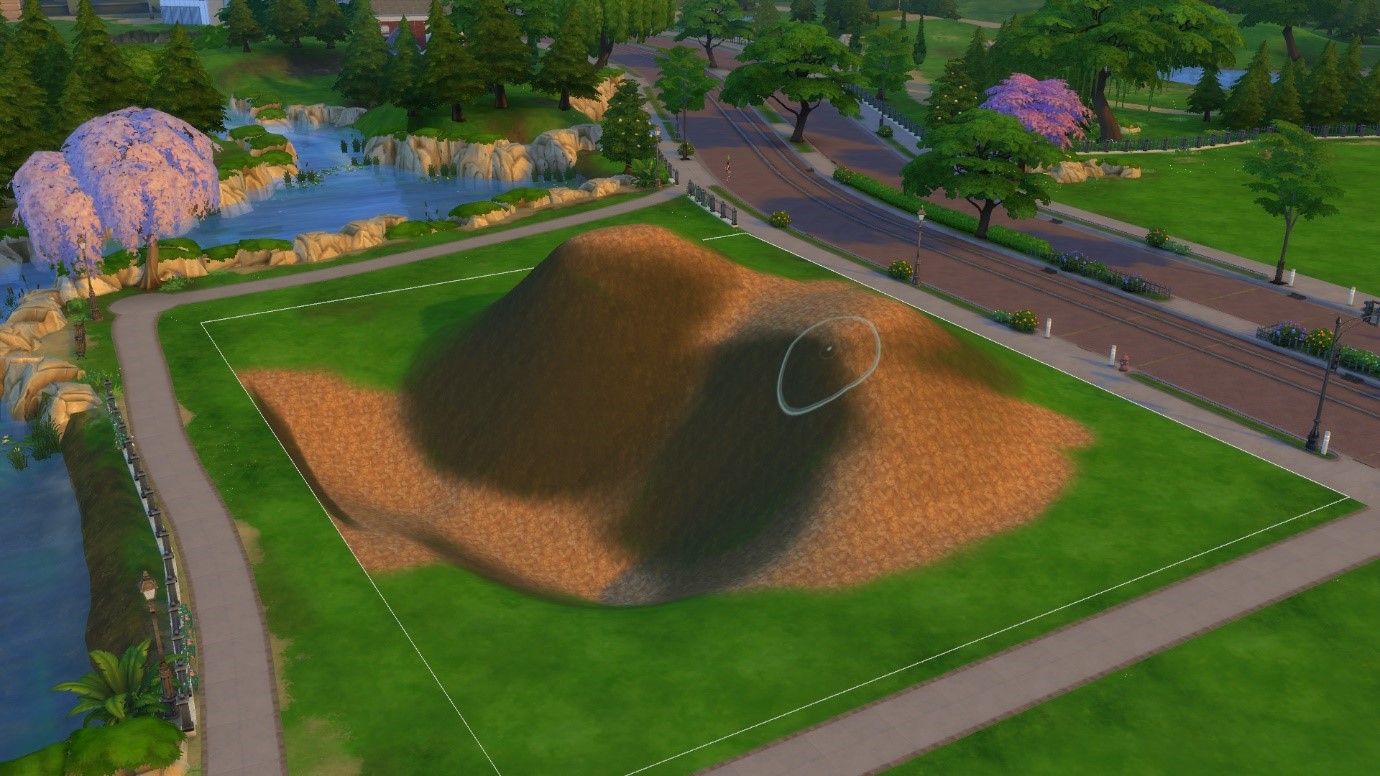
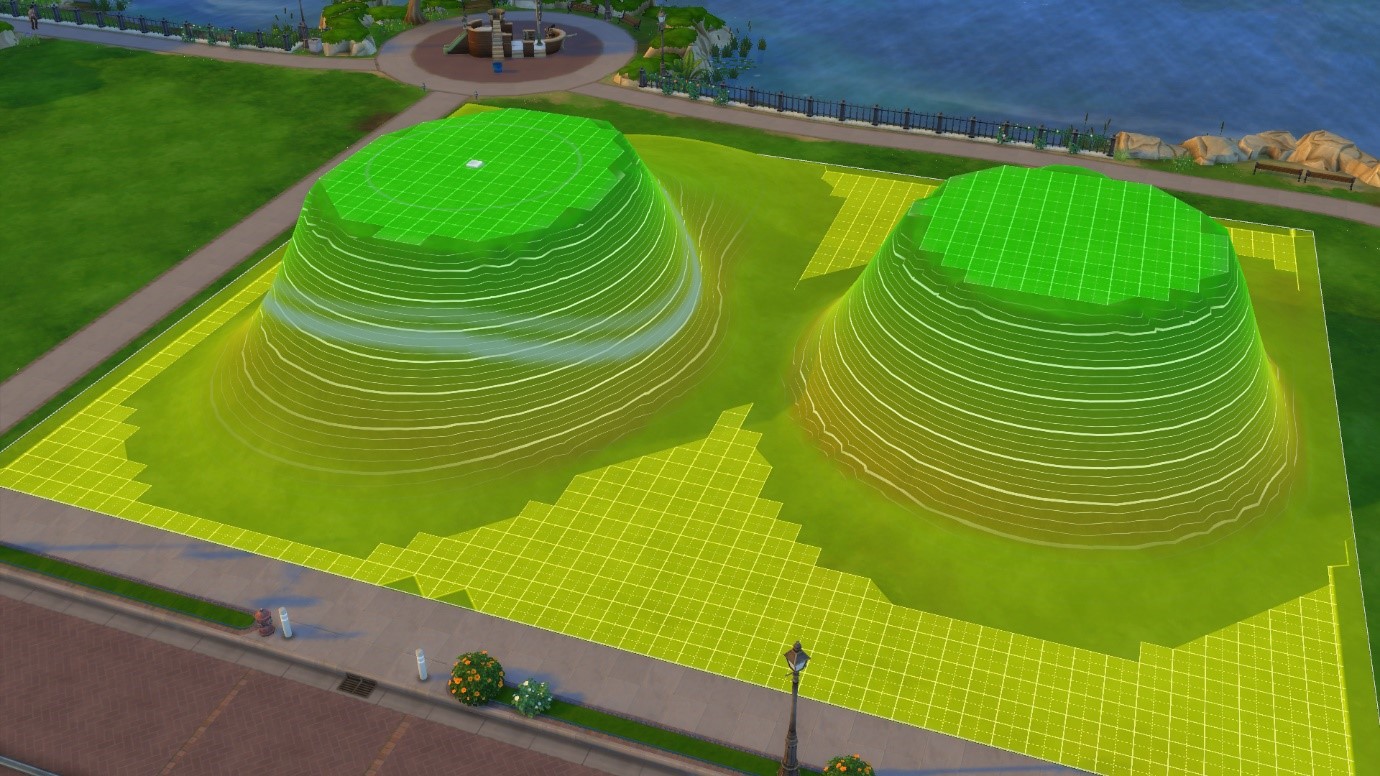
Selecting any of the 6 terrain manipulation tools will automatically toggle-on the Yellow Grid Squares – I call this ‘Yellow Mode’. In this mode, you will be able to clearly see which areas of your lot are flat. Anything that is yellow is flat.
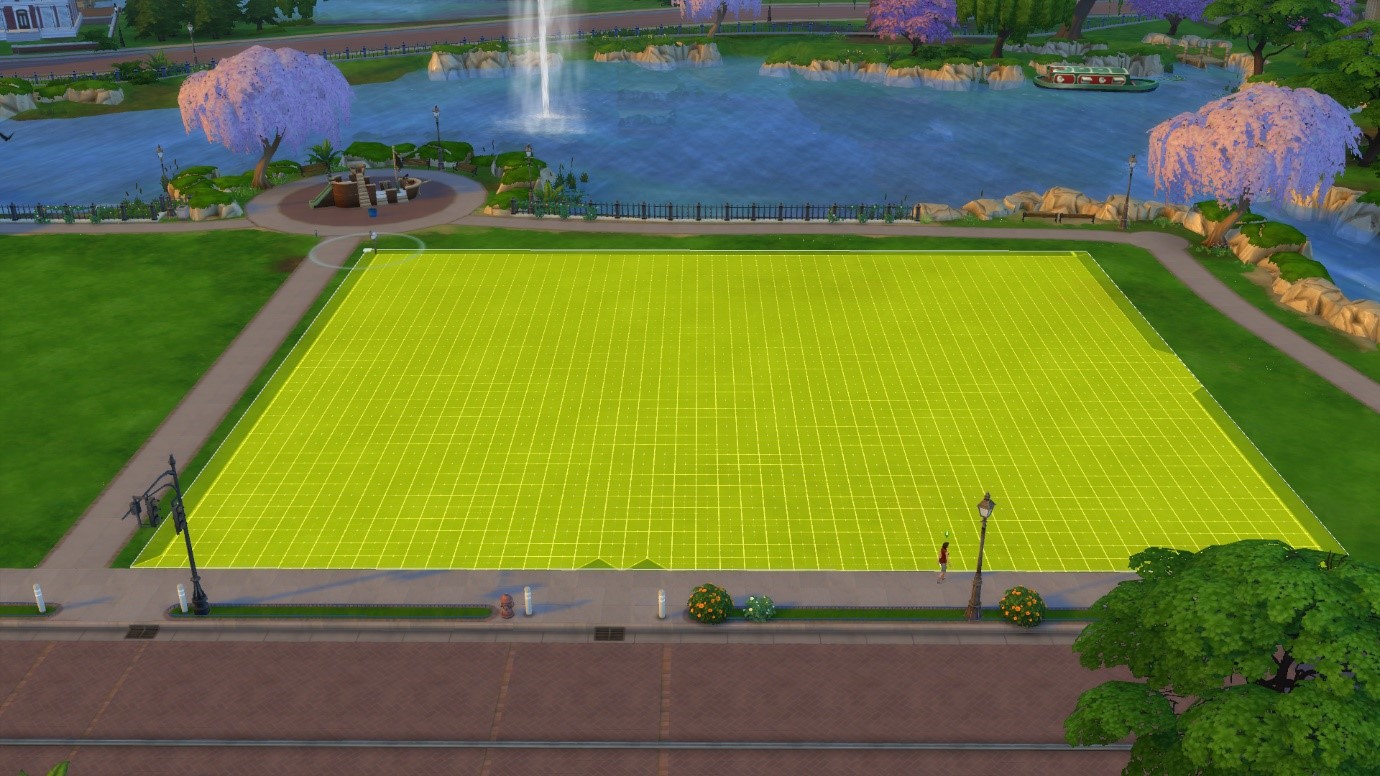
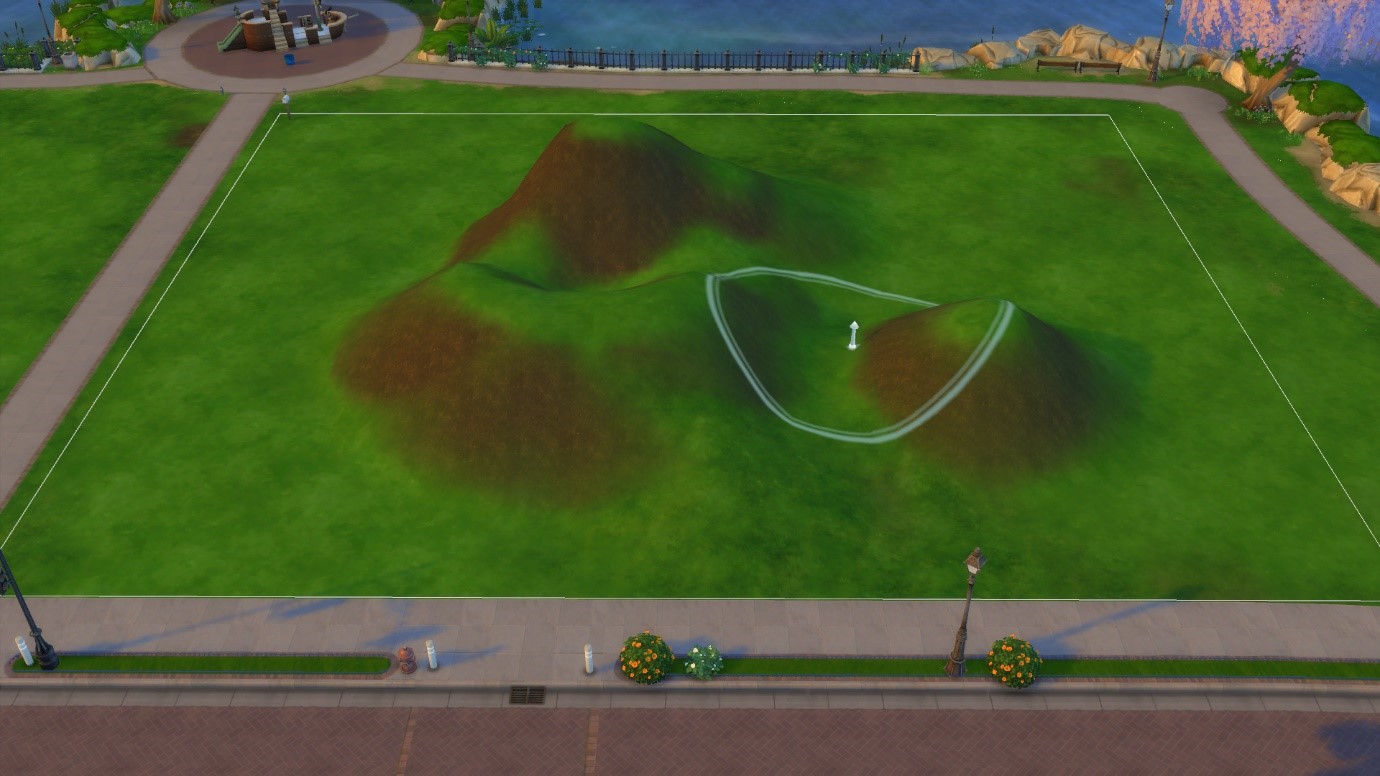
In this mode, you will also be able to see topography lines. When you begin raising or lowering terrain, topography lines will appear around your hills or inside your canyons.
You do not have to edit terrain in ‘Yellow Mode’ if you don’t want to. Pressing the G Key will toggle-off the yellow grid squares and allow you see exactly how your terrain will look in Live Mode. ‘Yellow Mode’ can be turned on again by pressing G.
It is important to note that not all lots in The Sims 4 are flat by default. If you load a lot and select a terrain manipulation tool and do not see the yellow grid squares appear you may need to use the Flatten Lot tool (see below).
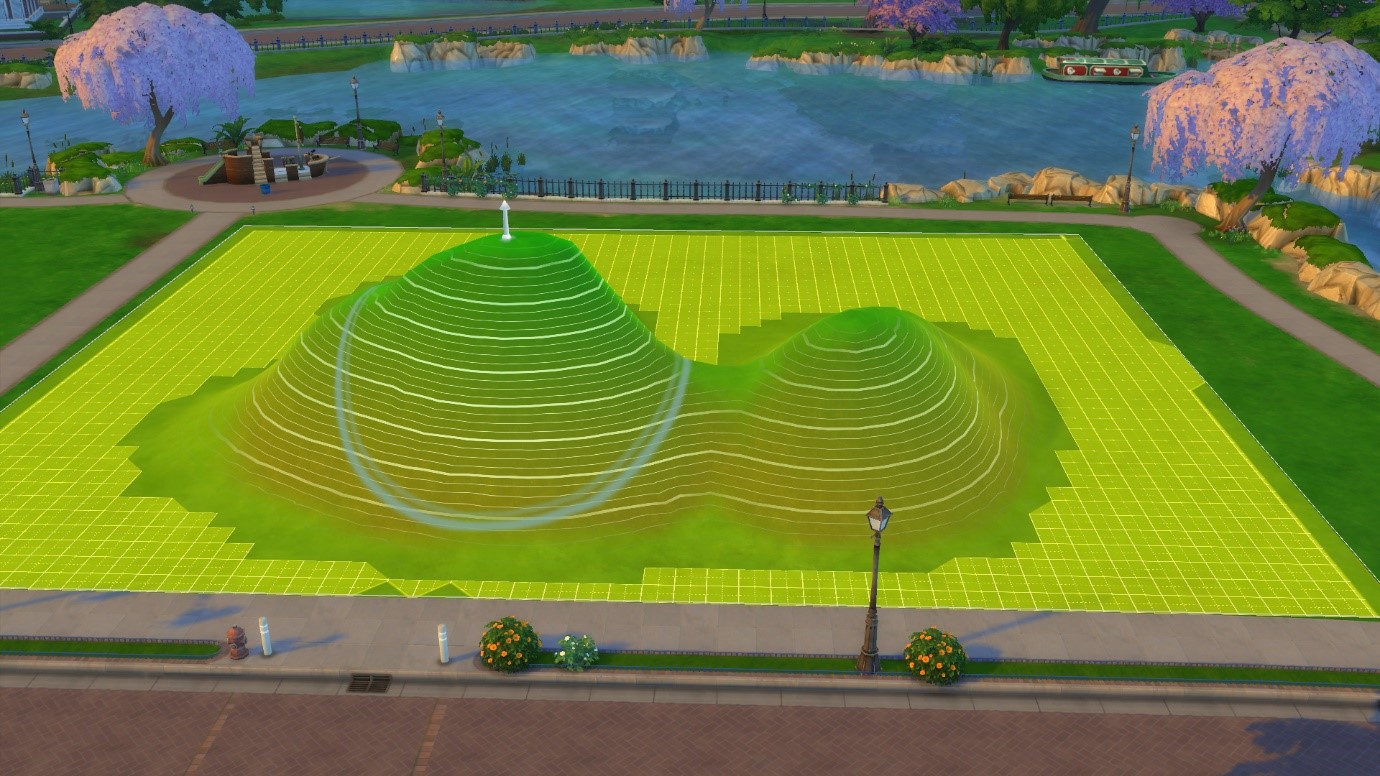
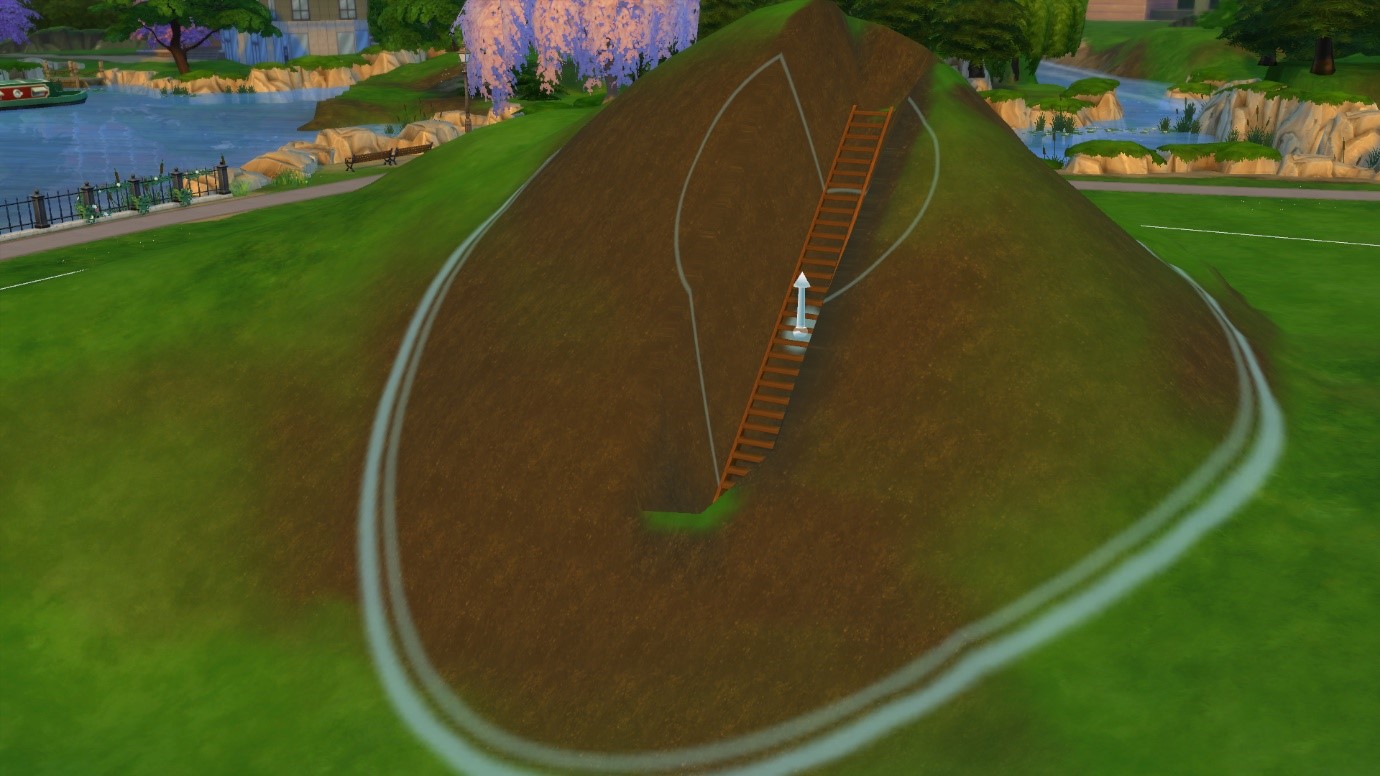
Raise Terrain
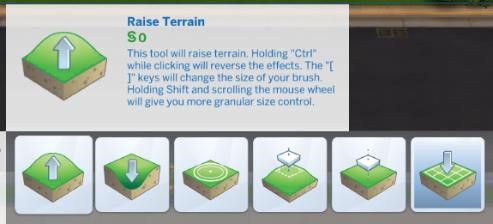
The first of the 6 new terrain manipulation tools is the Raise Terrain Tool. This tool is used to raise the terrain in any area of your lot and works by clicking and holding down the left-hand mouse button.
There is a limit to how high you are able to raise terrain, however. Clicking and Holding the left-hand mouse button indefinitely will not create a super tall structure. Once the terrain has reached its maximum height, the terrain will automatically begin to flatten out.
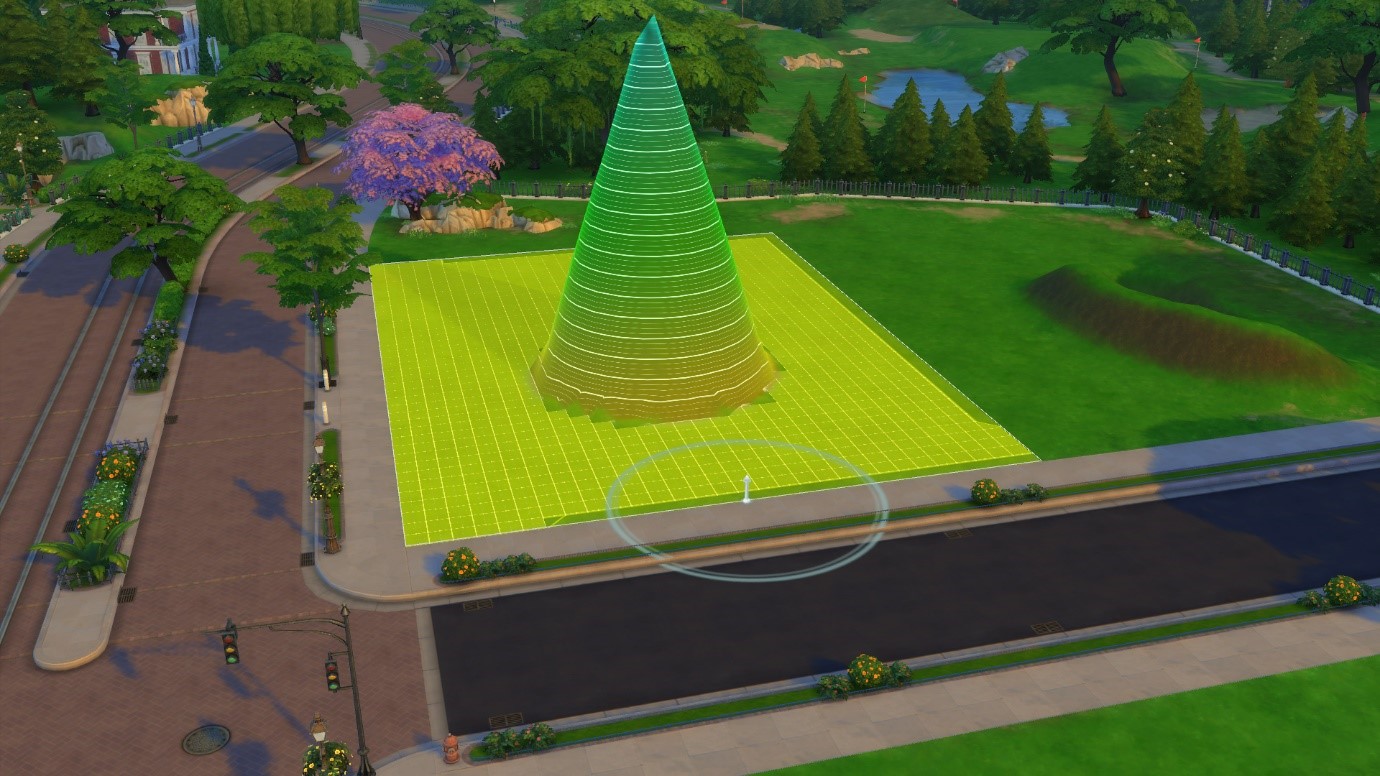
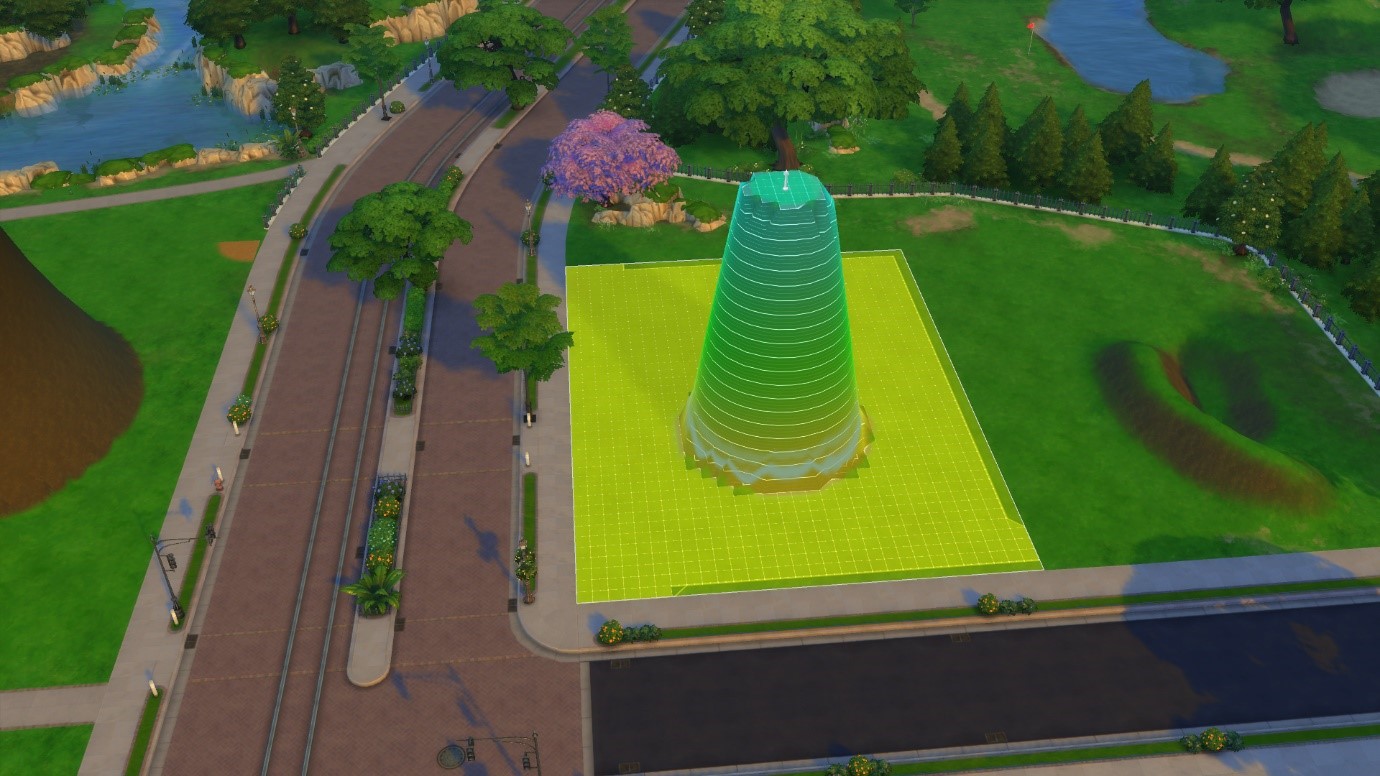
If you are manipulating terrain in ‘Yellow Mode’, you will know when you are approaching the tallest possible height because the terrain will appear light blue.
Lower Terrain
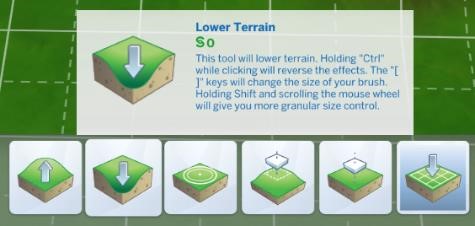
This tool works exactly like the Raise Terrain Tool only in reverse. The Lower Terrain Tool will create canyons, valleys and dips in the terrain on your lot.
Like the Raise Terrain Tool, there is a limit to how deep you can make a depression on your lot. Once you have reached that limit, the terrain at the deepest point of your cavern will begin to flatten out.
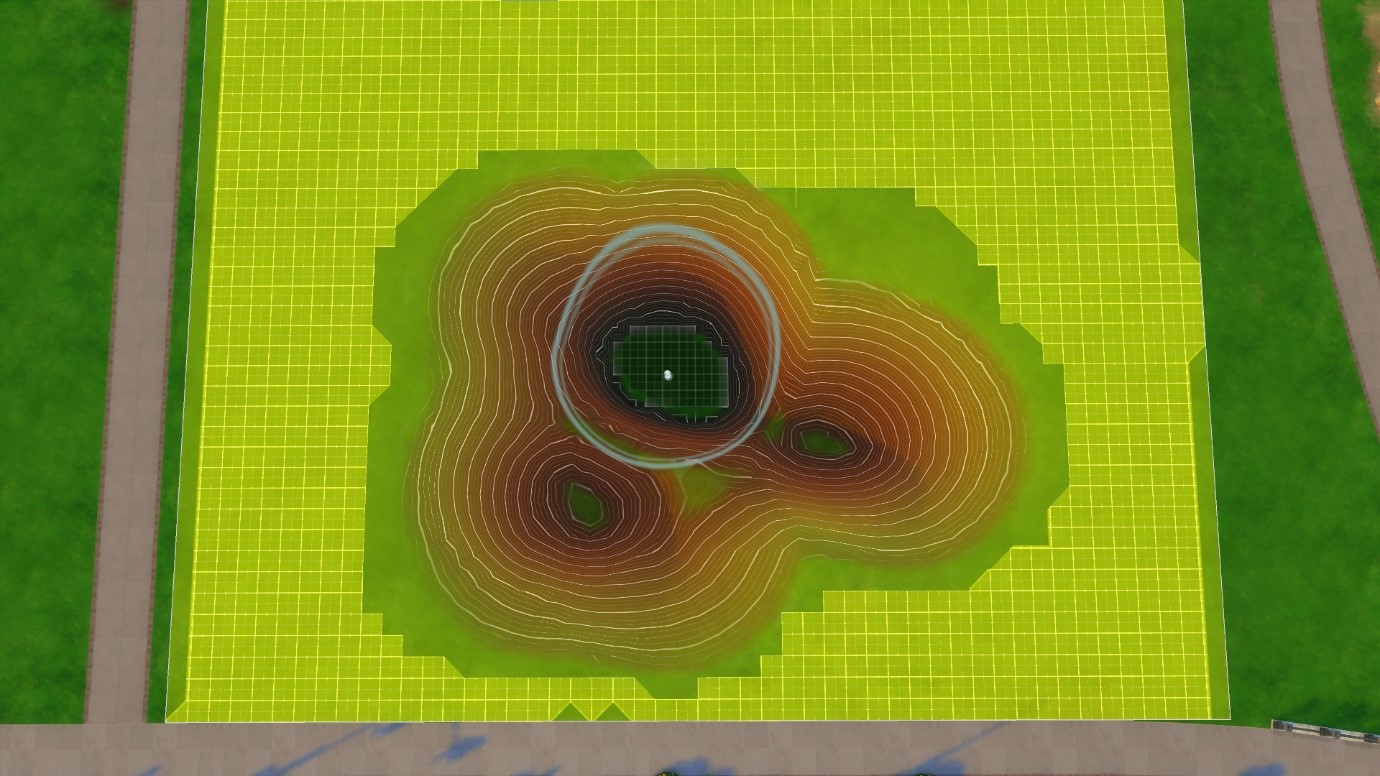
If you are manipulating terrain in ‘Yellow Mode’, you will know when you are approaching the deepest possible point because the terrain will appear near black.
Pressing and holding the Ctrl key whilst using the Lower Terrain tool will reverse the effect and begin to raise terrain. Similarly, when using the Raise Terrain Tool, pressing and holding Ctrl will cause the terrain to begin to lower.
Smooth Terrain
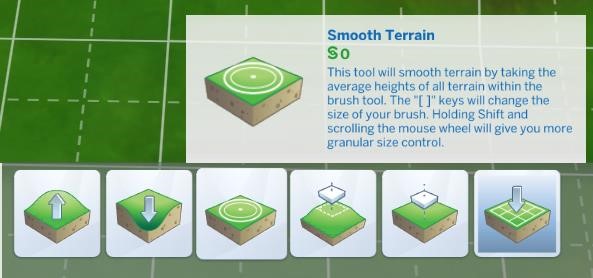
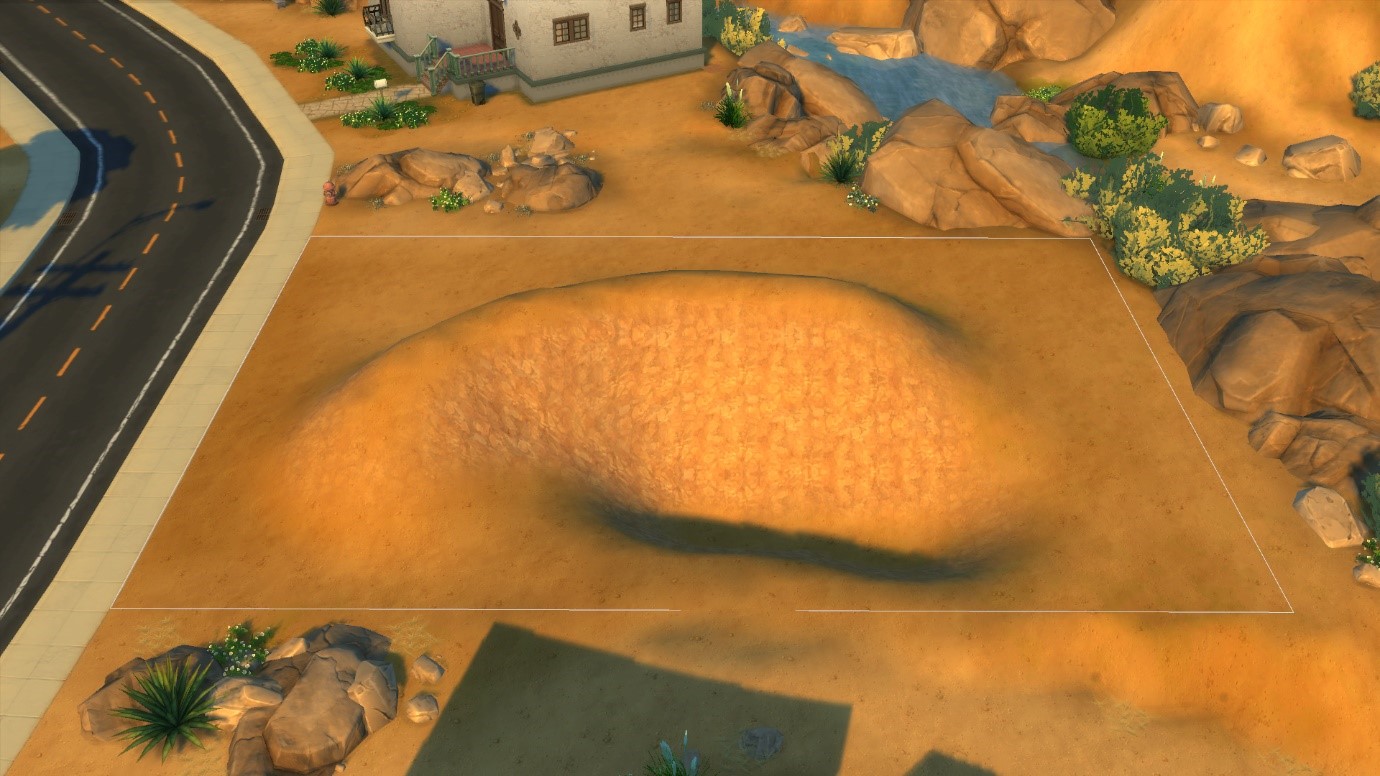
The Smooth Terrain Tool is used to decrease the steepness of terrain on your lot. This tool works by taking the average height of all terrain within the space outlined by the brush and altering the terrain, slowly, to match that height. This tool also works by clicking and holding down the left-hand mouse button.
This tool is particularly useful for creating less harsh lines and making your terrain look more natural.
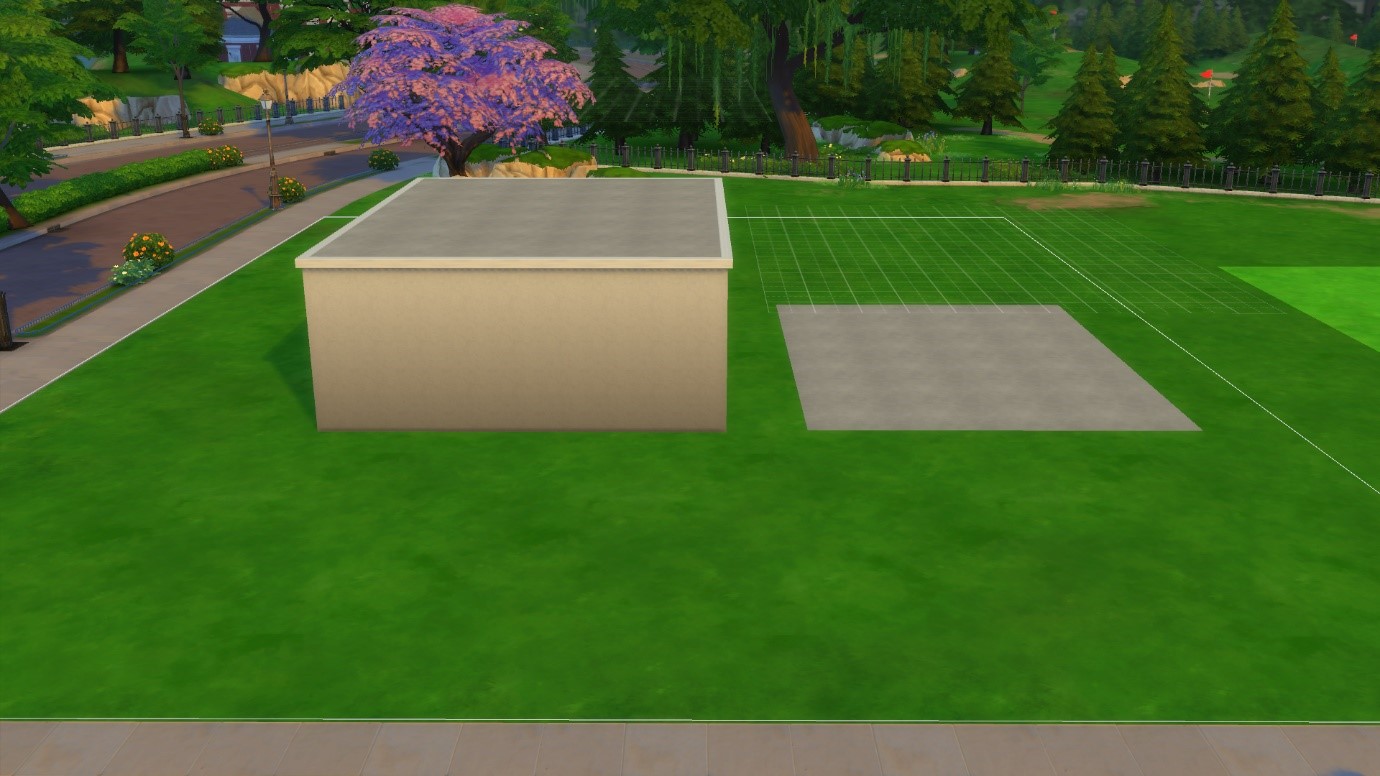
Flatten Terrain
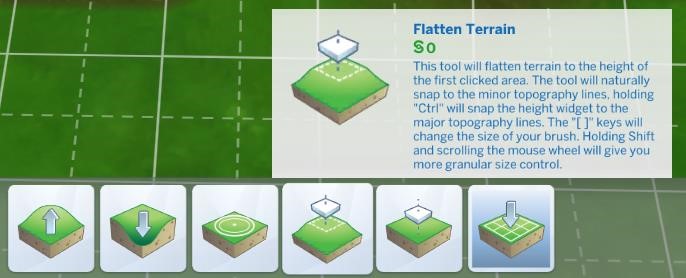
The Flatten Terrain Tool will allow you to create flat spaces at any height/depth on your lot. This tool will flatten the terrain to the height/depth of the first clicked area. Like the other tools, Flatten Terrain works by clicking and holding down the left-hand mouse button.
Moving your cursor up, down and across the lot will flatten different areas of the lot to different heights.
You are only able to flatten to heights indicated by the topography lines. This tool will automatically snap to these lines. Although technically a limitation, there are so many topography lines that this will not feel at all restrictive. A high level of customisation is still possible.

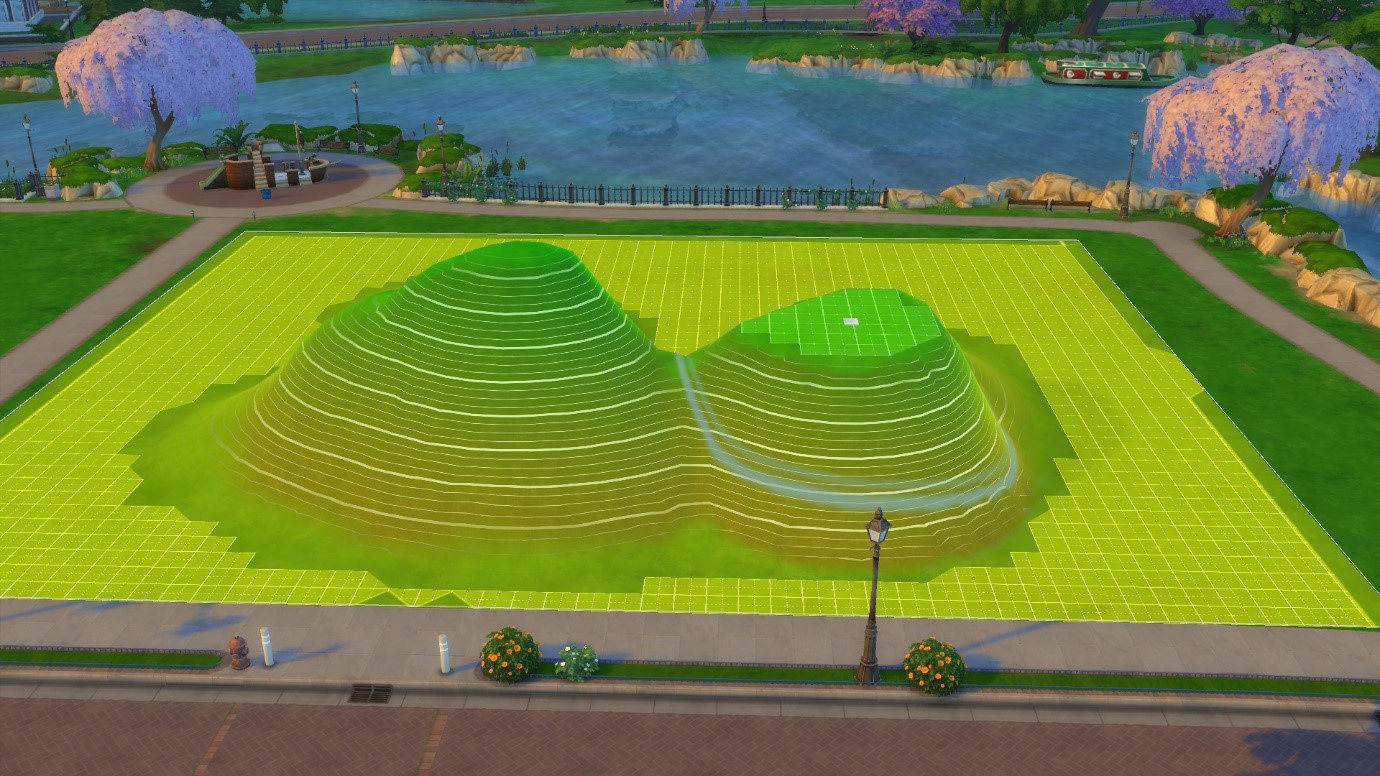
Flatten to Height
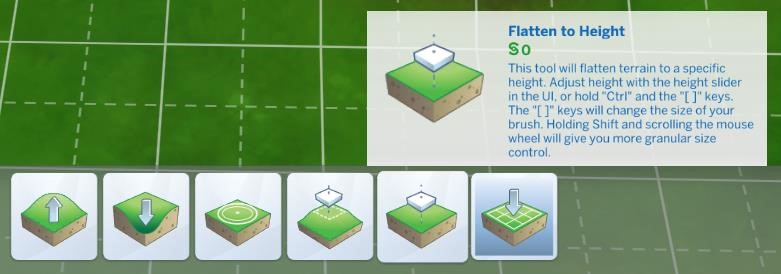
This tool is very similar to the Flatten Terrain Tool but has some key differences. This tool flattens terrain to one specific (pre-selected) height no matter where you click on the lot.
By default, the Flatten to Height Tool will flatten terrain to ground level but this can be altered by using the height slider or by holding down Ctrl and pressing the Right and Left Square Bracket Keys.
The height slider can be found to the left of the tool selection panel. As you move this slider up and down, you will notice that the little white square in the middle of your brush outline will move up and down too.
Holding down Ctrl and pressing the Right and Left Square Bracket Keys does the same job. As you press the either [ or ], you will see the white square move up and down. Once you are happy with the height, let go of Ctrl and begin to flatten your terrain.
This tool is particularly useful because it allows you to create two or more separate pieces of terrain that are exactly the same height.
Flatten Lot
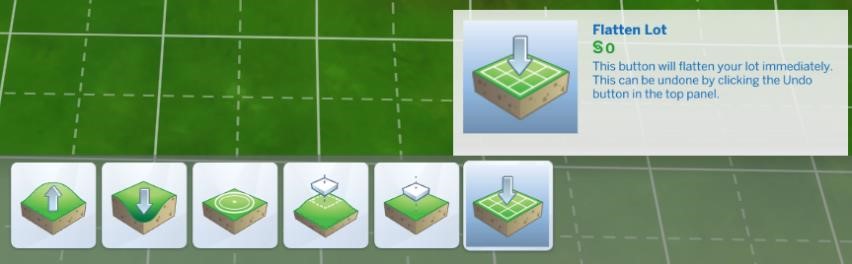
‘Flatten Lot’ is less of a tool and more of a button. You will notice that its icon looks different to the other tools; it has a blue background rather than a white background. Clicking this button will automatically flatten your entire lot.
Clicking Flatten Lot will not delete buildings, landscaping, objects or fences. These items will merely be lowered to ground level.
You are also able to flatten your entire lot pressing the flatten lot button found under the Bulldoze icon at the top of your screen. Simply bulldozing a lot will not remove terrain edits, so you will need to flatten your lot as well in order to get back to a completely blank canvas.
Brush Sizes and Shapes
There are 10 different brush sizes and shapes to choose from – 5 circular and 5 square. Different brushes create different effects. Square brushes create harsh lines, whilst circular brushes give a more rounded effect.
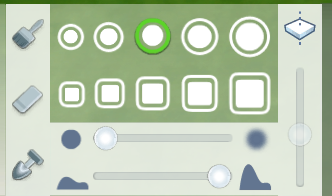
Pressing the Right and Left Square Bracket Keys whilst in terrain manipulation mode will toggle through brush sizes and shapes.
Softness and Speed
Underneath the brush selection panel are two sliders. The top one is the Softness Slider and the bottom the Speed Slider. These affect how harsh your lines are and how fast terrain is manipulated. These two sliders work in conjunction with each other and you will need to play around with both of them in order to create your desired effect.
Terrain Paint
As I mentioned previously, terrain paints are now found alongside the terrain manipulation tools. While terrain paints work just as they always have, there are a couple of things to note.
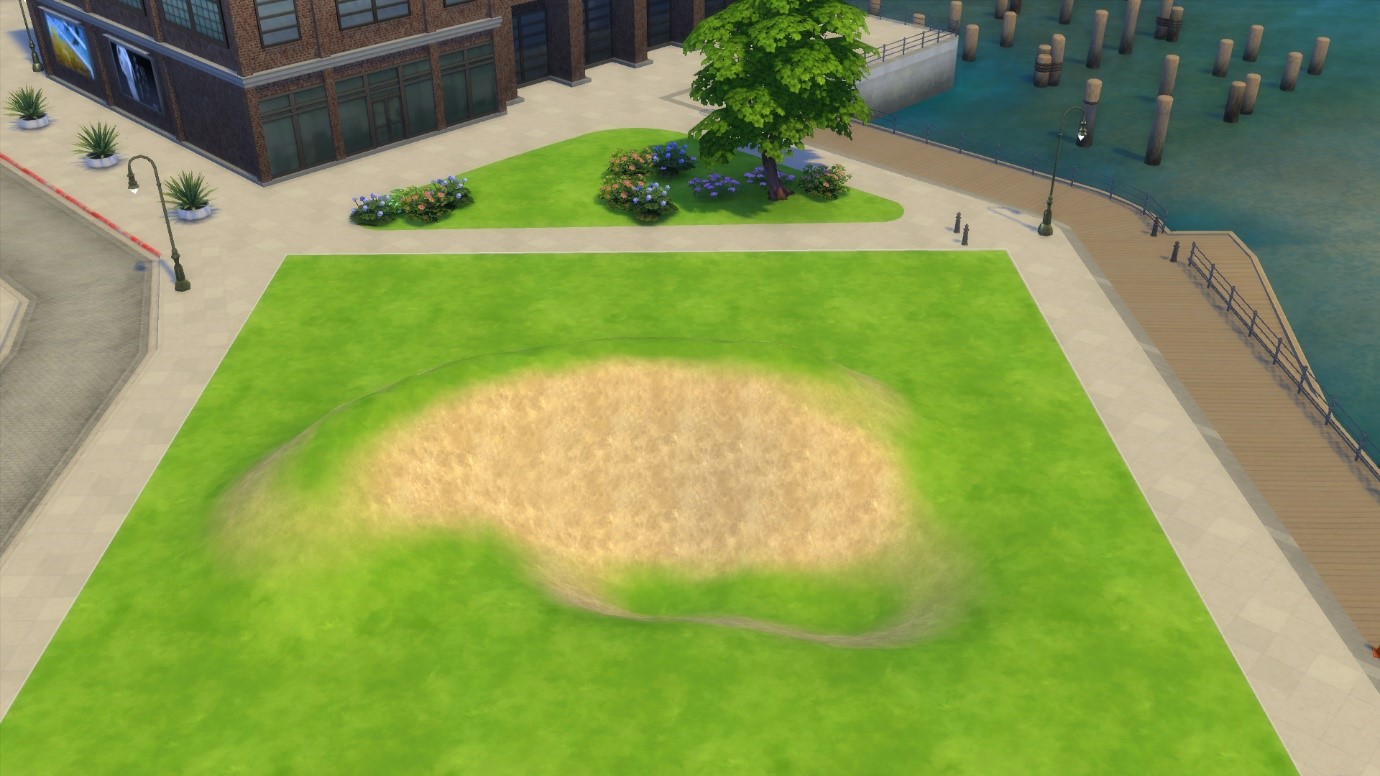
Steep, uneven ground cannot be painted. Any section of your lot that has the grass texture (or sand texture in Oasis Springs) is able to be painted.
The texture you see on lifted or lowered terrain is set by world and cannot be altered. When you place a lot from the gallery, lifted/lowered terrain will automatically change colour to suit the world it is placed in.
Here are some examples of the different terrain textures you will see across The Sims 4’s different worlds:

Sims and Routing
When manipulating terrain it is important to keep in mind the accessibility of the space for your Sims. Sims will not be able to walk across all uneven ground.
While some trial and error will be necessary, as a rule of thumb, Sims cannot traverse areas that have topography lines – these areas are simply too steep.
The Smooth Terrain Tool can be really useful for making a lot accessible to Sims as it flattens out terrain without completely getting ridding of your terrain edits.
Of course, stairs can also be used to allow your Sims to traverse a lot. See below for information on stairs and terrain editing.
Foundations
In order to work better with the terrain manipulation tools, as of the November 2018 patch, the way foundations work in Game has altered. To adjust the height of your foundations, simply click on the room (or block of rooms) you wish you alter. You will see that a widget appears in the centre of the room. Clicking on this and dragging it up or down will change the height of your foundations.

While foundations can now be much higher that ever before, there is still a limit to how high they can become.
Dragging the foundation adjuster below ground level will cause your room or structure to be buried in the terrain.
There are no changes to the way foundations are painted.
You are still unable to place doors or windows onto a foundation without first enabling MoveObjects.
Foundation height is now set by room (or block of rooms) rather than by lot. If you have two (or more) unconnected structures on your lot, it is possible for them to each have a different foundation height. This means that players are able to create a greenhouse, shed or garage that is on the ground level without a foundation, whilst still having a foundation on the main house.
Because of this new ability it is possible to have multiple structures on one lot that are all at vastly different heights. This, naturally, causes some issues with regards to connecting different structures or rooms together. If two rooms are at the same height they will be able to connect to one another. If they are at different heights they will not.
When you are raising or lowering a foundation, the Game will tell you whether your new foundation height matches any of the other foundation heights on the lot by highlighting the matching structure in white.
Using the copy tool on foundation blocks will not reproduce the height of the foundation, only the shape of the block.
Above Ground Rooms and Terrain
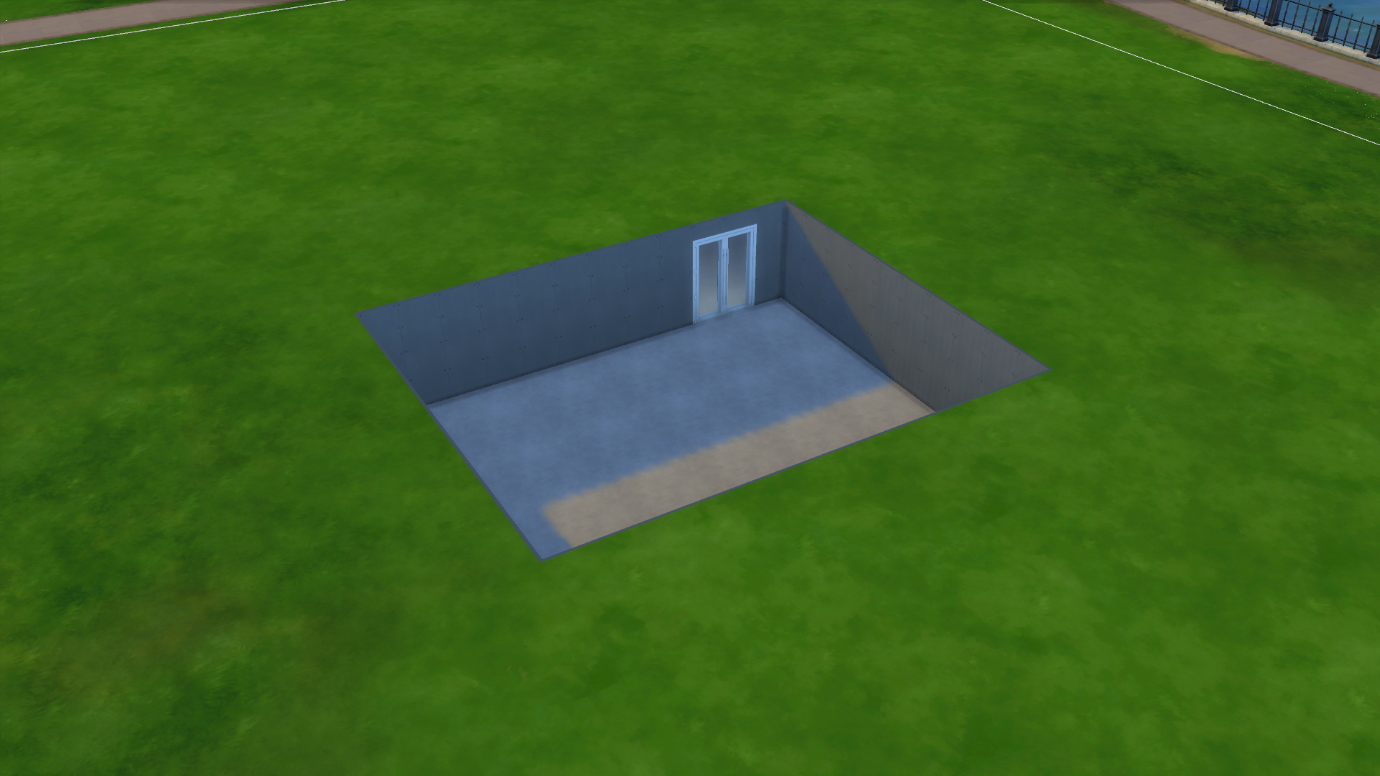
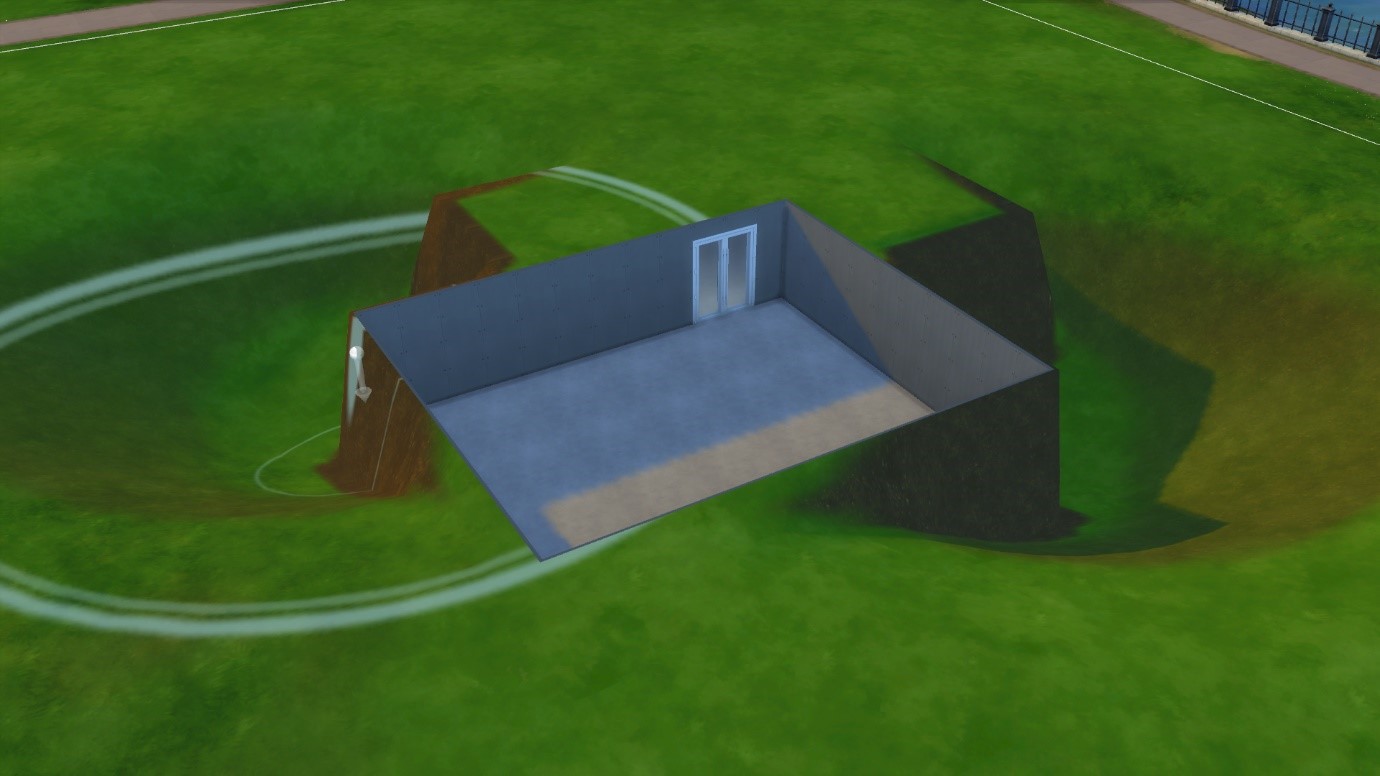
Above ground rooms can be built on any flat surface on a lot, no matter how high or deep that flat surface is.

There are a few ways in which above ground rooms interact with terrain manipulation. These depend on whether you are placing the room before you alter the terrain or after.
If you place your room before you raise the terrain, the terrain will shape itself around your structure.
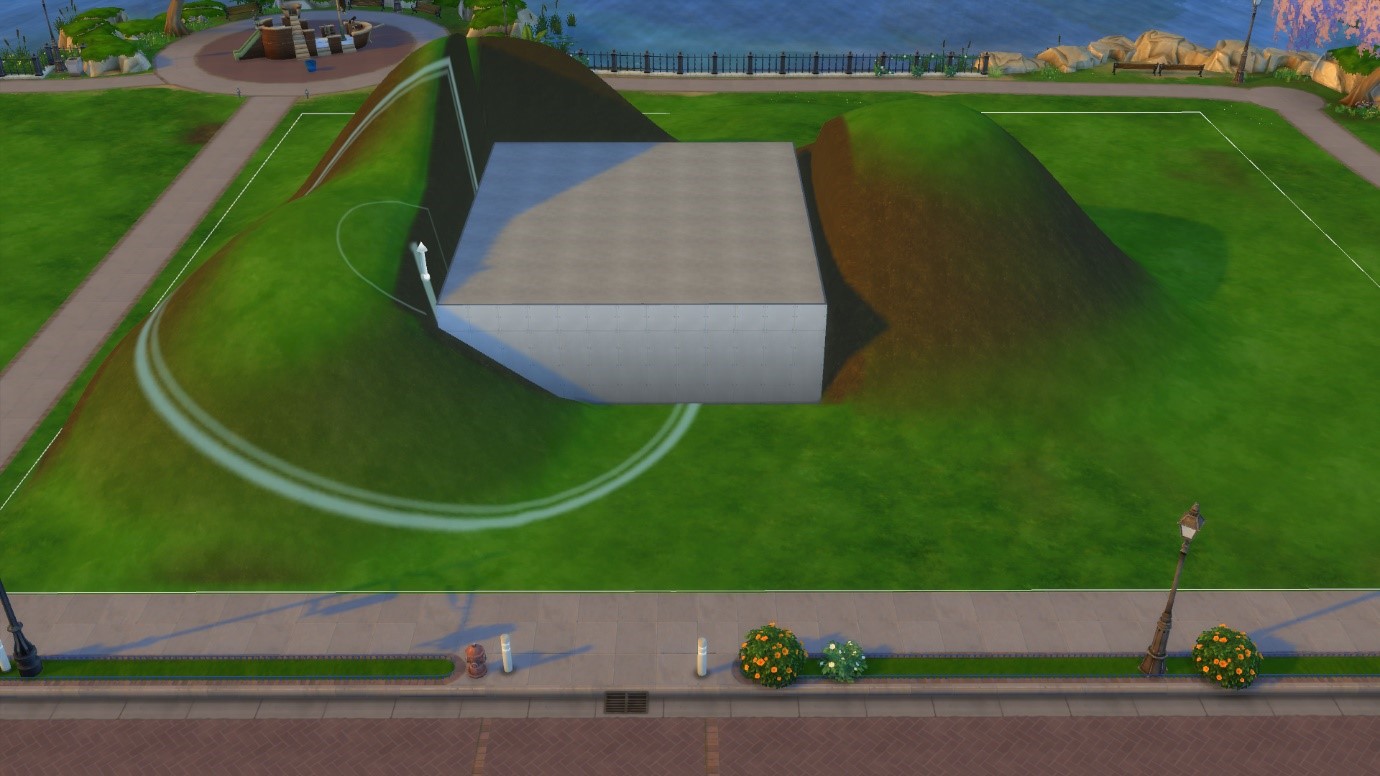
If you place your room and then begin to lower the terrain, foundation will be revealed underneath your room or structure.
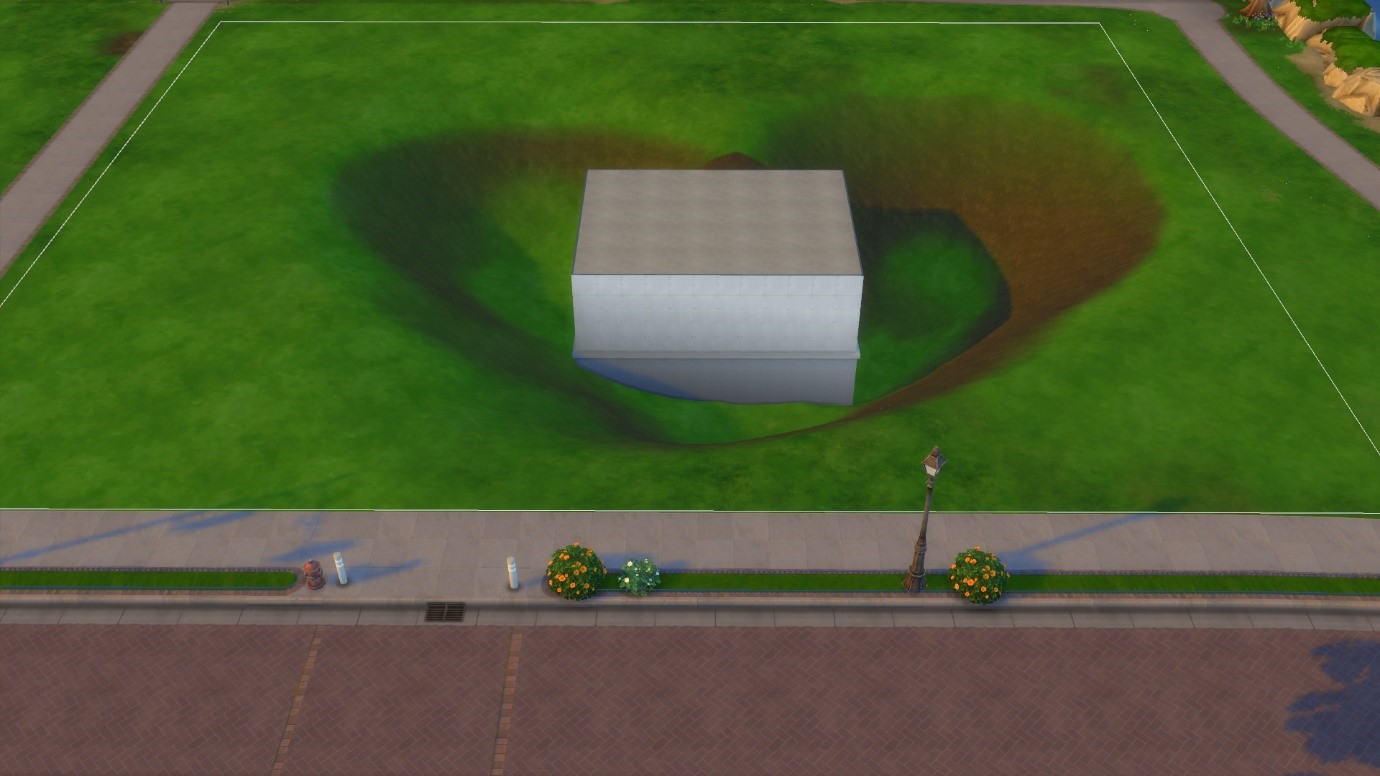
If you create your room after you alter the terrain, the Game will automatically create foundations underneath that room to better fit the structure into the environment. This is true for both lowered and raised terrain.

In either case, walls, rooms and buildings cannot be built into the terrain. It is possible to create this effect however, by using stones, MoveObjects and the Resizing Cheat. See our Guide on building Cliff and Mountain Lots for more information on this technique.
Despite the changes to the way that foundations function in Game, wall heights cannot be individually adjusted. This means that, as before, all the rooms that are on the same level must have the same wall height.
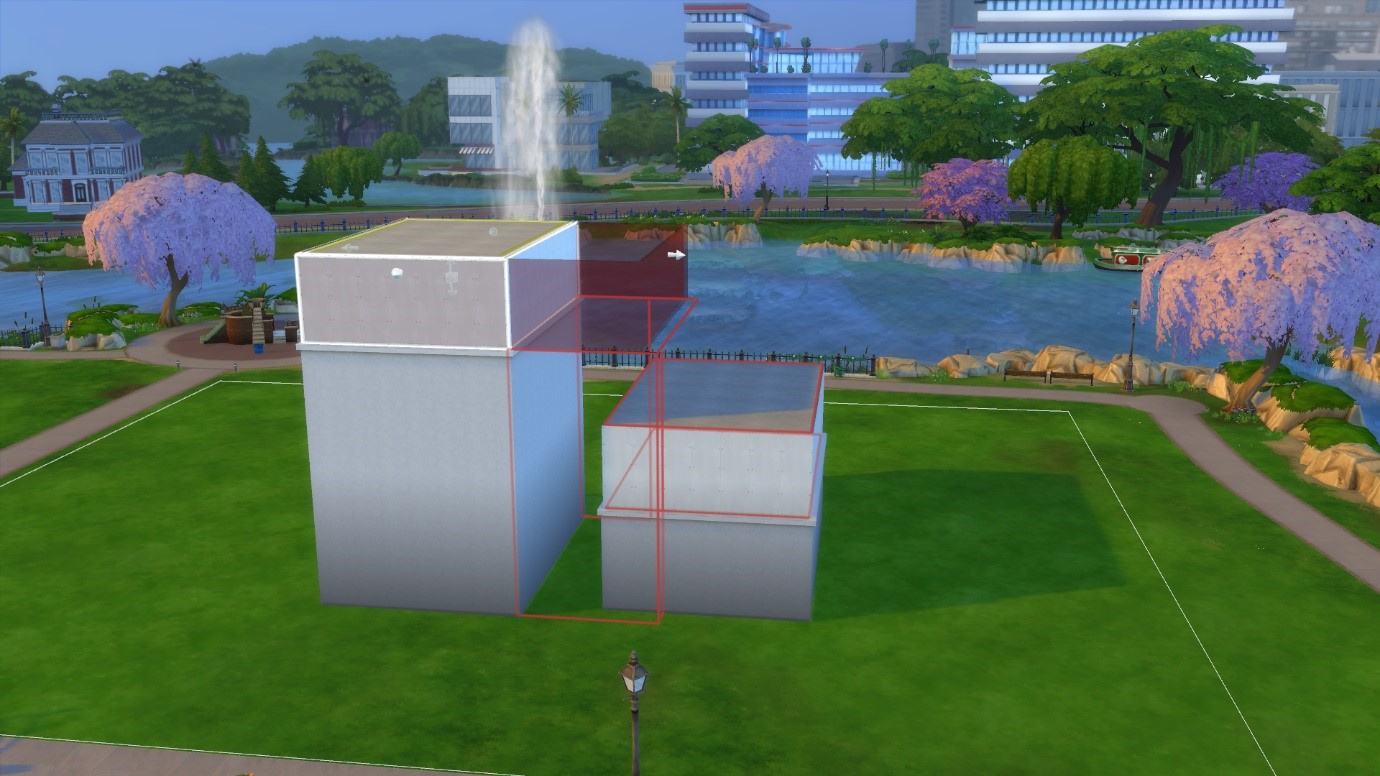
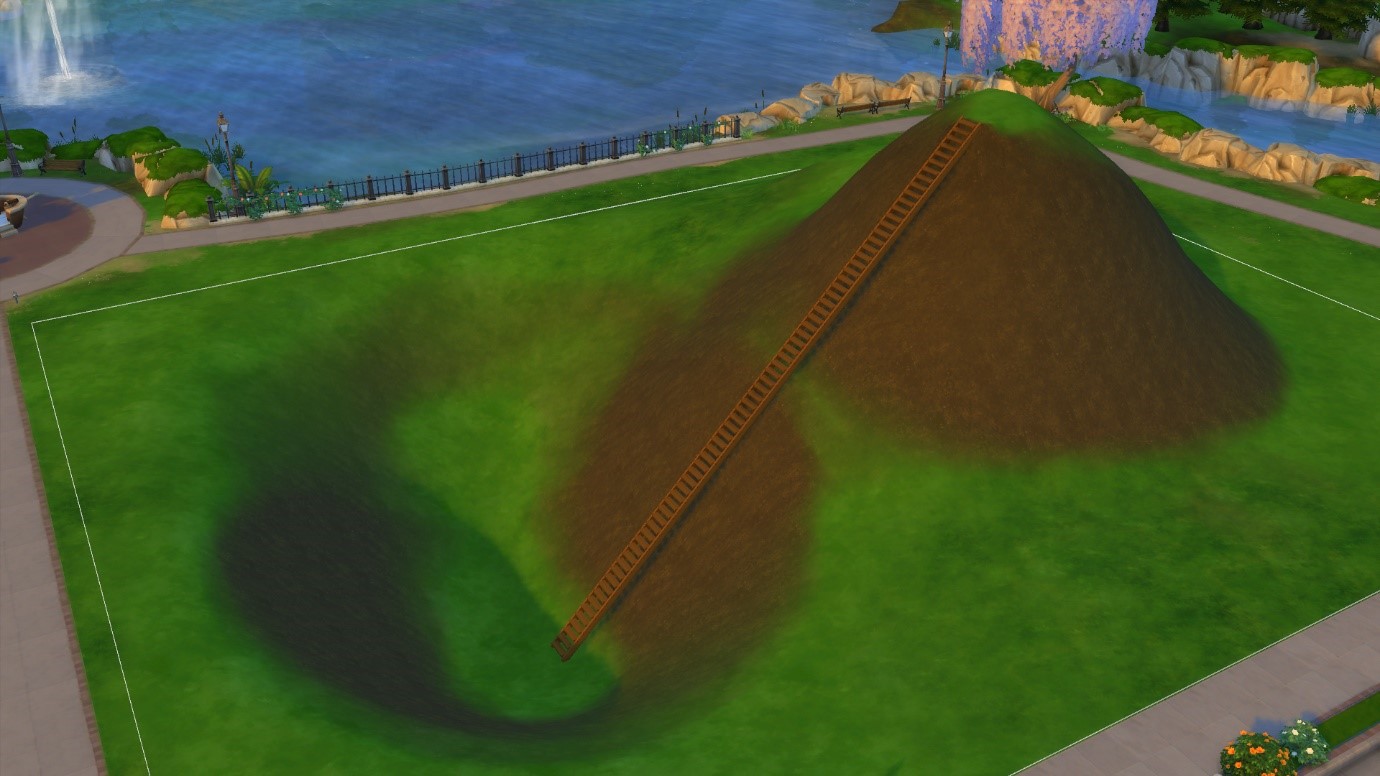
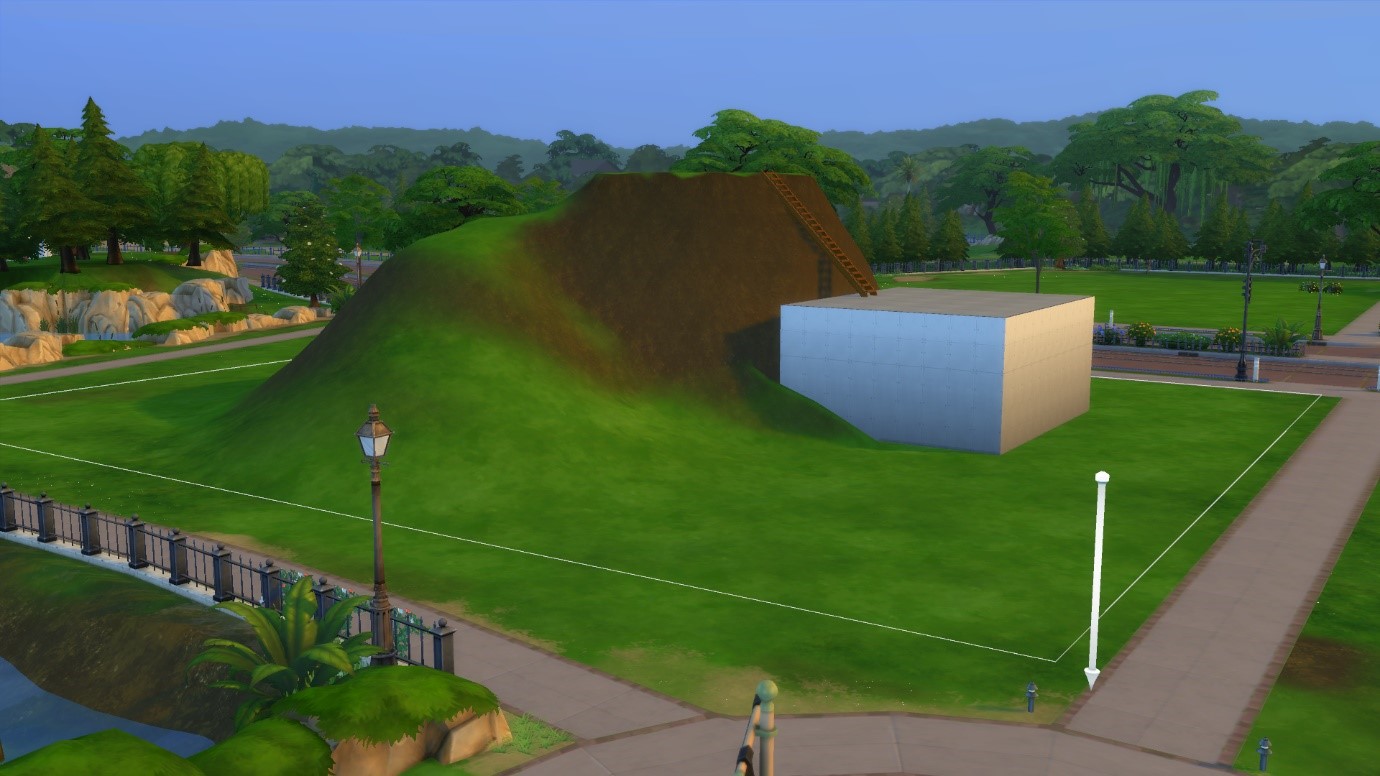
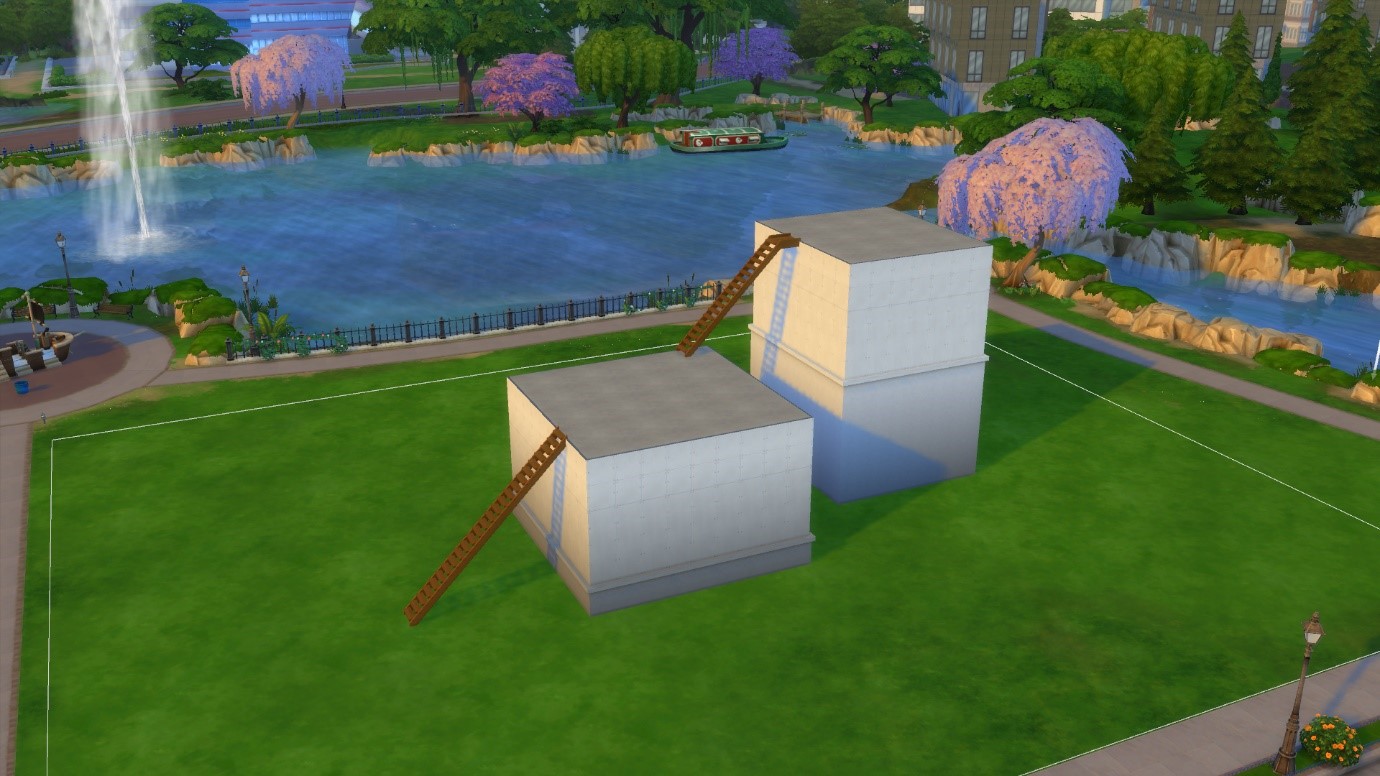
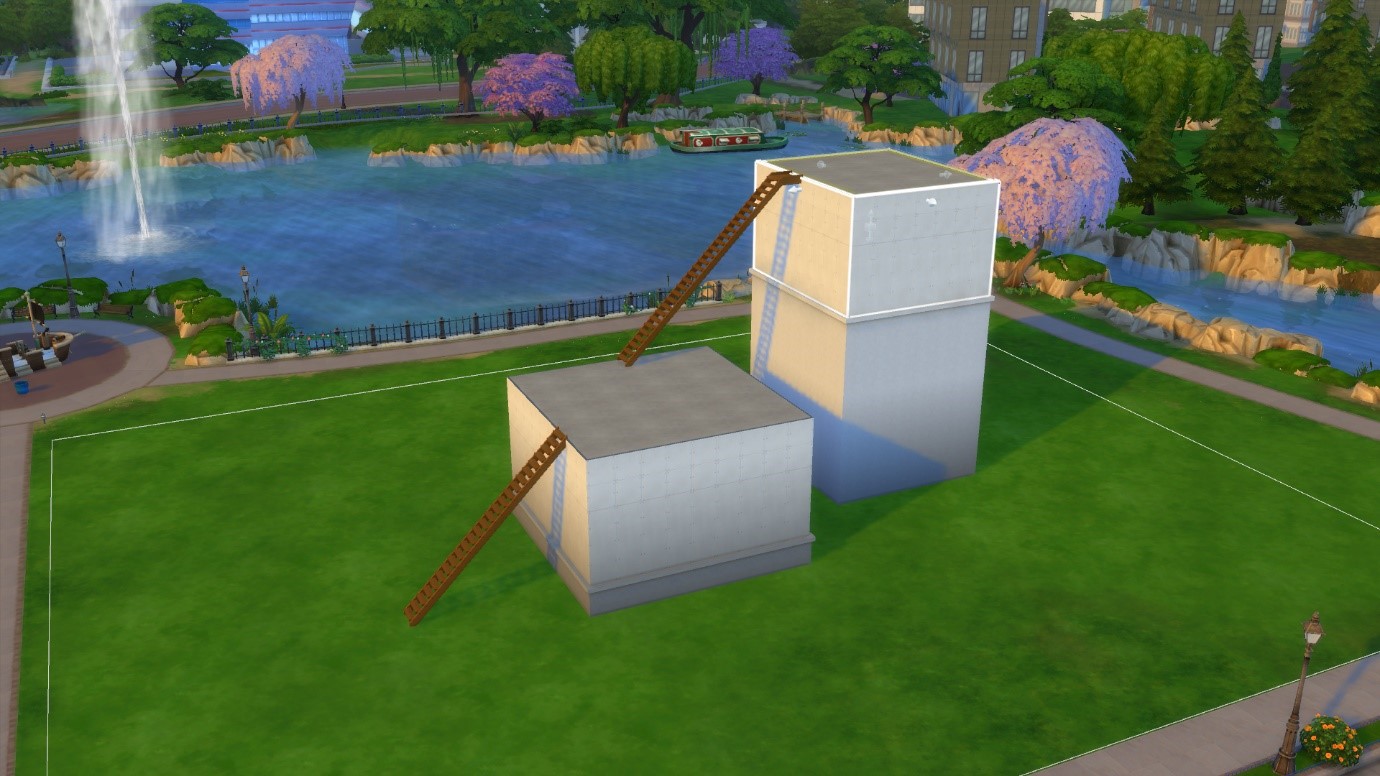
Building Bridges
To create a bridge you will first need to create two sections of raised terrain that are the same height (use the Flatten to Height Tool to achieve this).
Next build a structure on each of the sections of raised terrain.
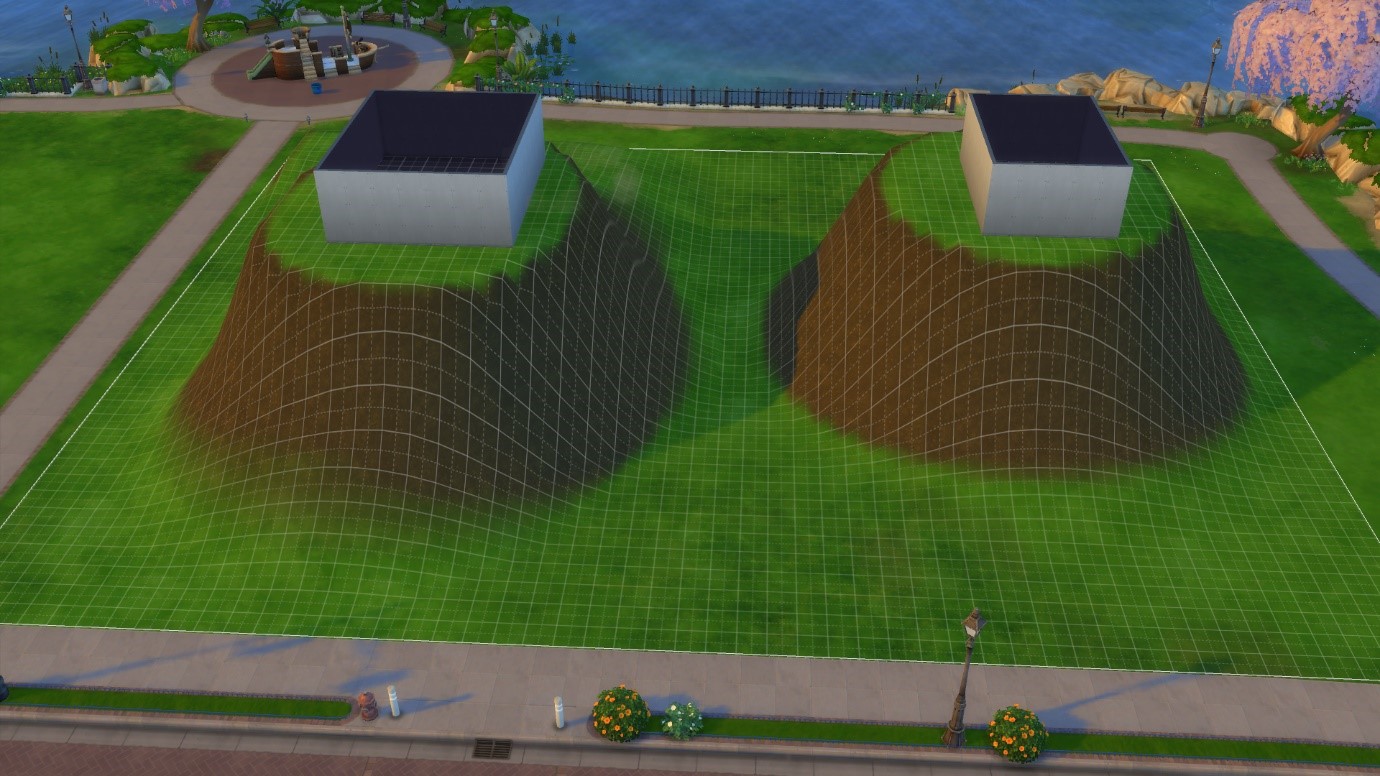
As these structures have been built on the ground level, the Game will automatically form a foundation underneath any flooring or rooms you build to connect the two structures.
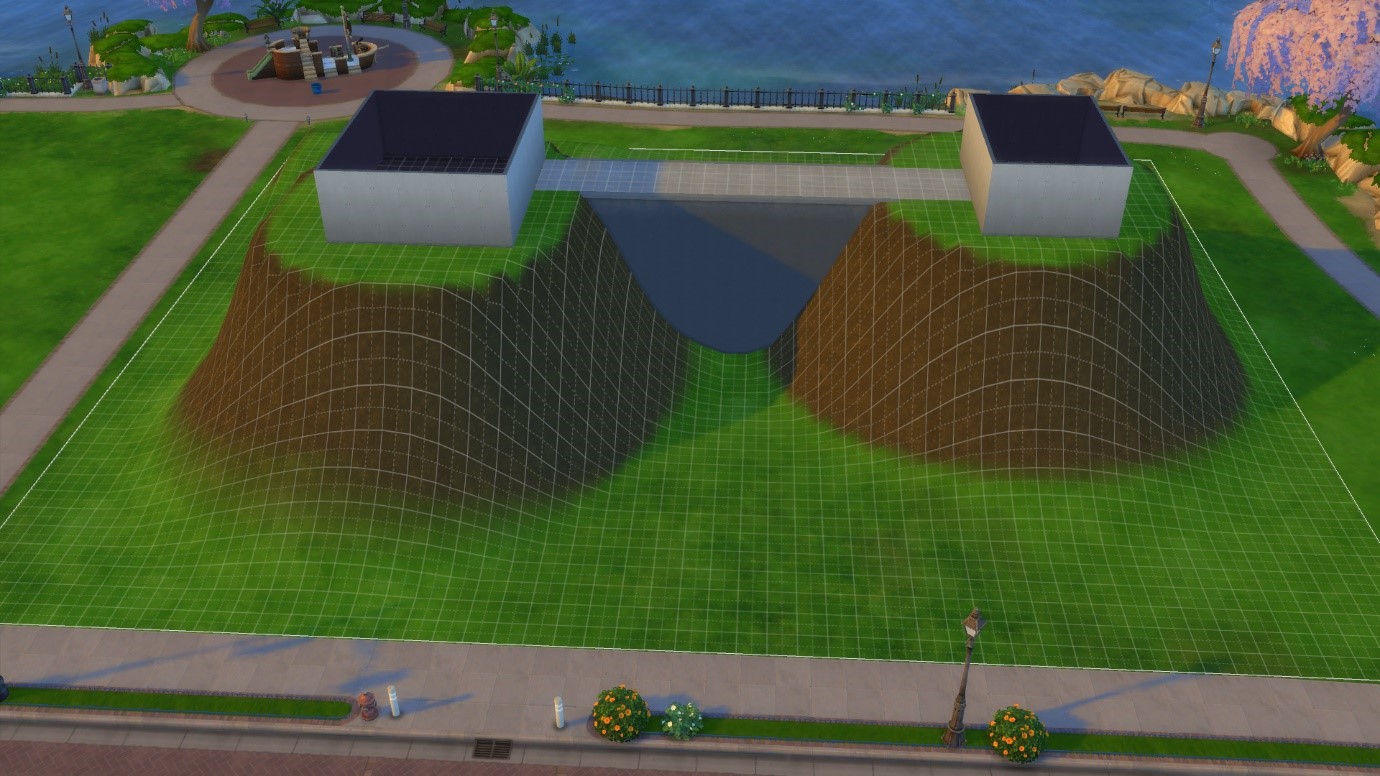
Instead, to build a bridge, you will need to build from a level above ground level. I used a piece of flooring, place it on top of one of the rooms, and dragged it across to meet the other.
Once this was completed, I used the terrain manipulation tools to make the terrain look more natural and realistic.

The same process can be used to create a floating deck.

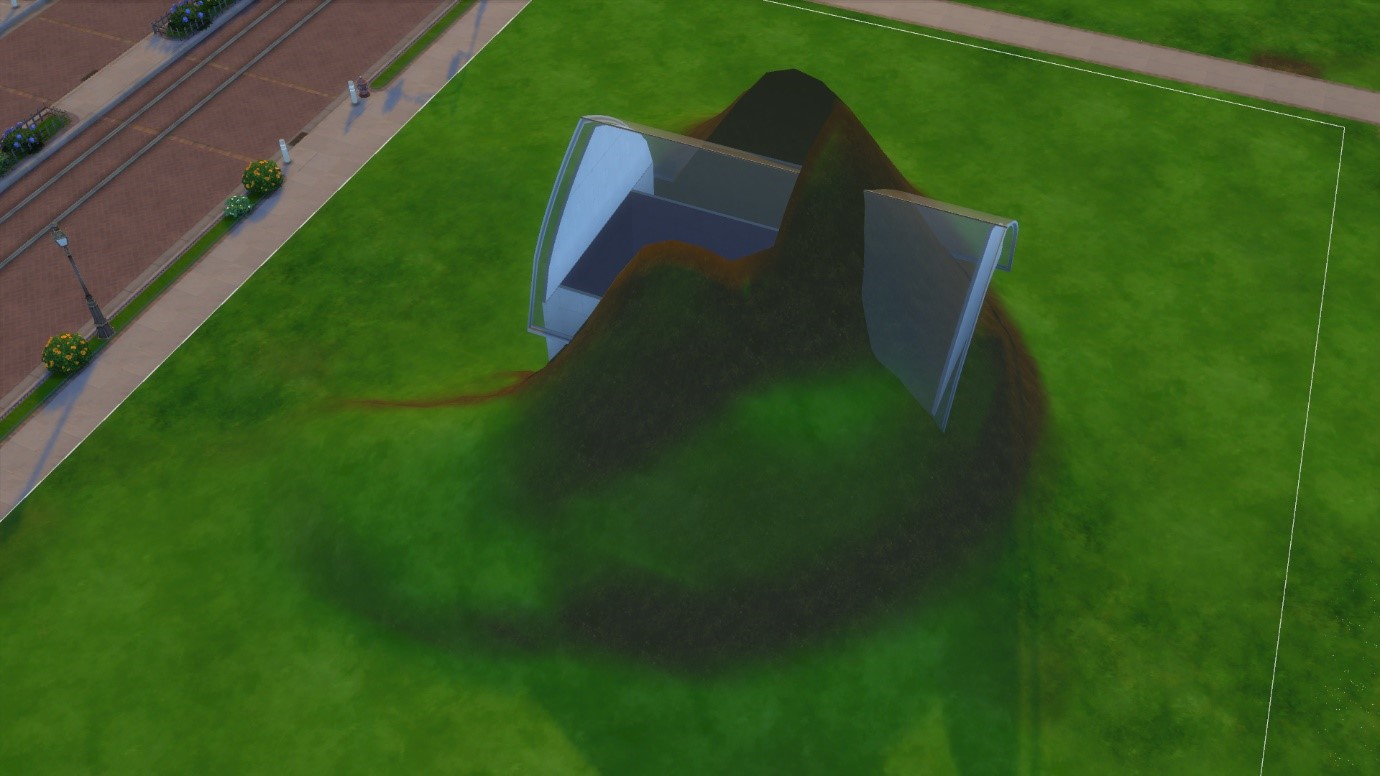
Basements and Terrain
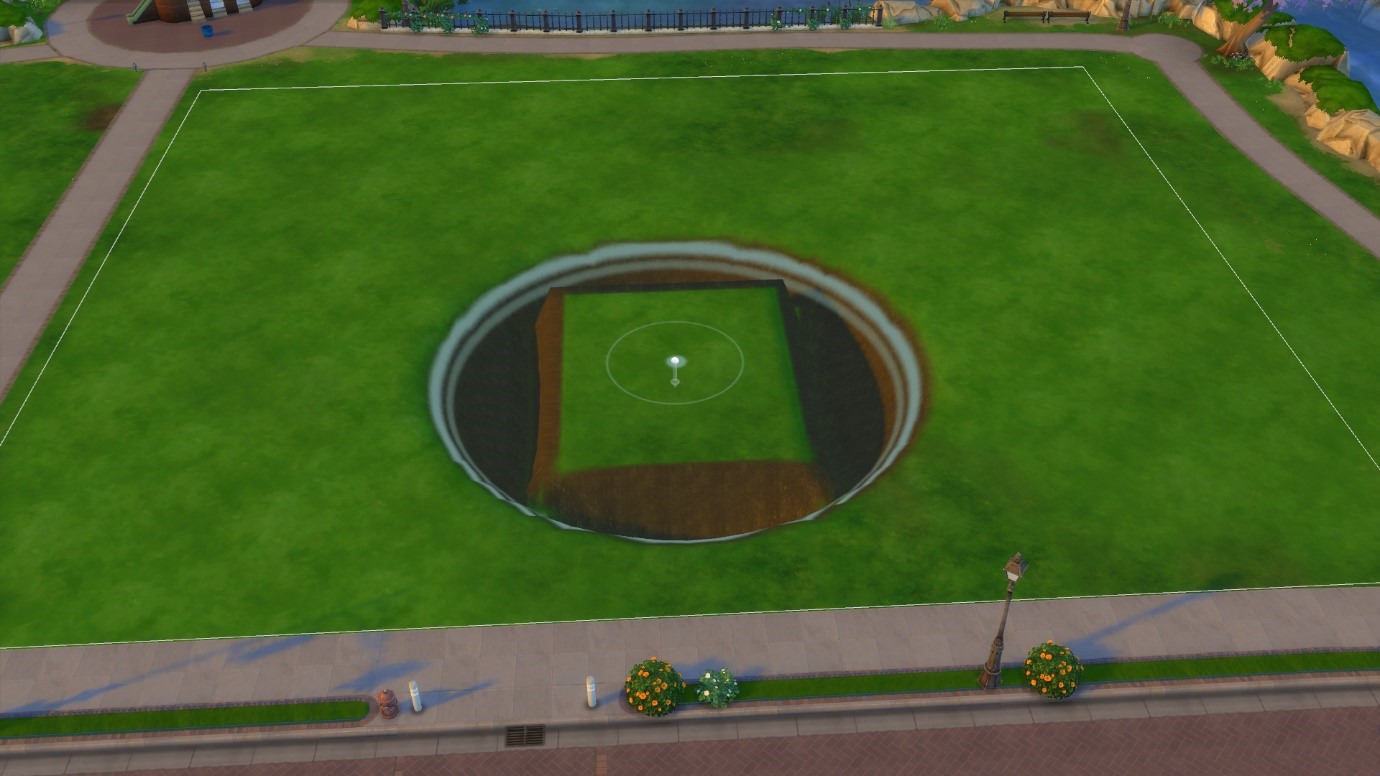
As of November 2018, it is now possible to create 4 basement levels in The Sims 4.
Basements can now be selected through the terrain, from ground level. To select your basement, all you will need to do is click on the area of the lot where the basement is located.
Basements in The Sims 4 will never emerge out of the terrain. They will always remain underground. This means that you will be unable to add windows and doors into a basement through the terrain. Sims cannot walk out of a basement.
It is (and has always been) possible to add windows and doors to exposed basement walls. Building 2 basement rooms next to one another and deleting the ceiling of one of the rooms will reveal the outer wall of the other basement room. Windows and doors can then be added to this basement. This technique cannot be combined with terrain manipulation tools, however. The terrain will simply work around the rooms rather than merge with them.
It is possible to raise terrain over the top of a basement. Doing this, however, may make it tricky to access the basement space. You may need to build a series of underground corridors or connect that basement space to a room that has access to the ground level.
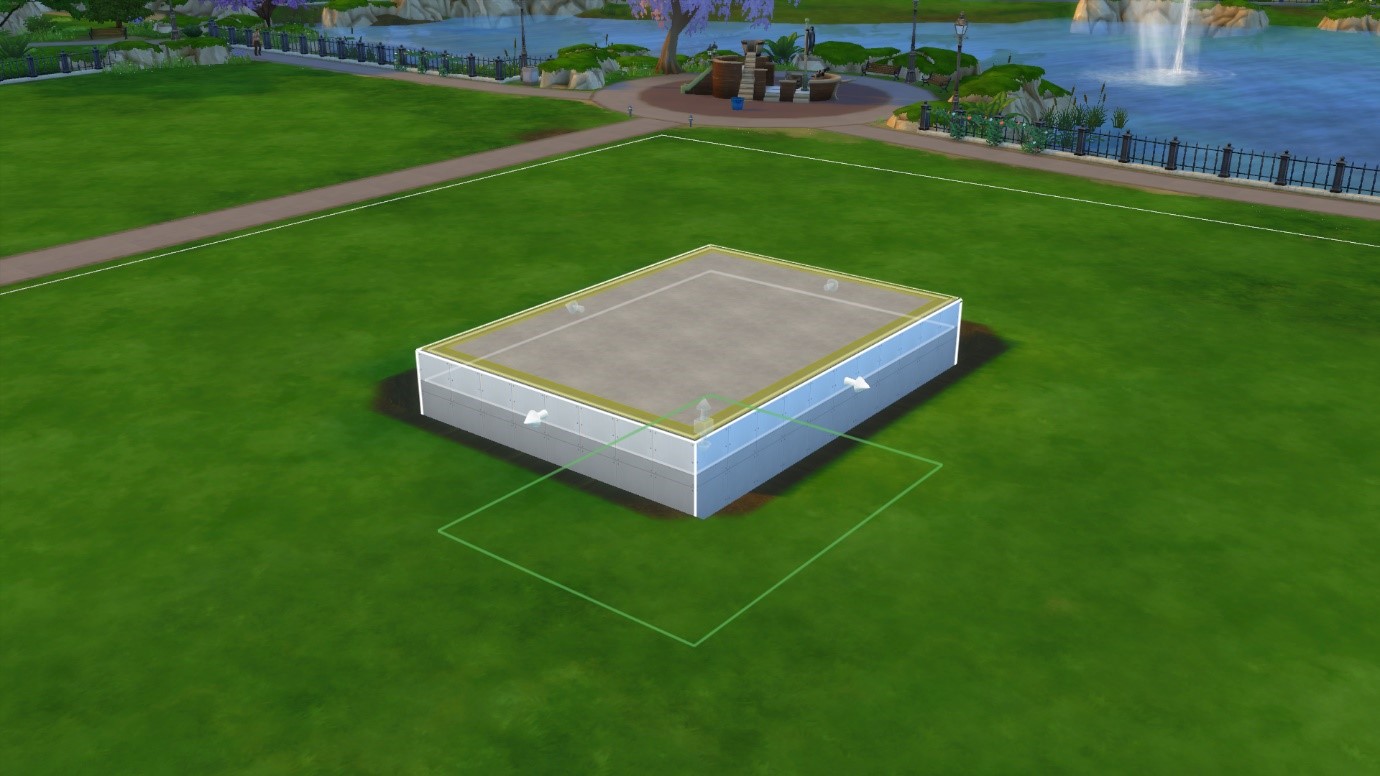
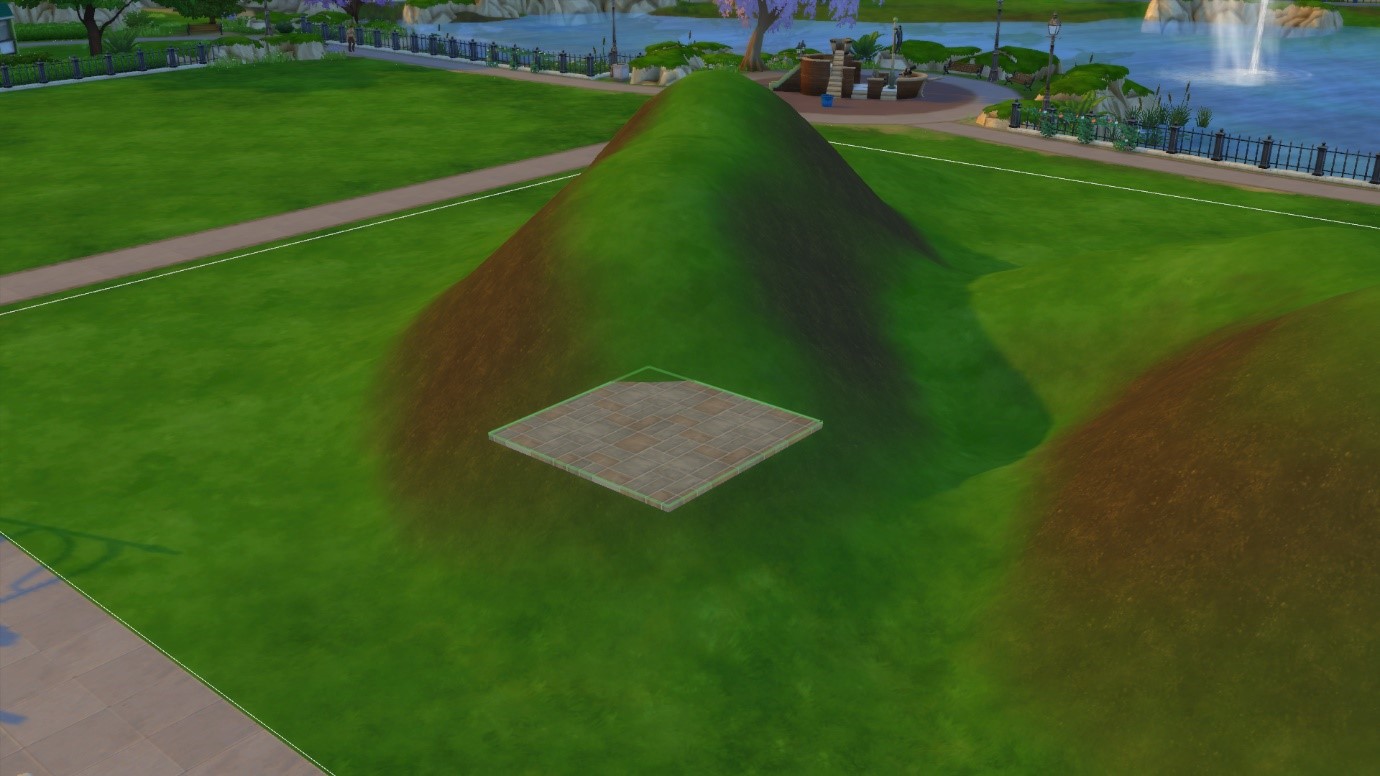
Pools and Fountains
Pools and fountains can be built on any flat surface on a lot, no matter how high or deep that flat surface is.
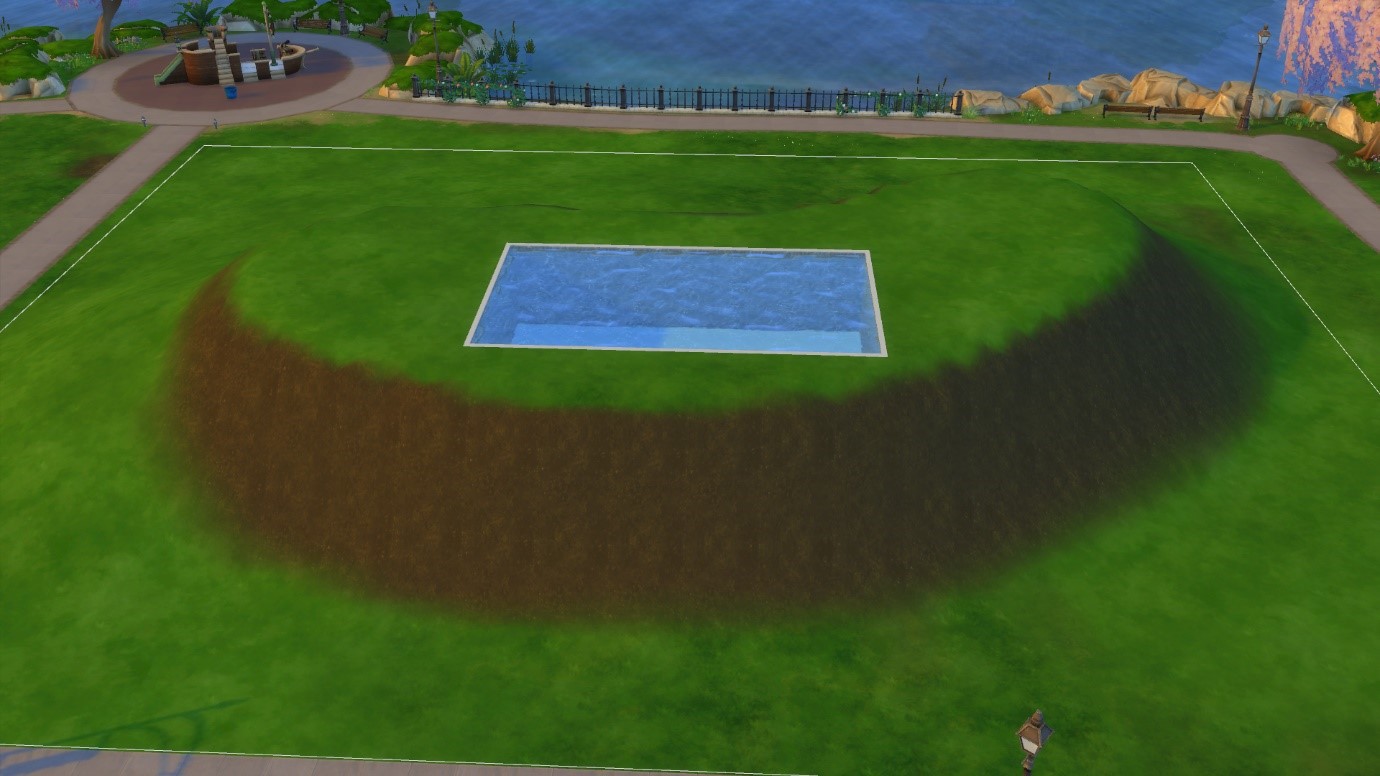
Pools function similarly to above ground rooms. If you place your pool before you raise the terrain, the terrain will shape itself around your structure.

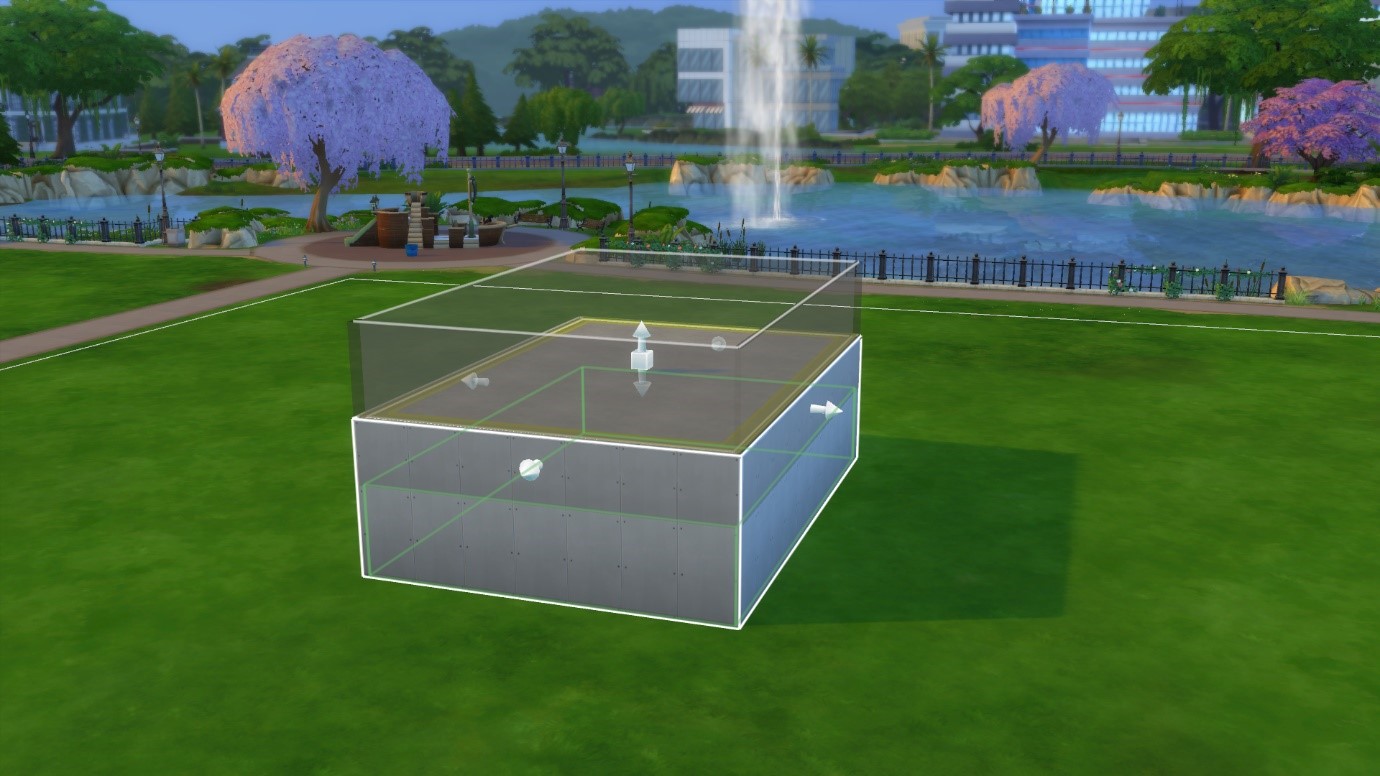
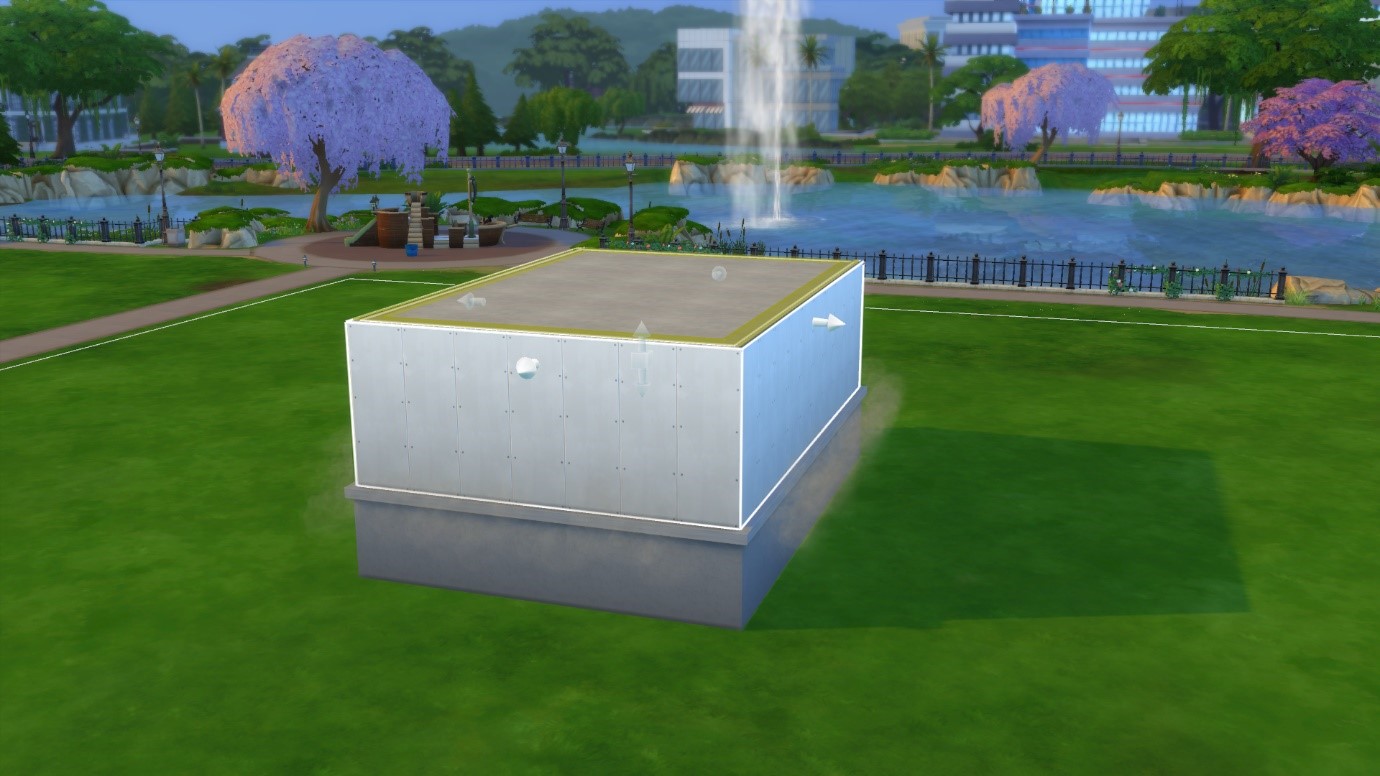
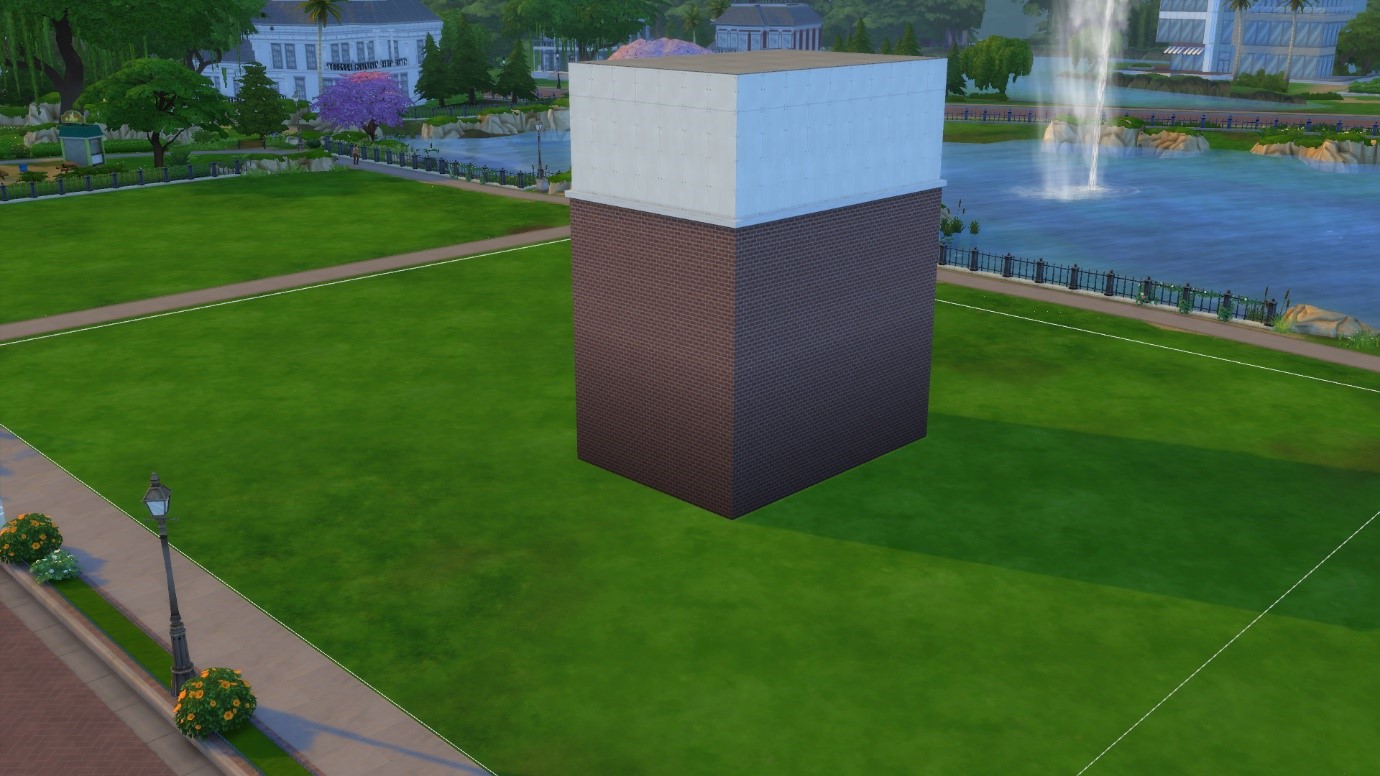
If you place your pool and then begin to lower the terrain, foundation will be revealed underneath your room or structure. You cannot place windows in this foundation.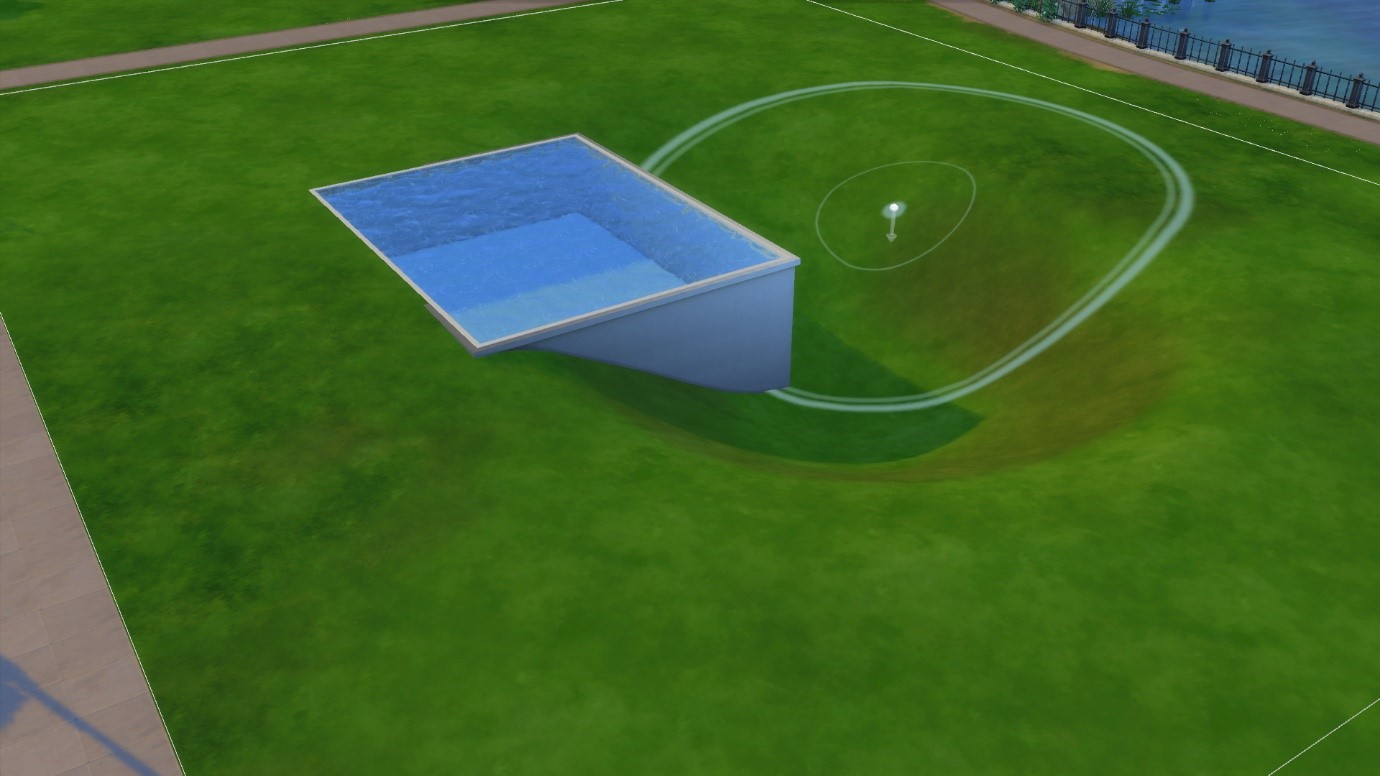
If you create your pool after you alter the terrain, the Game will automatically create a foundation underneath that room to better fit the structure into the environment. This is true for both lowered and raised terrain.
Fountains behave almost identically to pools. Instead of foundations appearing when you manipulate the terrain, however, you will see the lifted/lowered terrain texture. In the example below, I was building in Newcrest so the texture revealed is dirt-like.

Stairs
Stairs can be used to connect two pieces of terrain at different heights. When placing stairs, the interface will automatically look for the closest, flattest surface they can connect to. This means that you can very easily create huge staircases going from the lowest point on your lot to the highest.
Stairs will, automatically, completely flatten the grid square at the top of the staircase and at the bottom. This is to insure that the staircase is functional for Sims.
You cannot bring terrain over the top of stairs. It is possible, however, to embed a staircase in terrain. Simply raise the terrain in the area where you have placed the staircase.
Stairs can also connect terrain to a structure.
Stairs can now be used between structures of different heights and are able to cross multiple levels. Because the angle of staircases in The Sims 4 cannot alter, going from a very low point to a very high point on a lot will require a lot of space. If you don’t have this space, you won’t be able to place a staircase. Be prepared to have to change the shape or orientation of your rooms in order to place a staircase on your lot.
Once you have placed a staircase connecting two different structures, changing the height of the foundation of either of the structures will cause the staircase to auto-extend/contract.
When placing a staircase in The Sims 4, the staircase will, by default, ascend from the floor you are on to the floor above. Holding down the Ctrl Key when you have a staircase selected reverses this. The staircase will now descend to the floor below.
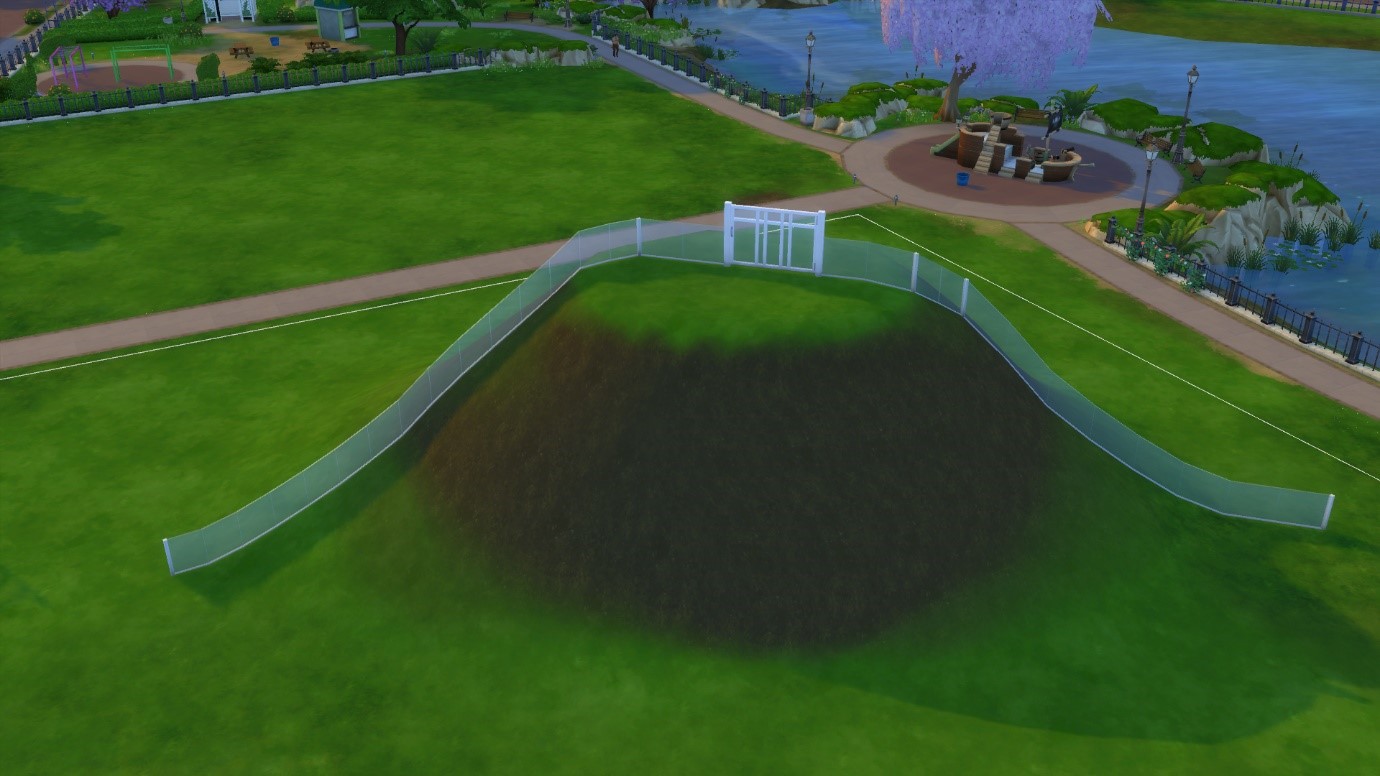
Fences
Fences interact with terrain in two different ways. If the first point you click when you begin to place a fence is on terrain, that fence will conform to the shape of the terrain it is placed on. These types of fences also automatically adjust to any changes in the terrain.

If the first point you click when placing a fence is a foundation or wall, the fence will stay fixed at one height and foundation will automatically form beneath it in order to maintain that height.

Gates must be placed on a flat surface. If you have a fence running across a hill, for instance, you will have to flatten part of that terrain in order to place a gate into that fence.
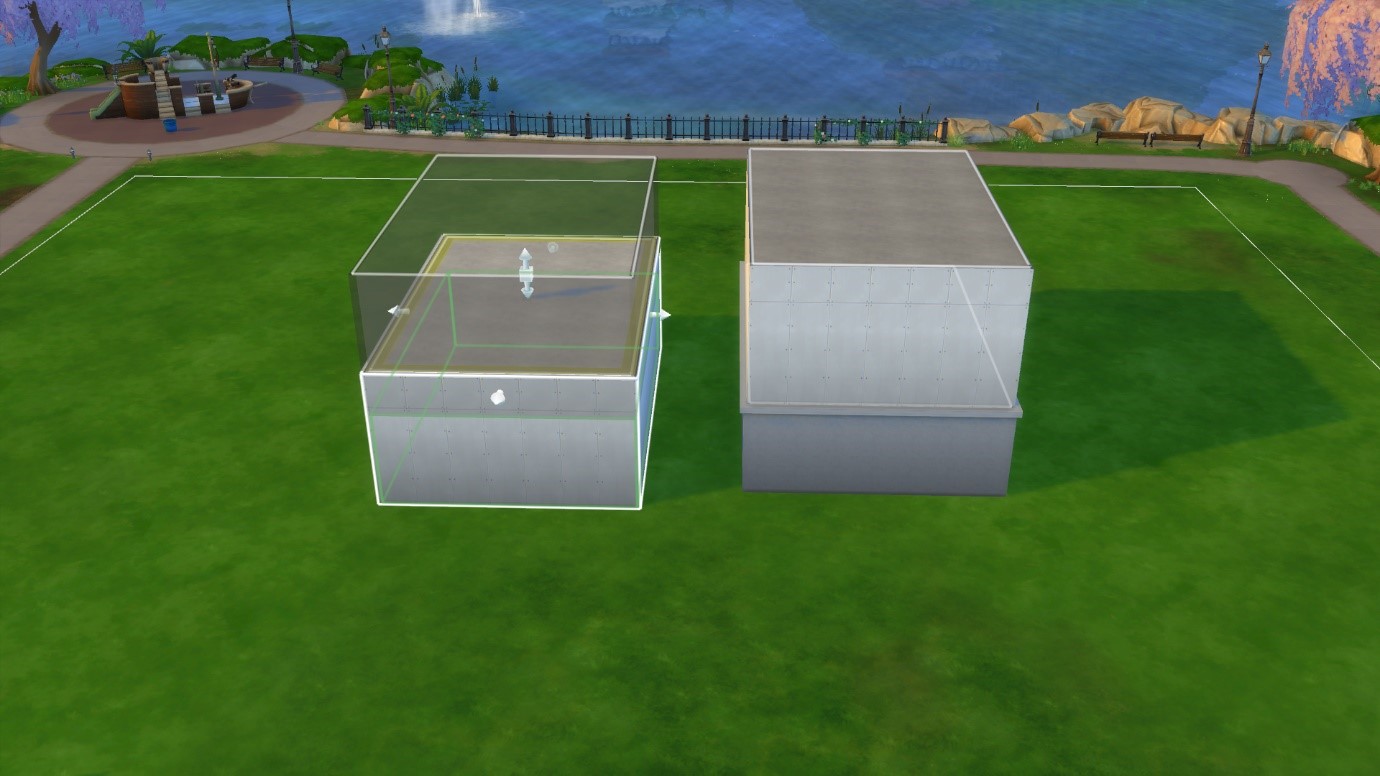
Roofs
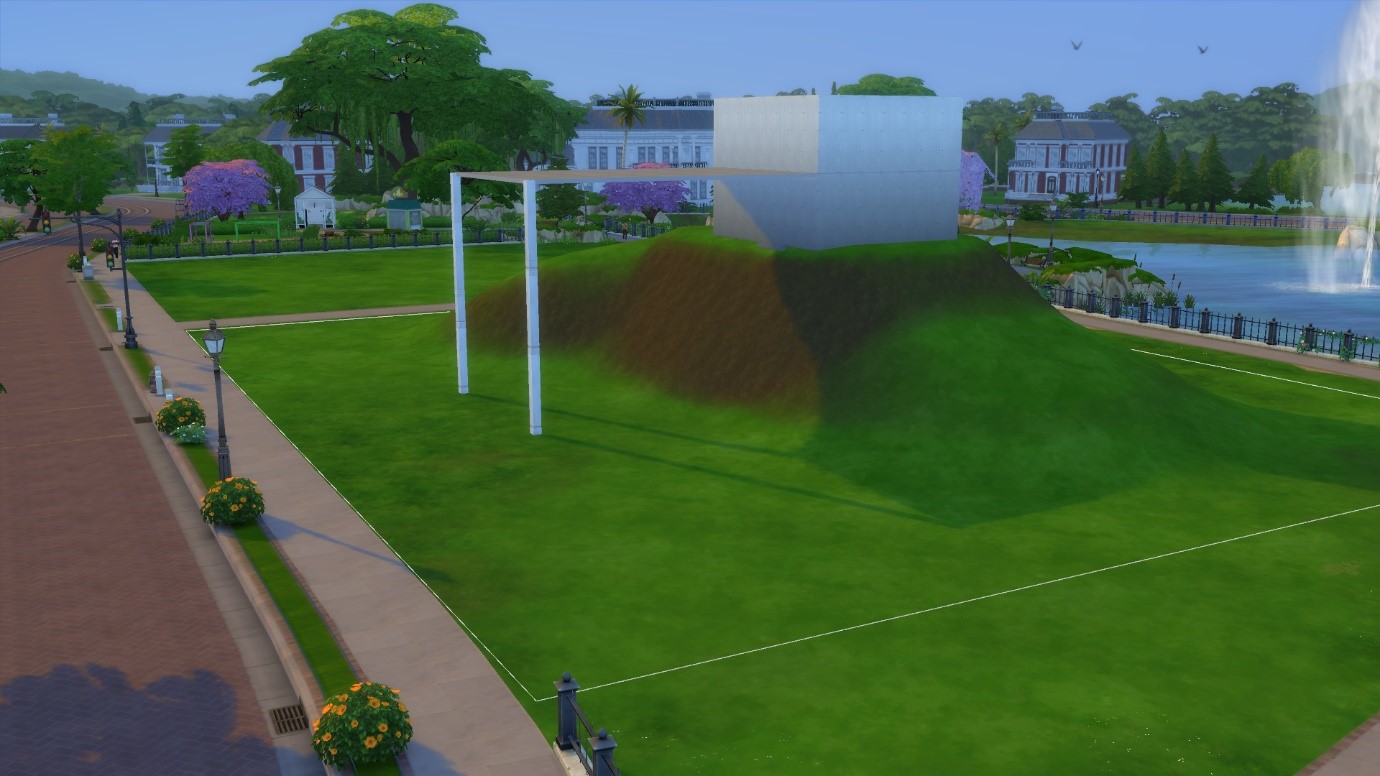
Unlike walls and rooms, roofs can merge into manipulated terrain. Roofs do not affect terrain and will disappear seamlessly into any uneven ground.
Roofs can be a good way of making your build fit better within its environment. The room in the image below is not actually merged with the terrain but the addition of a roof gives the impression that it is.

Floor Tiles
Placing floor tiles onto any uneven terrain will automatically flatten that terrain.
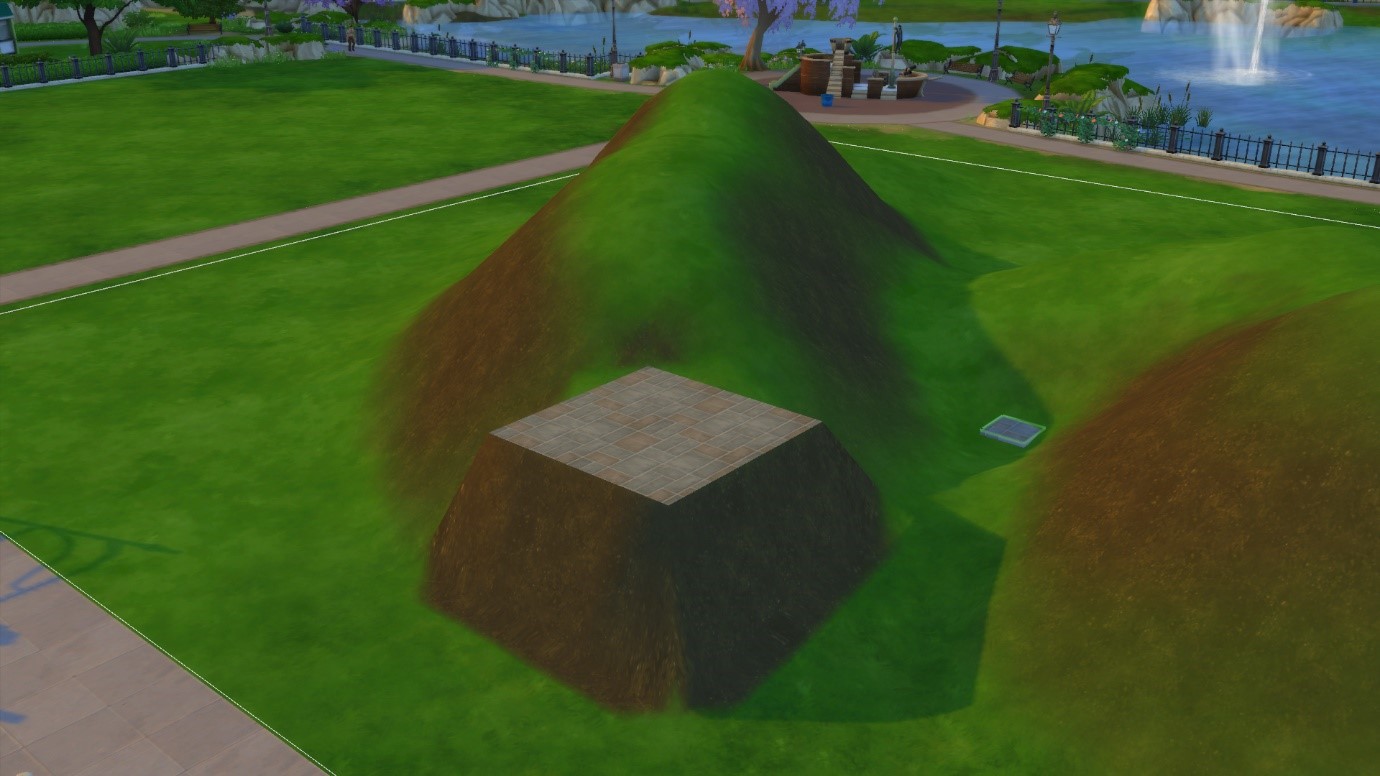
Because of this, floor tiles can be used to create a set of ‘stairs’. By placing floor tiles at small increments up/down a hill you can create a functioning set of stairs that allow your Sims to traverse ground they otherwise wouldn’t have been able to walk across.

Placing Objects
As a general rule, any object that a Sim interacts with must be placed on flat terrain. Objects that Sims do not interact with – plants, trees, decorative items etc. – can be placed on uneven ground.
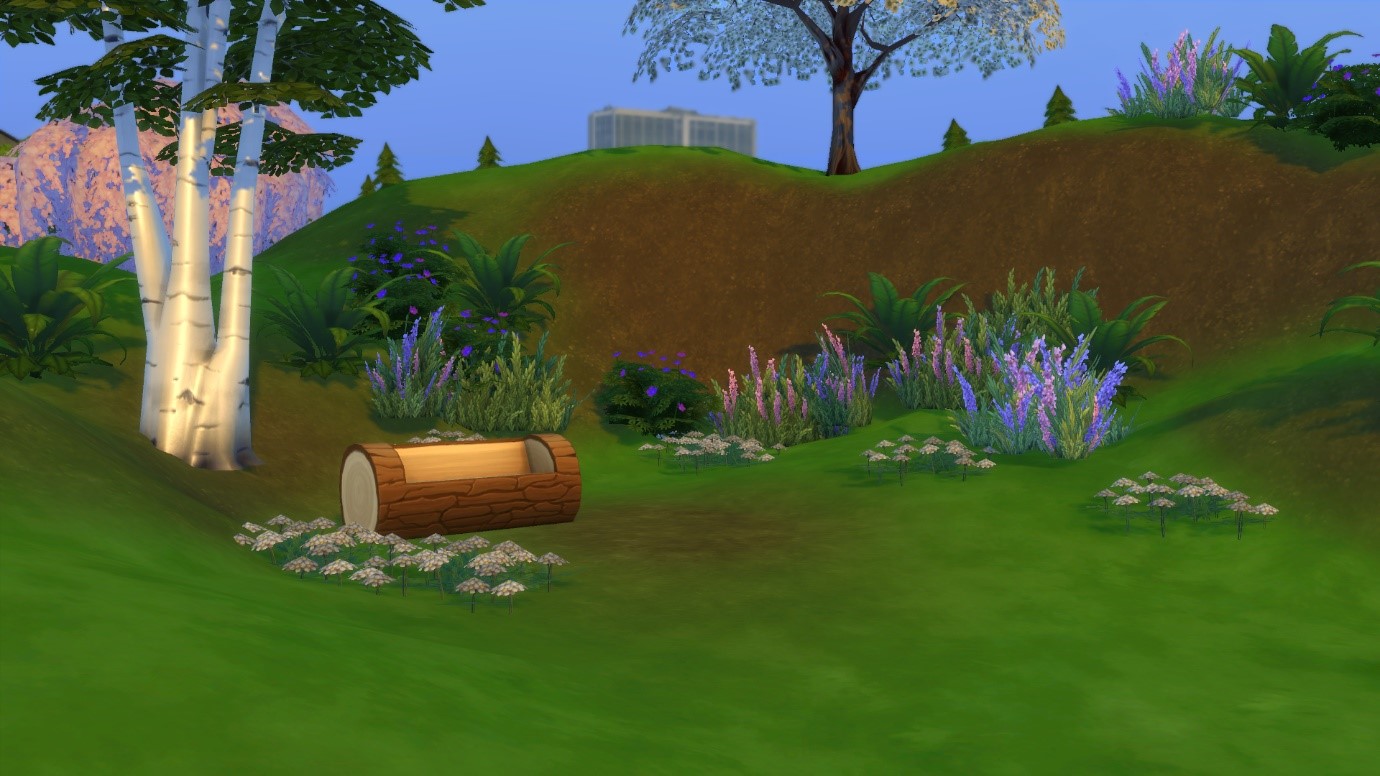
Although the Game will allow you to place non-interactive objects on uneven ground you should be wary of visual glitches. Objects won’t mould themselves to the terrain and so you may be left with floating objects.
While it is possible to place objects on uneven terrain, once that terrain reaches a certain steepness you will no longer be able to place any objects upon it.
Enabling MoveObjects will allow you to place objects across all terrain types, no matter how steep. With MoveObjects enabled you will also be able to place interactive objects on uneven/steep ground.
Pillars
Pillars will not automatically extend to fit the height of your buildings. Pillars are locked at one height.
In order to create the effect of super tall pillars you can use the 9 and 0 Keys to lift pillars upwards. Layering a few pillars on top of one another will create the effect of a single continuous pillar. You will need to have enabled MoveObjects to do this.


")


")