")

From murphy beds to multipurpose TV cabinets, The Sims 4 Tiny Living Stuff adds a fair few new Build Mode objects to play around with. Tiny Living Stuff isn’t all about the new furniture, however. Perhaps the most exciting thing about this Pack is that it’s brought with it three new lot types – Micro House, Tiny House, and Small House. Meet the requirements for these new tiny homes and your Sims will be able to reap all sorts of benefits…but just how does this Pack alter the way we go about making miniature homes for our space-saving Sims?
I have created three builds (one of each of the new lot types) to give you some inspiration and to share some tips and tricks for creating your own tiny builds using The Sims 4 Tiny Living Stuff.
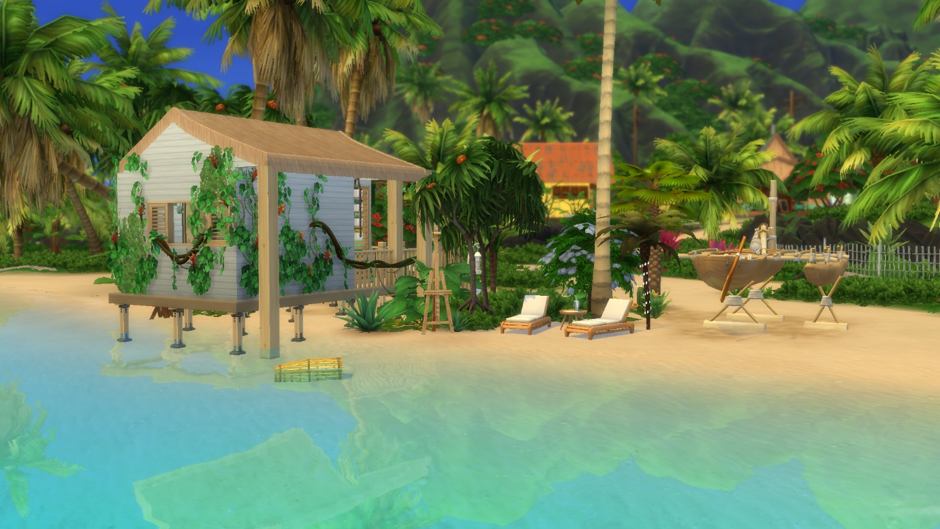
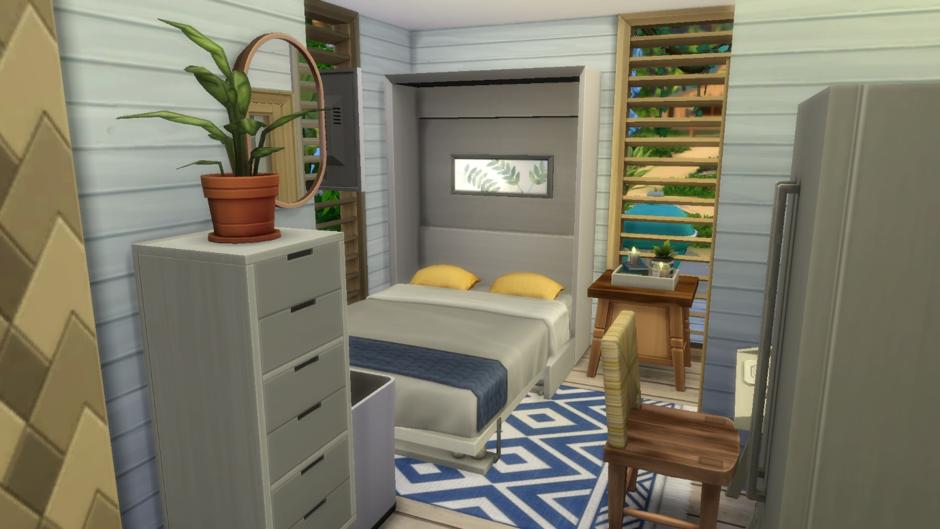
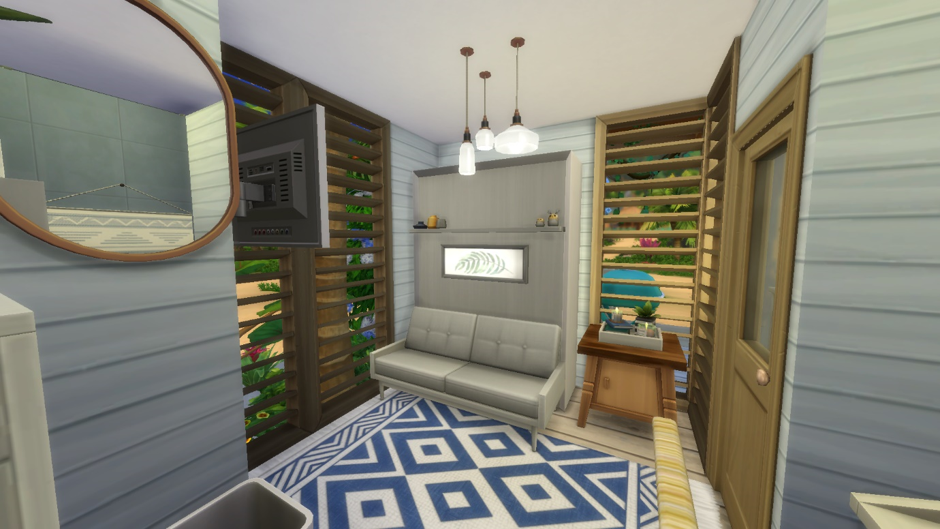
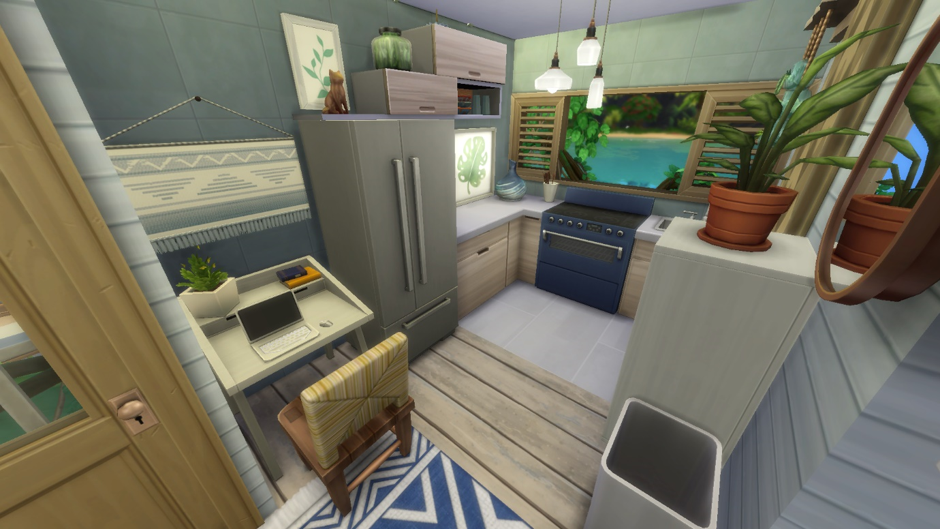
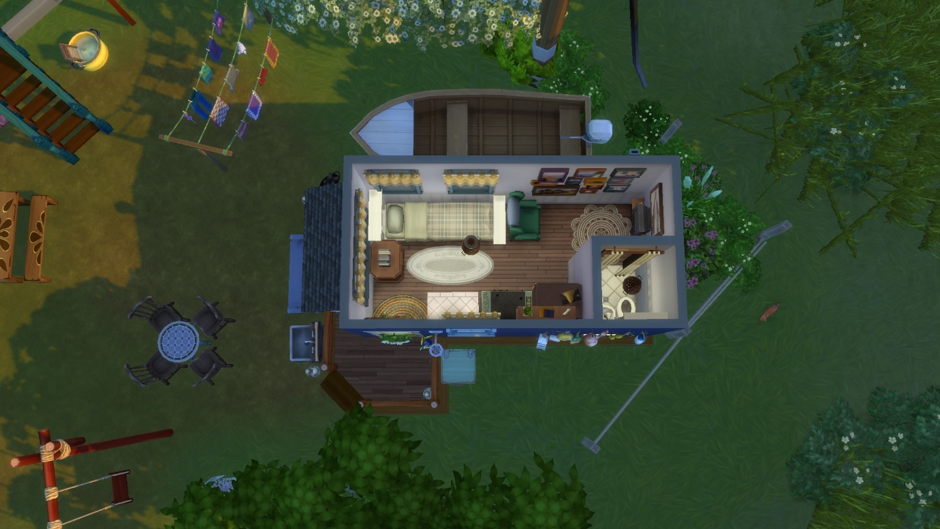
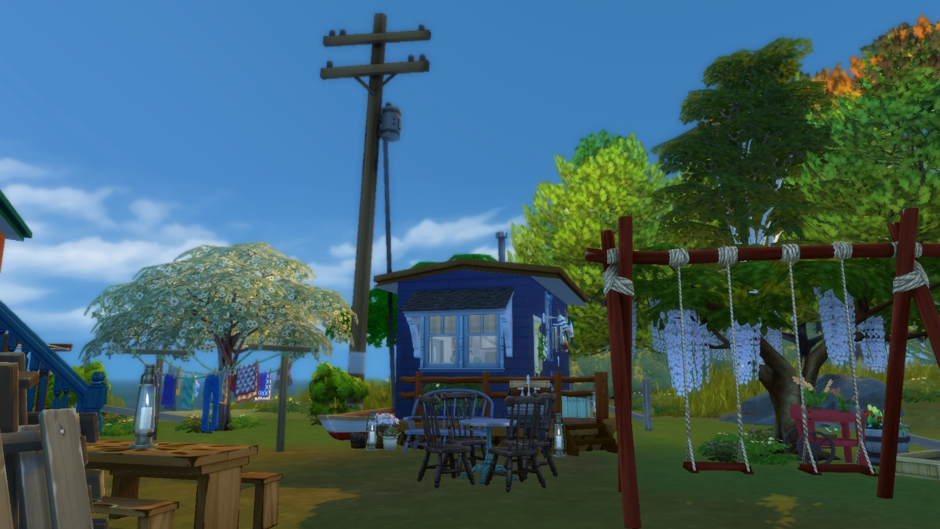
1Micro House (Sulani Beach Hut)

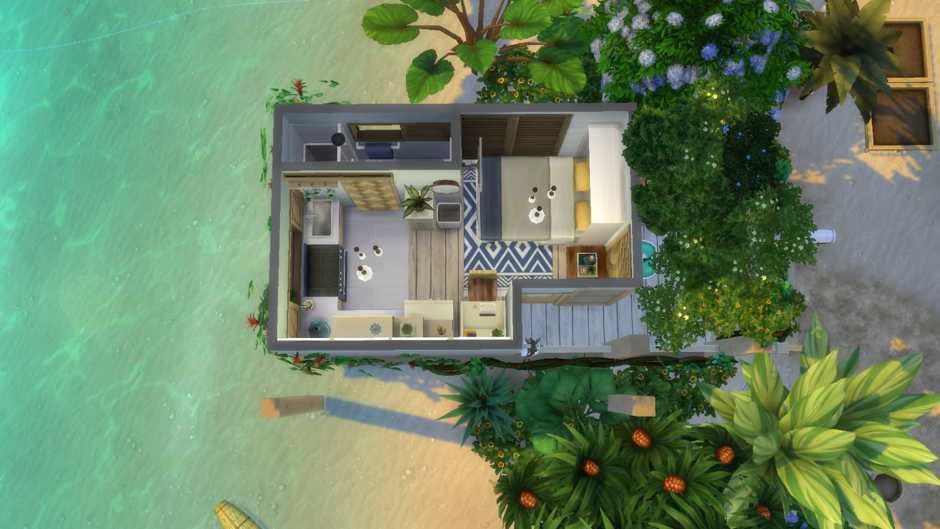
The Micro House is probably my favourite new lot type. These minuscule homes give you a whole host of gameplay perks (skill boosts, cheaper bills, and relationship benefits) but they also force you to challenge yourself when building. 32 tiles (the limit for this tier) doesn’t leave with a lot of space to take advantage of. I’ve really enjoyed testing myself and seeing just how much I can fit into a space this small!
The first thing to note when you’re building a tiny house of any size is that you’re going to need to have a tester Sim on your lot. Tiny builds often require you to squeeze objects into the smallest of spaces so it’s really helpful to have a Sim on hand to test out each item and make sure it’s functioning properly.
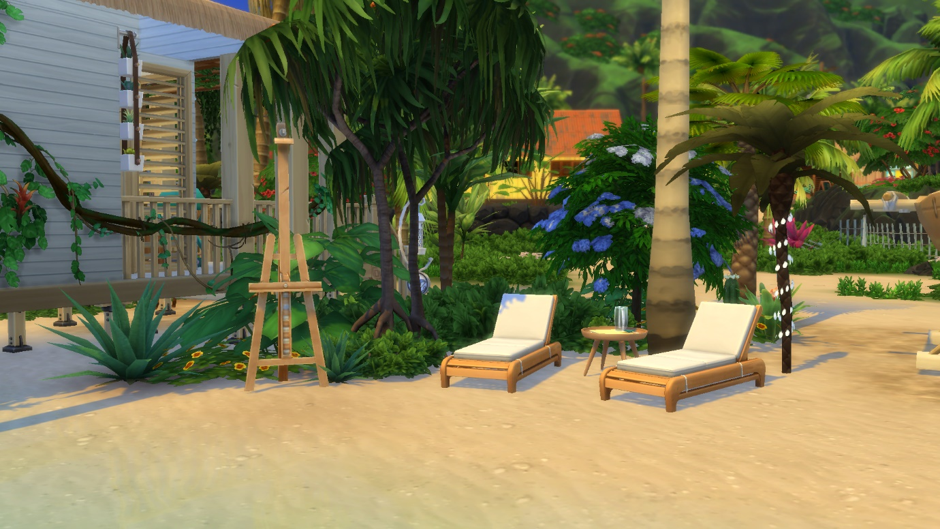
When I was deciding on the type of build I wanted to create to show off the Micro House tier, I immediately thought of a beach hut. Beach huts are traditionally extremely small and so I knew that I could create something stylish, realistic, and suitably tiny if I opted for this style!
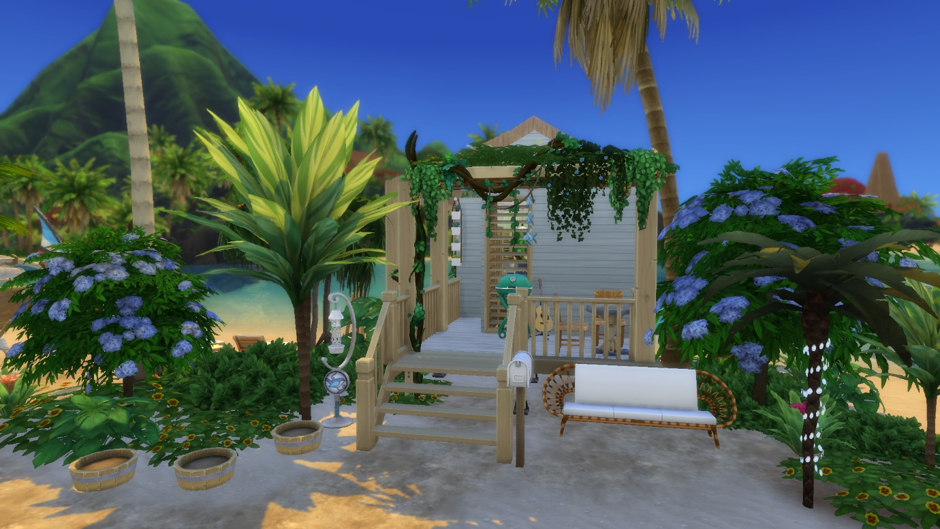
When you’re building a tiny house, it can be difficult to balance style with functionality. Although it would’ve given me much more space to play with if I hadn’t included a deck (foundation pieces count towards your tile count even if you don’t place any walls), this space adds to the overall aesthetic of the build and was definitely worth sacrificing a few tiles of indoor space for.
This deck isn’t all wasted space, however, I was able place a table and chairs and a guitar out on the porch!
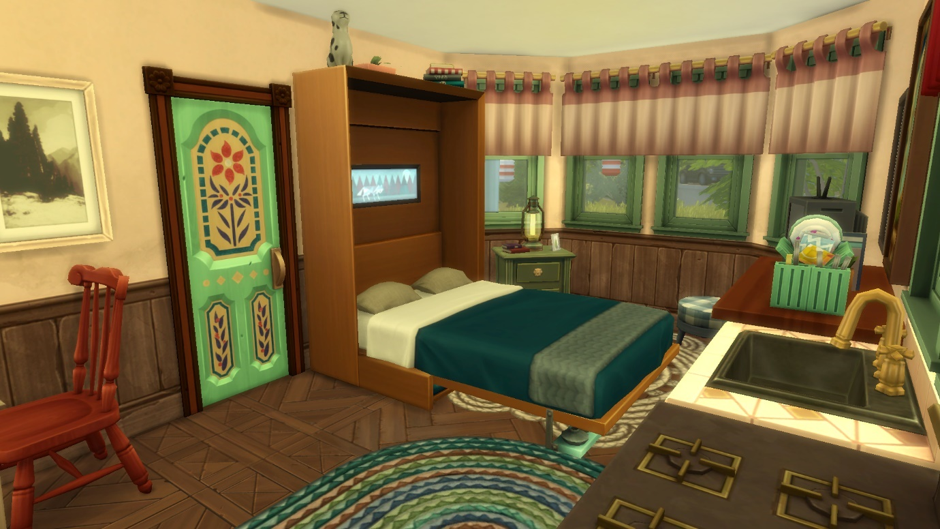
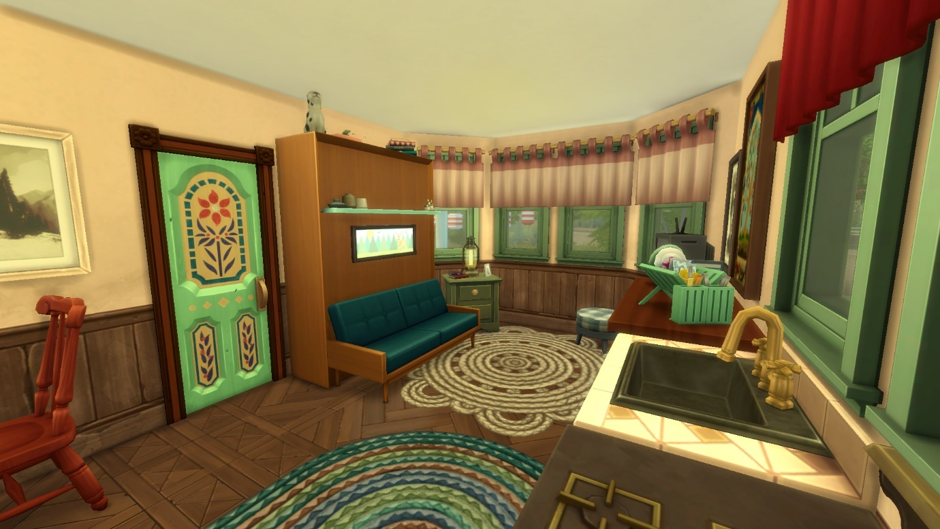
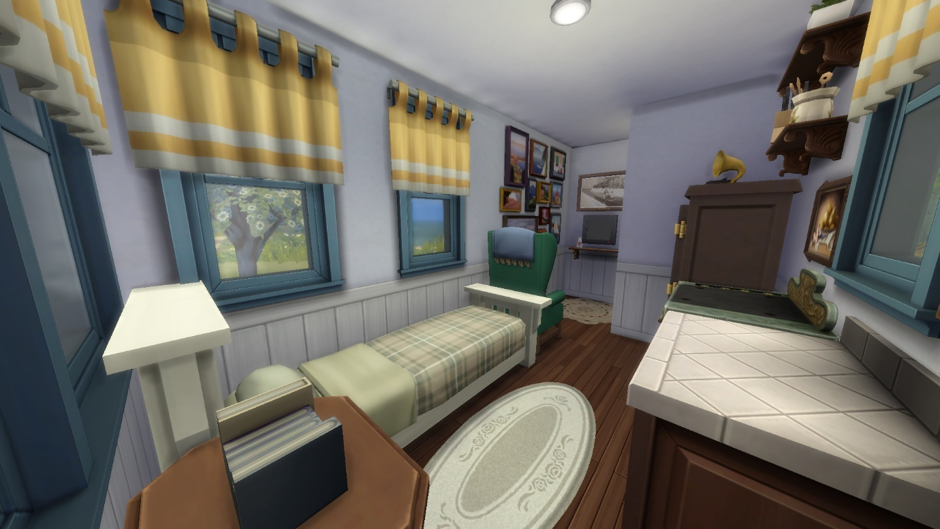
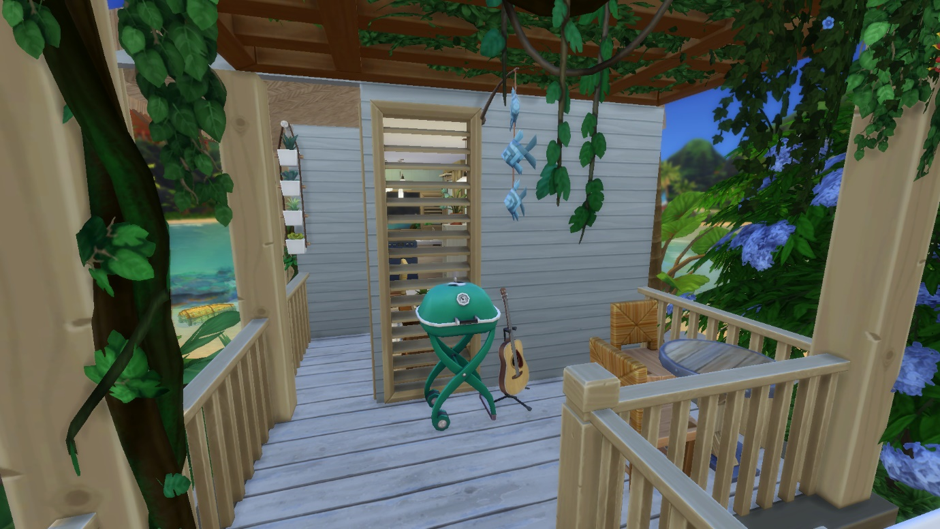 The addition of the murphy bed to the Game is definitely the biggest game-changer when it comes to building tiny houses. This object allows you to combine one space into two and fit a lot more into a smaller environment. Because I knew the murphy bed would take up a large portion of the house, I decided to base my colour scheme off of this object. Although the Tiny Living items are quite modern in style, I was able to keep to the island-theme of this build by using blues, greens, and wood tones.
Landscaping is key for any tiny house build. Because the build itself is only going to take up a fraction of the lot, it’s really important to find other ways to decorate the space. I had a lot of fun surrounding this beach hut with plants, trees and flowers!
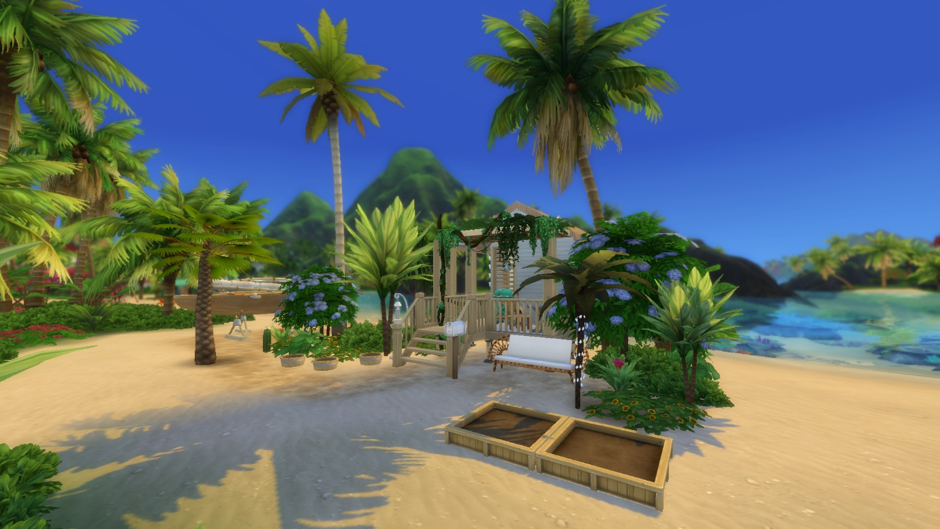 Outdoor spaces are also a great place to add in any objects you don’t have room for inside the house. I always find it really difficult to find room for skill-building objects in my tiny houses. Luckily, items like yoga mats, easels, and chess-boards all look perfectly at home in a outdoor environment.
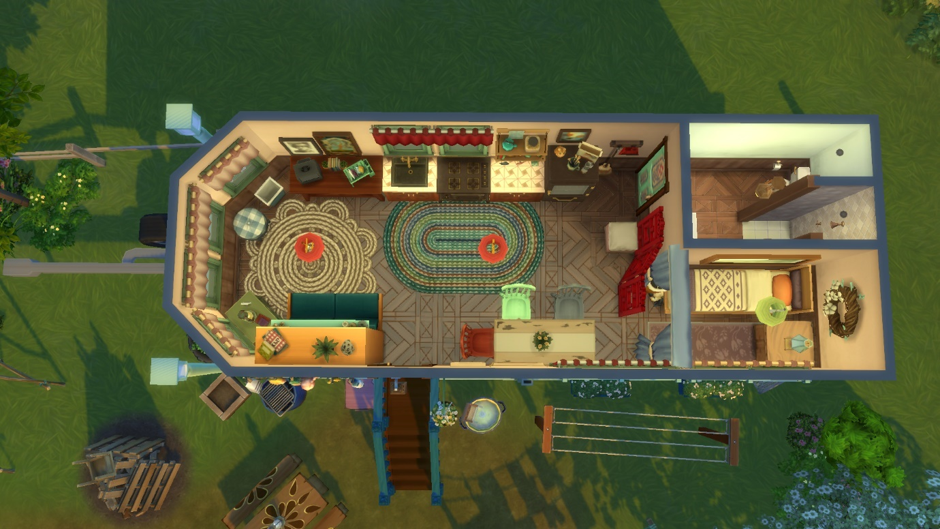
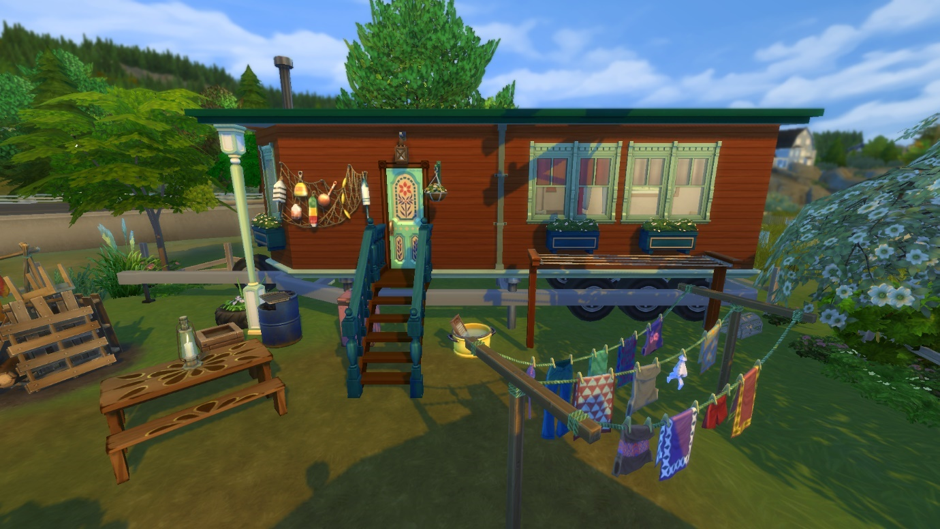
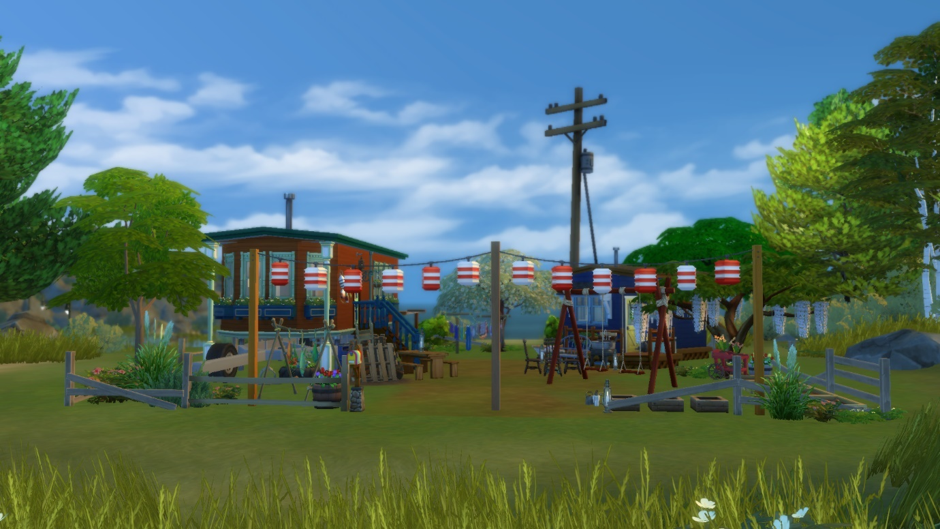
2Tiny House (Trailer Park)
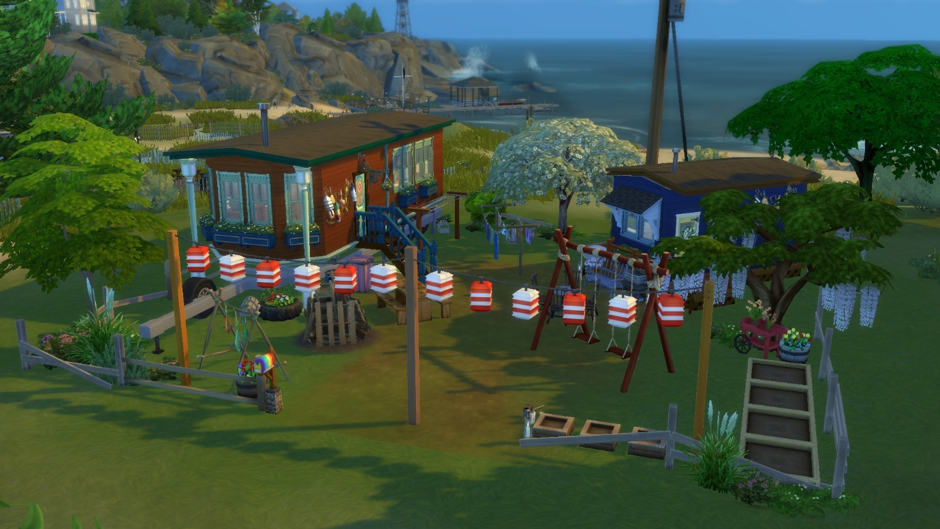
For this 64 tile build, I wanted to challenge myself and see if I could create two separate, fully-functional houses without going over the tile-limit. With this goal in mind, I decided to attempt a trailer park. I’m really happy with the way this lot turned out; I ended up creating one trailer for a single Sim and another for a family of three!
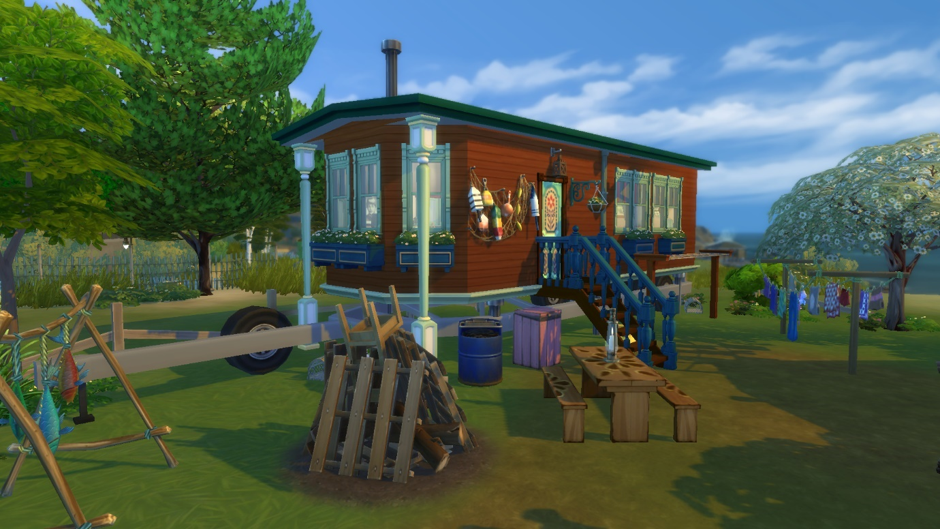
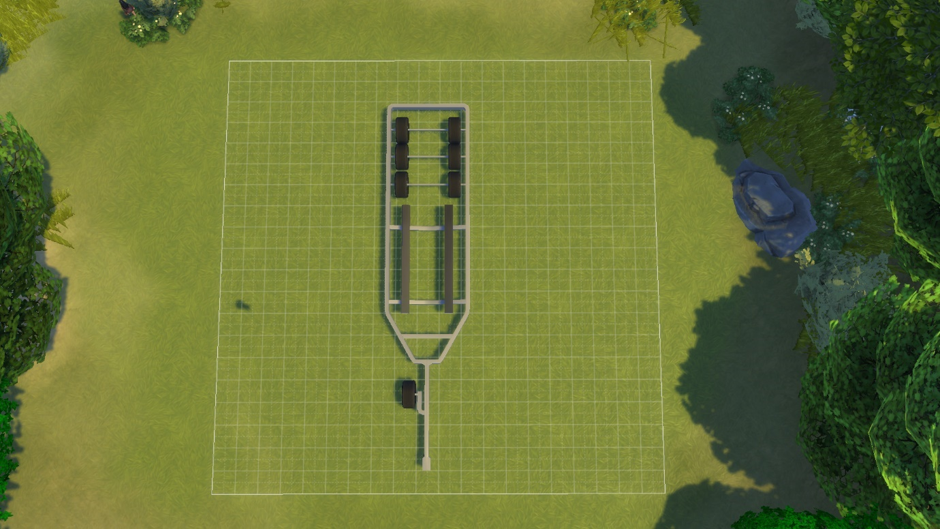
The three-Sim trailer is suspended above a trailer-base. I love using this item, it helps to make any trailer build look just that bit more realistic!
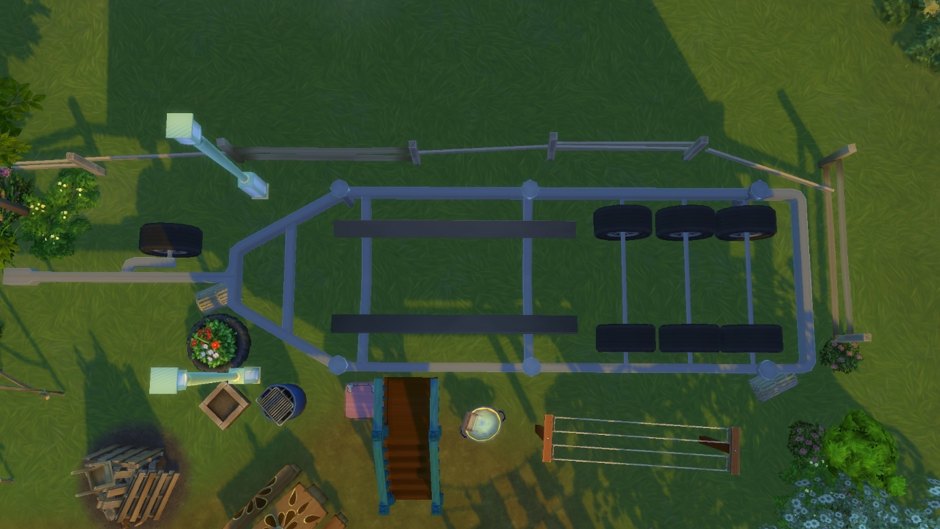
To create this effect you’re going to need to use a cheat. The trailer-base is a BuydeBug item and so you’ll need to open the cheat bar and type in bb.showliveeditobjects to unlock it.
Once you’ve placed the trailer-base on your lot, you can begin to build the trailer itself. In order for this to work, you cannot build the trailer on the ground level. Instead, you need to begin with a floating structure. Working with a floating structure means you’ll be able to lift the room up and down to any height you want without worrying about foundations. Use the top-down camera view (Press T) to build a room directly above the trailer base then, once the room is in position, use the widget that appears in the centre of a room when you select it to move the whole structure down and onto the base.
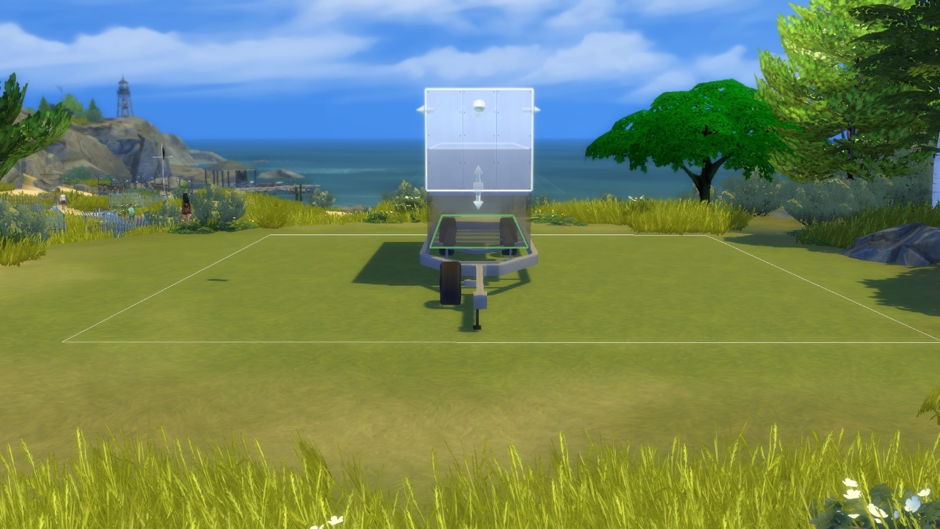
Make sure you don’t move the room too far down or the trailer-base will begin to clip through the floor!
For more information on using different room heights in the Game see our Terrain Tools Guide.
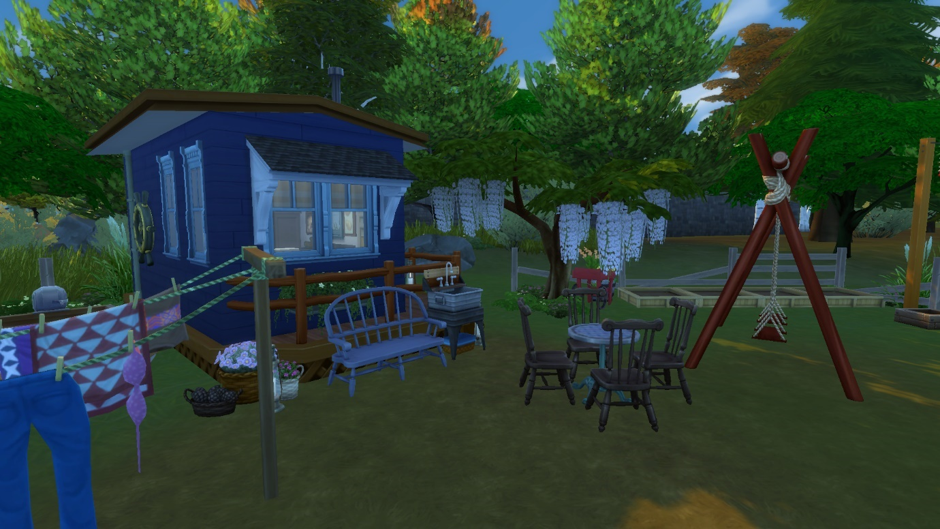
This build features the same murphy bed as the Micro House. Although only having one style of murphy bed can feel limiting, it is possible to use this object in a variety of different homes. By opting for one of the more colourful swatches, and surrounding the bed with bohemian-style items, I was able to make it feel like the murphy bed belonged in the space.
For the second trailer on this lot, I decided to build diagonally. If you’re building a tiny home in The Sims 4, a good thing to remember is that building a diagonal structure will provide you with slightly more space regardless of how many tiles you use.
Even with the extra space, this trailer was a challenge! I spent a long time playing around with the layout of this build until I found a design that worked. Tiny houses are always going to be a bit of a struggle but with some perseverance and a lot of experimentation, you will get there eventually!
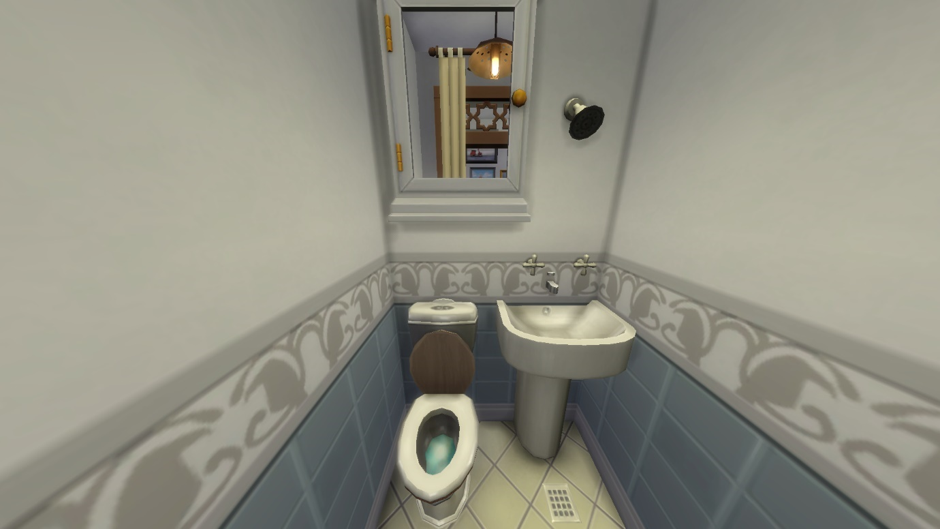
This build also features a single-tile bathroom. Youtuber and streamer Simarchy first came up with this technique and it’s an amazing space-saver. Unfortunately, as this bathroom utilises the wall panel shower, it’s only possible to create this effect if you have Discover University installed. To recreate this space you’ll need to enable MoveObjects. Once you’ve done this, use the Alt Key (which allows you to place items off-grid) to place the toilet towards the far left of the grid square, and the sink towards the far right. You’ll also need to use the Alt Key to merge the sink into the wall. You’ll notice in the screenshot below that the taps look as if they’re sticking through the wall – that’s the effect you need to aim for! Next, simply place the Discover University shower over the top of the sink. It’s crucial that you use your tester Sim to make sure everything works but I’ve found that as long as the shower drain is visible, your Sim should be able to use the shower without any issues!
Once again, I filled the remainder of this lot with plants, tress, and outdoor activities. I had fun creating some community spaces like an outdoor eating area and a small garden, and adding in BuydeBug items like a boat, an electricity pole, and some broken fences.
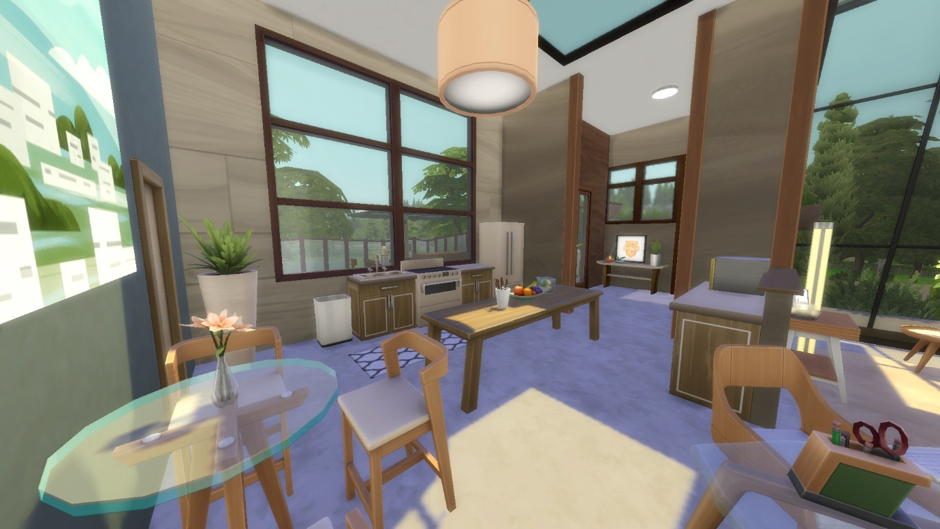
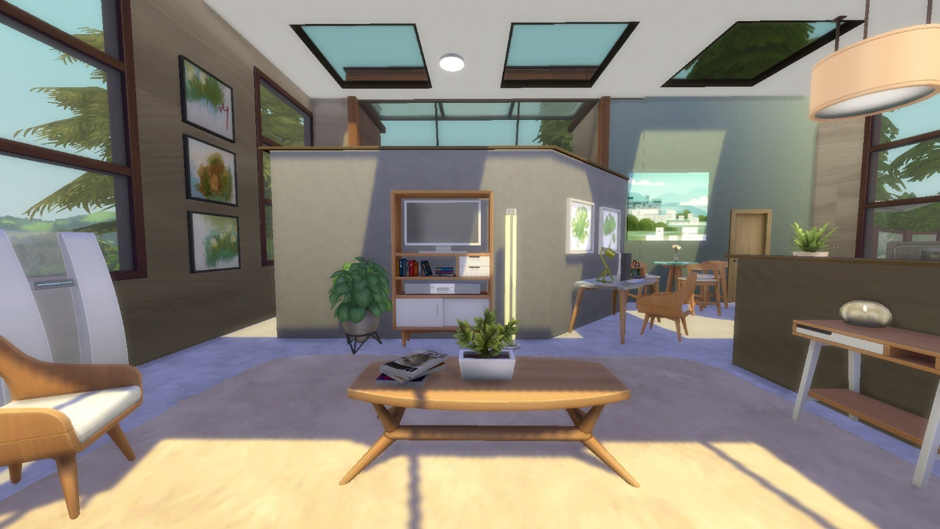
3Small House (Windenburg Contemporary)
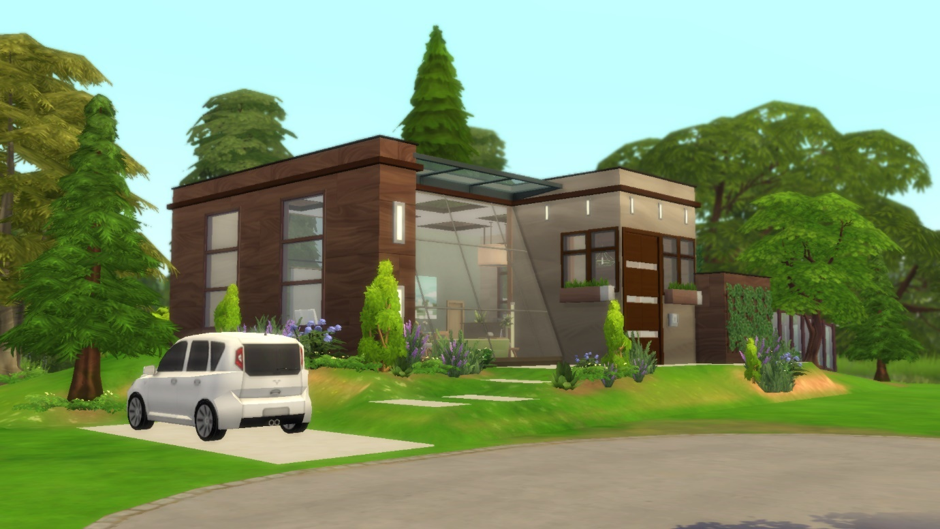
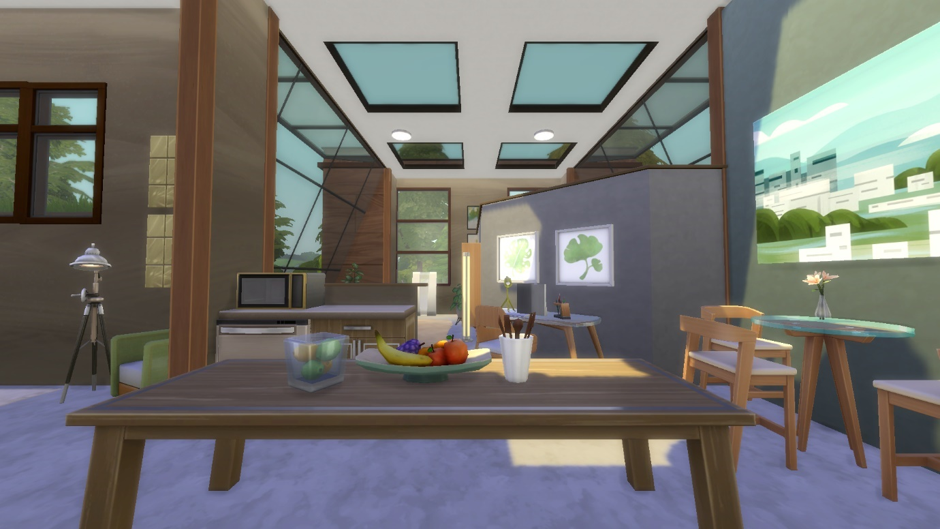
For this Small House build, I wanted to create something that fit with the modern-style of Tiny Living. I was inspired by the clean lines and bright colours of the Tiny Living items and jumped over to Windenburg to build a light and airy contemporary home.
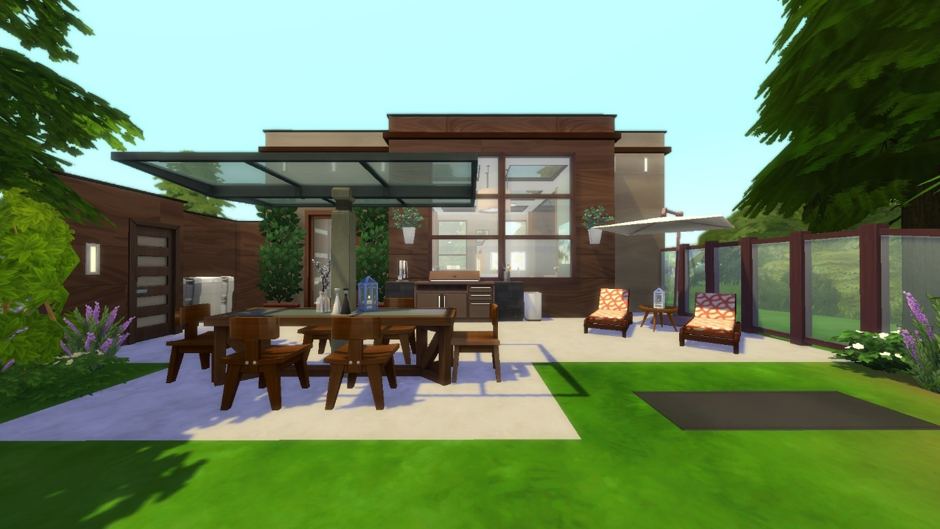
One of my favourite build mode tricks is to use glass roofs to create angled windows. It’s perfect for any contemporary home but is particularly useful when you’re building tiny houses.
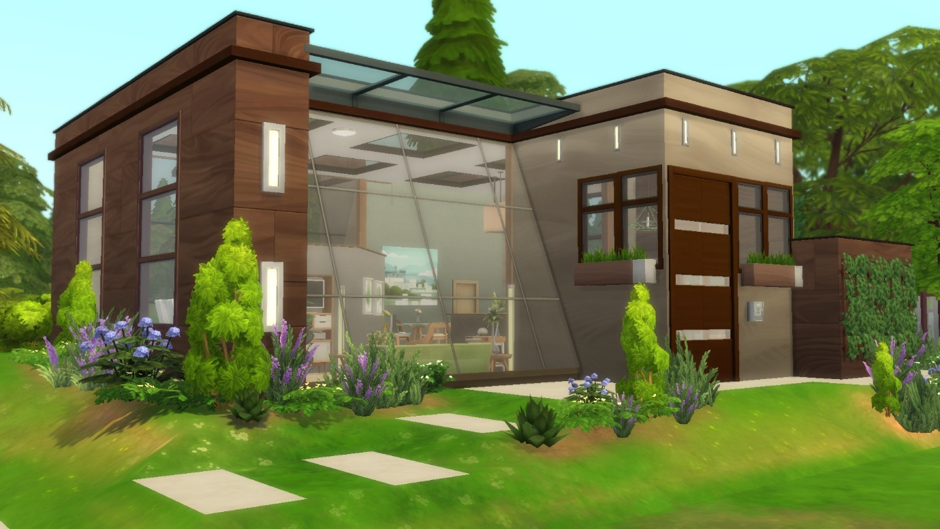
Using this technique is a great way to add some more square-footage to your builds without going over the tile limit. The space under these glass roofs adds another 16 tiles worth of space to this home but doesn’t add to the tile count at all.

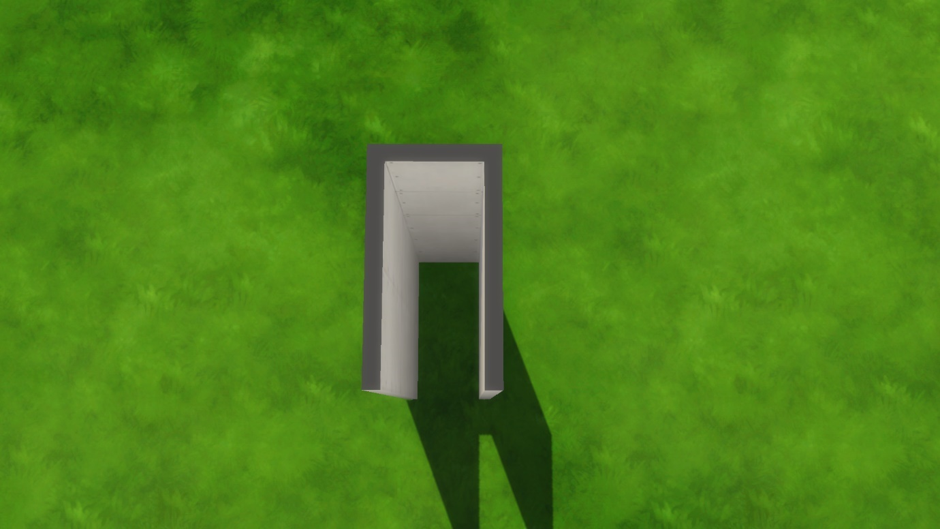
To create this effect you’re first going to want to build a 1×2 rectangular room. Once you have your room in place, delete one of the single grid square walls so you’re left with a U-shaped structure.
Next, grab out a half-gabled roof from the Build Mode catalogue, and use the arrows to make the roof small enough to fit perfectly within your U-shaped structure. Place the roof within the structure making sure that the tallest section of the roof sits flush with the opening.
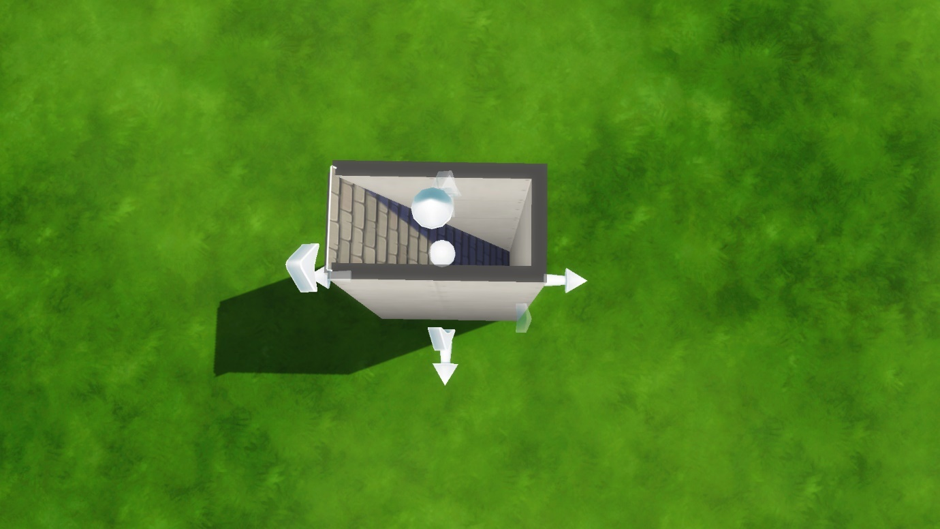
Next, whilst holding down the Shift Key (which allows you to alter the roof eaves individually), drag out either the left of right eave as much or as little as you want – this will form your window.
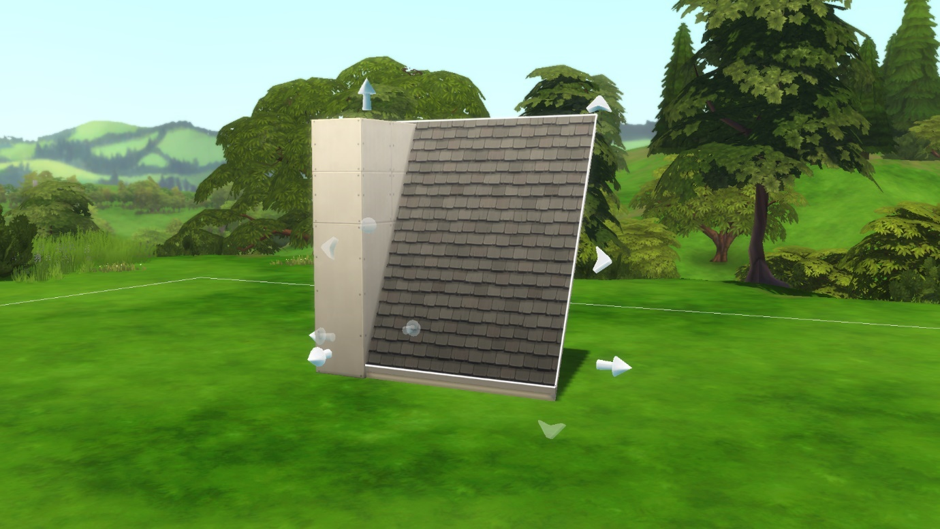
After you’ve completed this step, all you need to do is change the roof tiles to a glass roof of your choosing and you’ll have an angled glass window ready to build around!
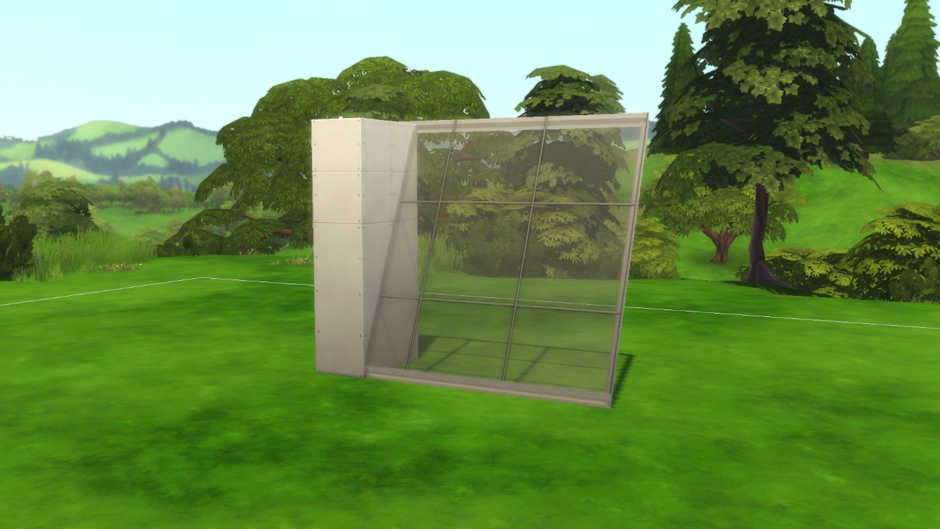
Although using roofs in this way does mean that the Game will think that the interior of your home is outside, you don’t need to worry about your Sims getting too cold during the winter months. The Game does recognise this space as sheltered despite the outdoor lighting. Once your Sims enter this space any weather-related buffs will vanish.
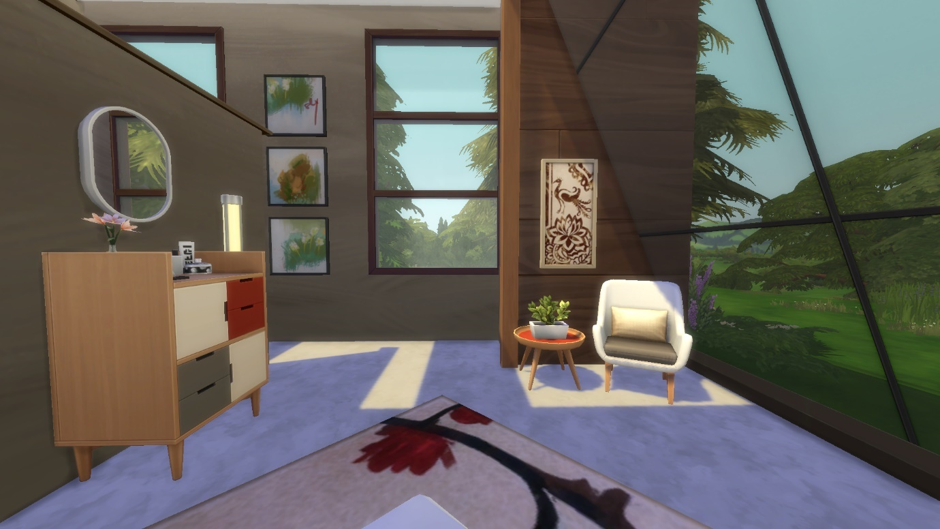
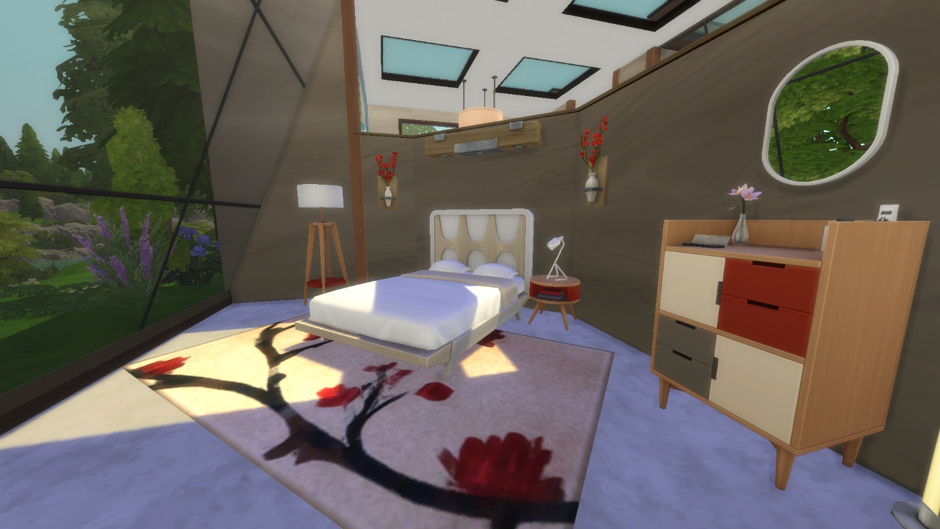
Deciding on the floorplan of this home was a bit of a struggle. The unusual shape of this build meant I couldn’t easily divide the space into clear areas. I eventually decided to keep the central section of this room relatively open and use a half-wall to separate the living room from the bedroom.

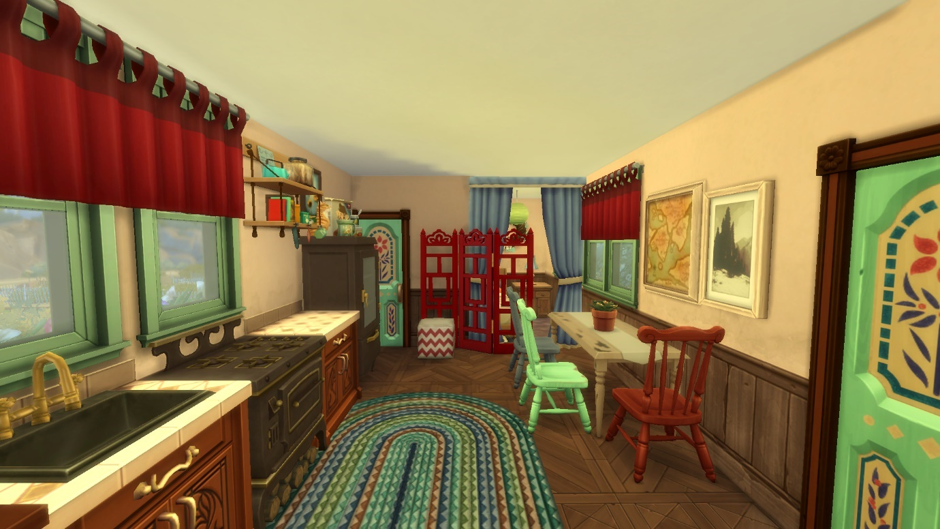
I was pleased to find that a lot of the swatches that come with Tiny Living Stuff match nicely with those already in Game. I was able to match the new table and chairs to the Cool Kitchen Stuff counters, and create a coordinated bedroom using the Tiny Living armchair, side-tables, lamp, and dresser, and a bed from Get Famous.
Hopefully this has given you some inspiration and guidance for building tiny houses in The Sims 4! Happy Building!
Click Here to Download the Sulani Beach Hut!
Click Here to Download the Trailer Park!
Click Here to Download the Windenburg Contemporary!


")


")