")
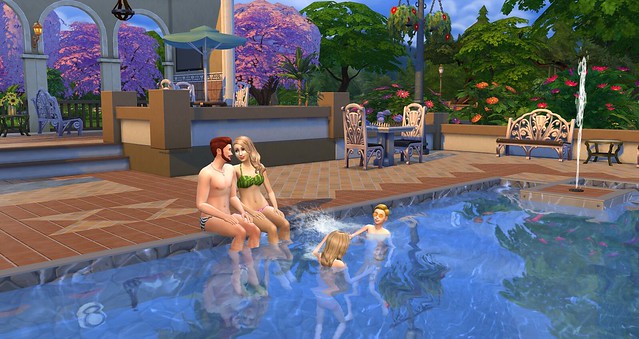
Pools are a new interactive addition to The Sims 4. This guide covers everything you need to know about pools, gameplay, drowning to death, and building your very own pool. To ensure our readers are only met with the most comprehensive pool building guide, we’ve brought on Ruthless_kk to put it all together for you.
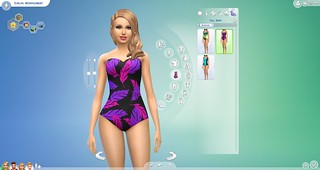
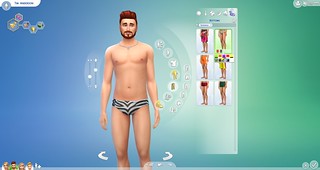
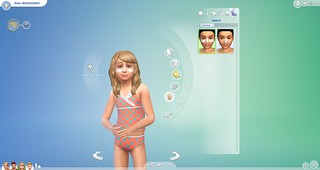
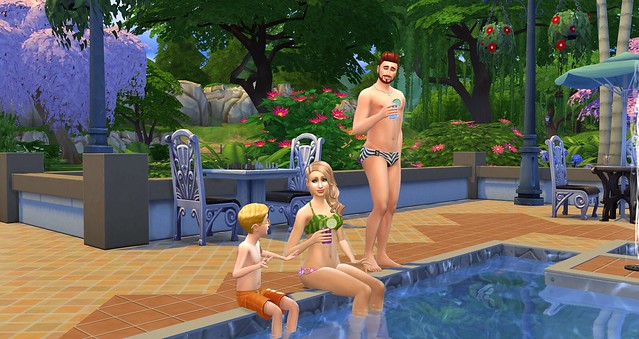
Create-a-Sim
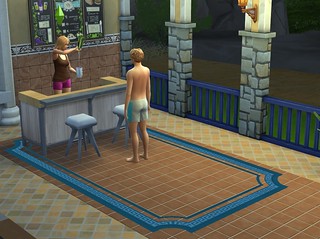
Swimwear Outfit Tab/Filter – There is a dedicated category for swimwear that filters out clothing that works best as swimwear.
No Clothing Restrictions – You are not restricted to swimwear only. Select any type of clothing for your Sims to wear at the pool by removing the Swimwear filter.
Styled Looks – Swimwear has also received its very own Styled Looks for each age group. Styled Looks allow you to quickly and easily add an outfit to your Sims.
Face Paint: Sunscreen Lines – There are two new face paint accessories available for Sims of all ages.
Swimsuit Count – There are brand new clothing options available for Sims of all ages. The teen/adult female bikinis are interchangeable.
- Female Adults – 3 Full Body Swimsuits, 3 Bikini Tops, 3 Bikini Bottoms
- Female Children – 2 Full Body Swimsuits
- Male Adults – 2 Pairs of Swim Shorts, 1 Speedo, 1 Necklace
- Male Children – 3 Pairs of Swim Shorts

Click here for The FULL Sims 4 Building Guide
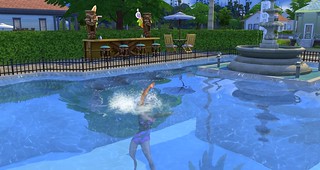
Swimming in a Pool
• Start Swimming! – Sims can use the “Swim Here” or “Swim Laps” option to enter any pool. Sims are able to get into the pool using a pool ladder, or by jumping directly into the pool from above.
• Group Discussions: Social interactions in the pool are similar to those outside the pool. Sims who swim together have many of the available interactions enabled while in the pool, and this allows groups of Sims to engage in discussions. Multitasking, however, is not available while swimming.
• Splash: The “Splash” interaction is available between two Sims in the pool, or between swimming Sims and Sims sitting on the edge of a pool. Be alert! Other Sims will splash back!
• Sit on the Edge: Direct Sims to sit poolside by clicking the edge of a pool. This interaction allows Sims to sit with their legs in the pool, all while using many of the already available social and multitasking interactions.
• Skill Building – Adult and Child Sims can use the “Coach Swimming” and “Learn to Swim” interactions while in the pool. Teens and Adults will increase their Fitness Skill when swimming, and Children will increase their Motor Skill.
• Pee in the Pool – When a Sim’s bladder is low enough to make them uncomfortable, a new self-interaction is available called “Pee in Pool”. This allows a Sim to empty their bladder in the pool while swimming. The water beneath them becomes cloudy, and they receive the “Secretly Relieved” moodlet.
Emotional Interactions – Sims who enter certain emotional states will unlock special emotional swim interactions. The following 4 emotional swim styles are available in game:
- Swim Sadly
- Swim Angry Laps
- Swim Energized Laps
- Swim Around Playfully
Death by Drowning
If you do not attend to your swimming Sim’s decaying needs, they will slowly become uncomfortable and fatigued. If left neglected, a Sim will become “Exhausted”, which only leaves you will a few short hours to tend to their needs. If you don’t tend to their needs, Sims will drown in the pool and die.
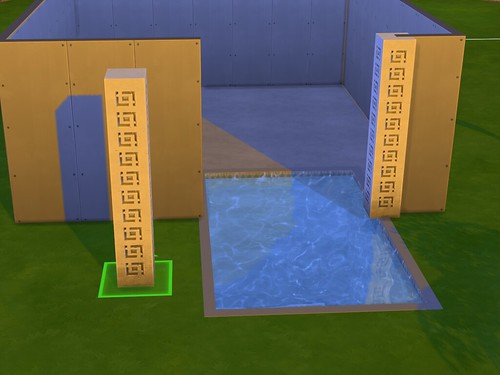
NOTE: Due to the fact that Sims are self-sufficient survivalists, the only easy way to ensure they drown in the pool, is to enclose the pool with a wall or fence. This prevents a Sim from exiting the pool.
The ghost of a drowned Sim has the same interactions as all other ghosts, but also leaves behind puddles of water when walking around. Additionally, these ghosts become tense and uncomfortable when interacting with water. Learn more about death and ghosts in our Sims 4 Ghosts Guide.
Building Pools in The Sims 4
The Sims 4 Pool Building Guide has been written exclusively for SimsVIP.com by Ruthless_kk. All images and text for the pool building guide below are property of SimsVIP. Unauthorized use of the guide or its images will result in legal action.

The latest update brings us a very long awaited object: Pools! The pools in The Sims 4 offer many new ways to use and place them, allowing you to be more creative than ever. Hopefully, this guide gives you everything you need to get started and make a big splash with the new Pool Tool.
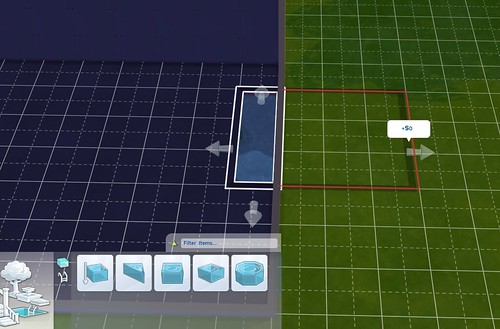
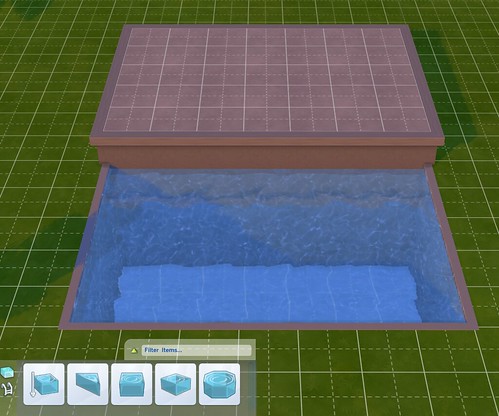
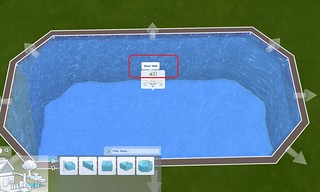
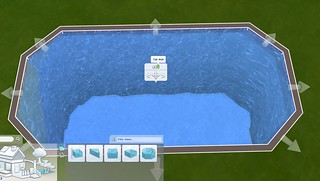
Shaping Your Pool
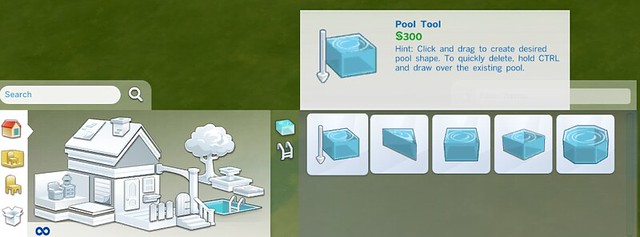
Access the Pool tool by clicking on the image of the pool in Build Mode. The Pool Tool allows you to draw a rectangular shape of any size by dragging the cursor out in any direction. The other options (Square, Triangular, Diagonal and Octagonal) allow you to place a complete pool room “unit” in that particular shape. Unlike walls, you cannot draw a pool free hand; you must use the tool or place one of the shapes.
Once you have placed a pool unit, you will find that they behave exactly like rooms. Select the pool unit to activate the sub menu of controls and manipulate the pool much as you would a room unit. You can rotate it, pick it up and move it to a different location and push or pull the walls into the desired shapes.
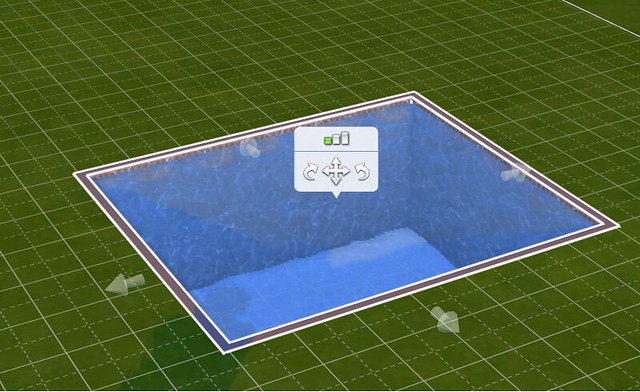
TIP: The shaped pool units are very small and must be pulled into the correct shape. If you find that the submenu is blocking your view or making it hard to grab the arrows, rotate your camera to a top down view. This makes it much easier to see what you are doing and to grab the walls.
You are not limited by these shapes. Once you connect two different shapes or room units, they become one solid unit. By combining them in different ways, you can make just about any form you can imagine and get a unique look for your pool!
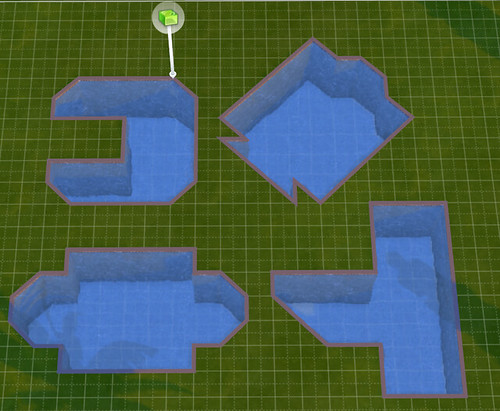
While you are experimenting with different shapes, you might decide you need to delete part of the pool. If you use the sledgehammer tool, it will delete the entire pool. So if you only want to remove a section of your pool, hold down CTRL while using the Pool Tool. You will be able to delete sections of the pool one square at a time, enabling you to further sculpt the shape.
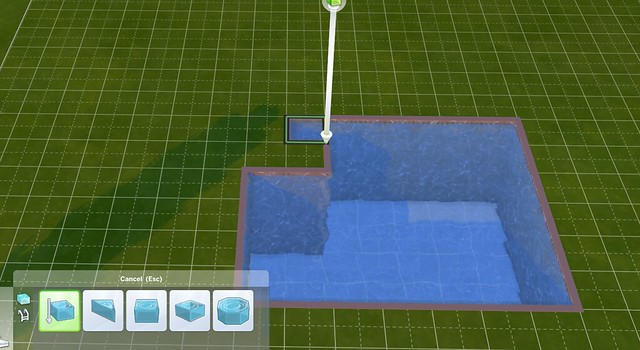
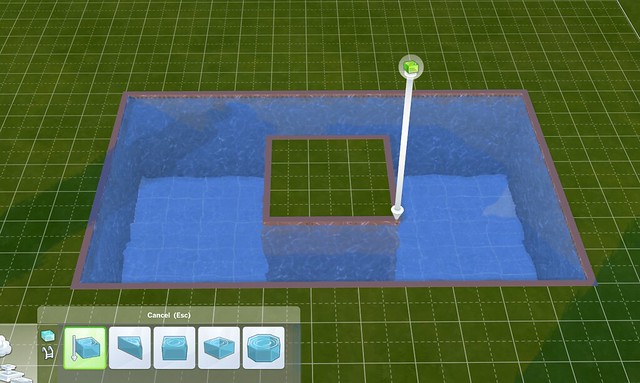
TIP: You can use this method to form an “island” in the center of your pool. Simply make the shape you want and then hold down CTRL with the Pool Tool active to draw in your island.
Pool Placement
You can place your pool in a variety of locations including in ground, on a deck, indoors, and on rooftop. You can even make your pool free standing. There are some limitations depending on the location you choose.
Lots Without Foundations
• You cannot place your pool on a deck. Adding a deck foundation for your pool will make everything else on the lot automatically have a foundation as well.
• You can place your pool right up to the edge of a wall.
• You may not place your pool under or through a wall.
TIP: To make an indoor/outdoor pool you must first delete the walls where you want the pool to pass through. Add your pool. Cap off the ends of the wall with a column for a polished look.
Lots With Foundations
• You can place your pool in-ground OR on the foundation. You can also have both on the same lot, but you may not have a pool on a foundation and a pool in the ground touching each other. There must be a one unit space between them.
• In-ground pools may be placed directly next to any foundation that does not have a pool on it.
• To create an in-ground pool on a lot with foundations, make sure to start drawing your pool away from the foundation. If you start drawing a pool next to a foundation, the game will place the pool on a foundation automatically.
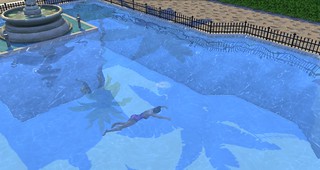
Pools Inside Rooms
• You may place a pool inside a room or house regardless of whether or not there is a foundation.
• You may not stack two pools on top of each other. If there is a pool on the first floor, you may not place a pool on the second floor directly over it.
• Pool walls inside houses function just like other walls. You may place windows and other objects on them. Only objects found in the pool section can be placed on the inside walls of a pool.
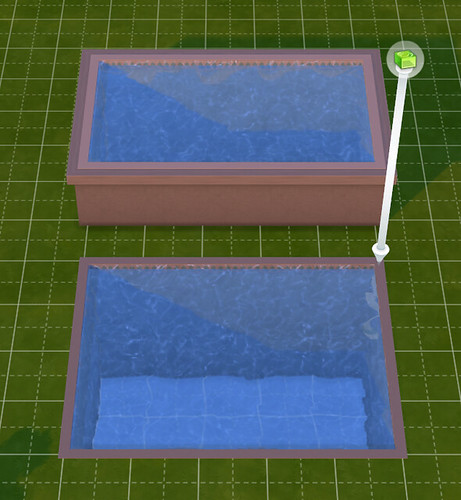
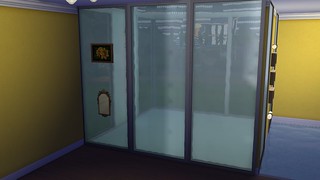
Note: If you place windows in your pool walls, you will not be able to see the sims swimming though the interior windows…only the exterior windows. From the outside of the structure you are fully able to see your sim swimming, but oddly enough, the pool will appear empty when viewed from the inside.
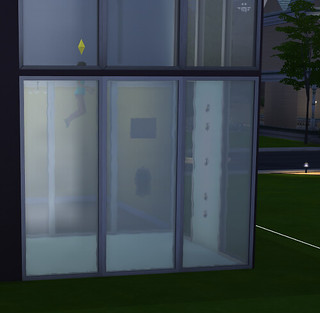
Same pool as seen from inside, but no sim!
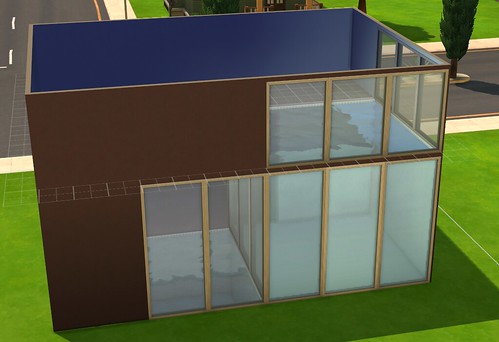
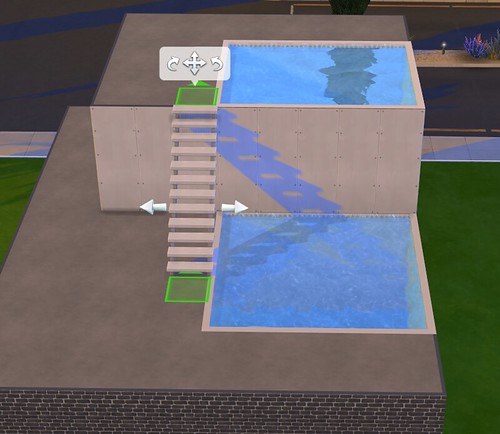
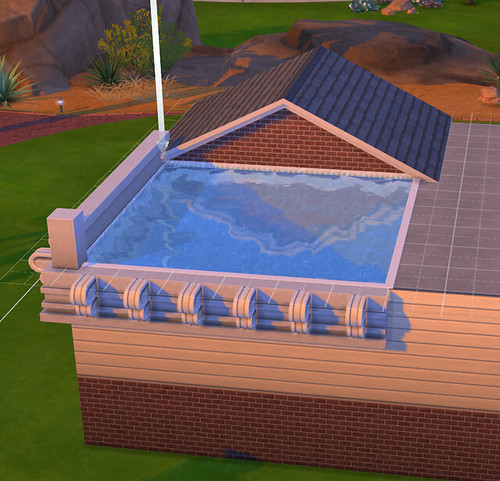
Rooftop Pools
You can place a pool on any level of a home, including the roof. Here are some things to be aware of when doing this:
• You cannot place a roofing section directly on top of any part of a pool.
• The roofing can be placed right up to the edge of the pool, but no more.
• Make sure you allow plenty of space for your sims to get to the pool.
• You may have a pool on every level of your home as long as they don’t overlap. A pool on the first floor can be placed directly up to the edge of a pool on the second floor but no farther.
• Pools do not stack.
• Stairs can be placed directly next to any pool to allow access.
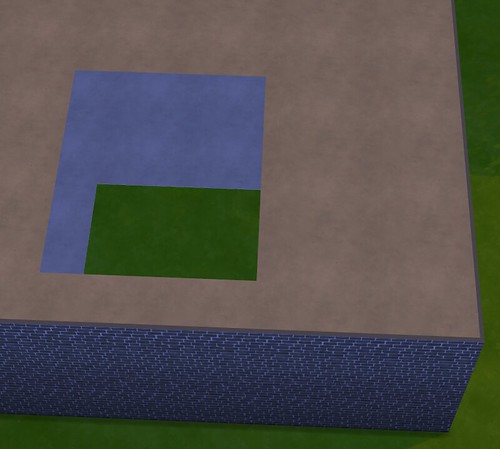
• When you delete or move a rooftop pool, you will be left with an odd looking empty hole in your structure. To get rid of this, the gap must be filled in with a room unit…either by drawing a new one to replace the space or by pulling the nearby walls over to cover the gap.
• If you use the Pool Tool + CTRL method to delete part of your roof top pool, there will also be a gap left over. Handle this the same way as if you deleted the whole pool: either draw a new room unit or pull a nearby wall over to cover the space.
• Rooftop pools do not prevent you from using friezes, exterior trims, fencing, windows or any other décor objects on the exterior of your home.
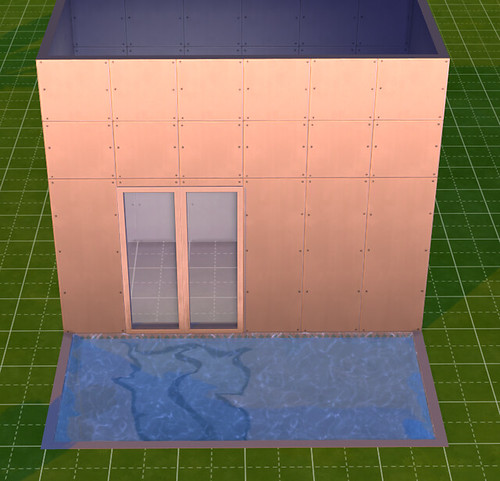
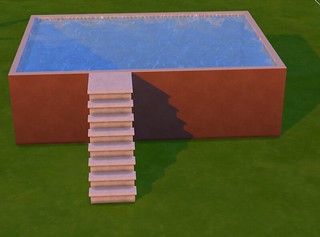
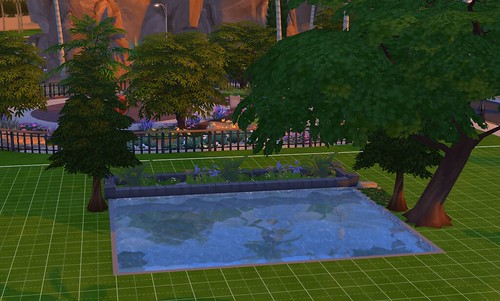
Free Standing Pools
To get the look of a free standing pool, place a deck the exact size of the pool you desire, aise the height of the foundation to the appropriate level, and place a staircase. Remember, if you place a raised deck on a lot, every structure on the lot will have the same foundation height.
Next, draw the pool all the way out to match the edges of the deck.
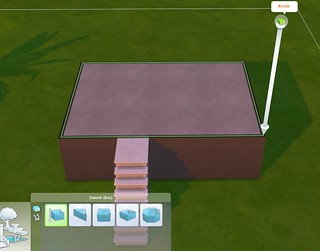
• Your sim will be able to use the pool with no issues. They will not, however, be able to sit on the edge of the pool. You will need to leave at least one unit of deck space around the edge of the pool for sims to be able to sit on the edge.
TIP: If you are the sim killing type, removing the stairs from a free standing pool will effectively prevent your sim from being able to exit the pool.
• The exterior walls of a free standing pool made in this manner are actually foundation walls, not regular walls. This means only the foundation textures can be applied to the exterior.
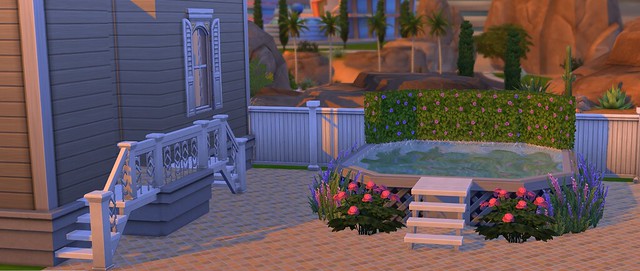
• Another great use for the free standing pool is to mimic the look of a hot tub. There are currently no hot tubs in The Sims 4. But a small free standing pool with a low foundation will give the appearance of a hot tub and your sim can still swim in it. Plants and fencing can help create the look you want.
Pool Depth
As you are manipulating and shaping your perfect pool, you will notice that the submenu also gives you the ability to choose the depth of the pool! Select short wall for the shallowest depth, medium wall for a medium depth, and tall wall for the deepest pool.
Things you need to know about pool depth:
• For a roof top pool, the pool depth matches the height of the walls. This means adjusting the pool depth will change the height of the walls for that level of your structure.
• Remember that if you change the depth of your pool (and the walls on that level) it could affect the windows on the exterior of your house. After making a pool depth adjustment, take a moment to check the exterior of your home and replace any windows if needed.
• The depth of the pool does not affect the sims in any way. Sims will not drown faster in a deeper pool and children are able to use all pool depths. It is strictly an aesthetic choice.
Pool Objects
Now that you have placed your pool, check out the Pool Objects category in the pool menu. Here you will find several different objects that can be placed in and around your pool.
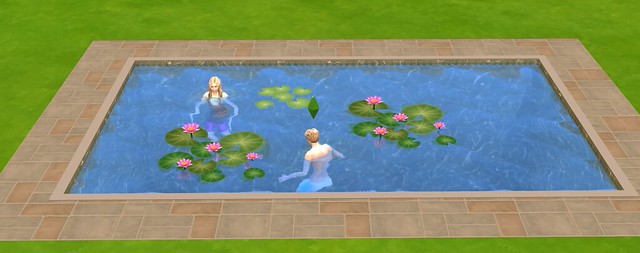
NOTE: the objects in the pool objects category are the only things that can be placed inside a pool without using a cheat code. The Lily Pads from the fountain décor section can be placed in pools with no issues though. Sims will simply swim around them.
If you want to get really creative and don’t mind using cheats, the MoveObjectsOn cheat is a wonderful way to add traditionally “non pool” items to your splash zone. Just be sure to playtest your pool to ensure that the new additions don’t prevent your Sim from swimming. Learn more about the MoveObjectsOn cheat here.
Things you need to know about pool objects:
• Pool ladders are not needed. Your sim can and will pull themselves out of the pool from any edge.
• Pool ladders can be placed on any edge of a pool, including diagonals.
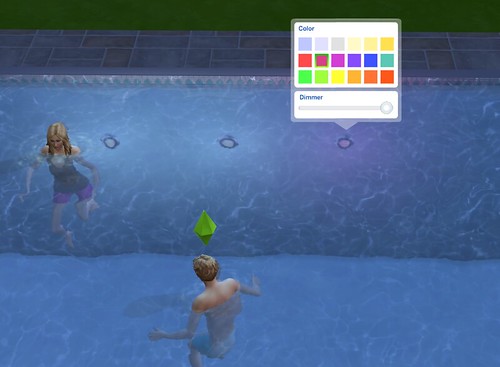
• Pool lights are not limited to in-pool placement. All of these lights can be placed anywhere on your lot. Just as with other lights, clicking on them in Live mode opens up a submenu that allows you to choose the color and intensity of the lights.
Note: Don’t expect to see much from lights that are under water. Even at full strength, the color and intensity of these lights are strongly muted by the water effects.
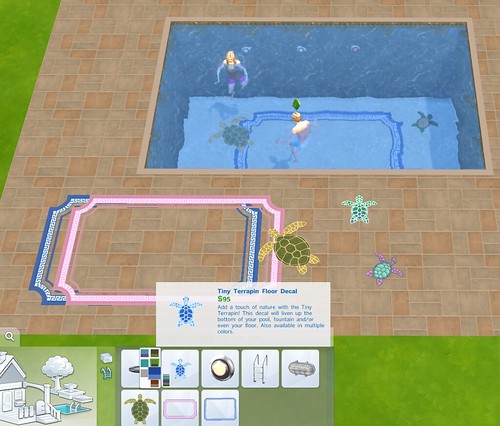
• Click on the pool mosaic shapes to see the different color options available. Because these are objects, and not room units, the mosaics cannot be pushed or pulled into shape. But they can be layered over each other.
• Pool mosaics don’t have to be placed in the water. They can be used to decorate any area of your home.
TIP: Consider using pool mosaics as an accent for your bathroom or kitchen floor. They also work great on patios or any place you want to add special flair. Get creative!

Other Ways To Decorate Your Pool
• Fences can be placed directly up to the edge of your pool. Just be sure to leave space for your sims to get in and out of the pool. (Unless trapping them is part of your evil plan!)
• Landscaping can also be placed directly up to the edges of your pool, including trees and shrubs. Perhaps your nature loving sim would like to take a dip in a hidden glen pool surrounded by trees and lush landscaping?
• Terrain paint can be sprayed right up to the edges of your pool. This is a great choice if you want a more natural or softer looking pool surround.
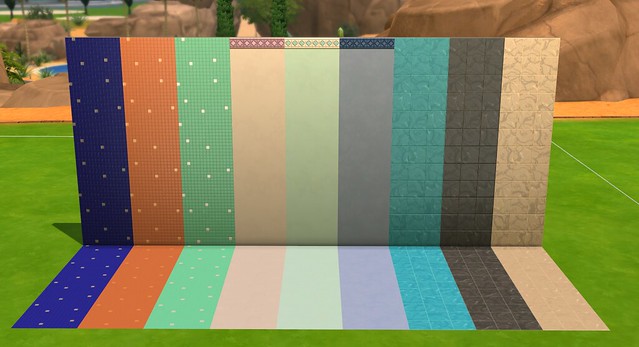
• Wall and Floor textures can be used in your pool. The pool update came with several new wall and floor textures to use in your pools, but you are not limited in any way. All floor and wall textures may be used on the sides and bottom of your pool. You can have a stone pool or a pool covered in wallpaper if that is what you desire.
• Be aware that the effect of the water drastically mutes the color and appearance of any texture you apply to the inside of your pool. Even the most vivid walls will lose most of their appearance below the water line. In the image below, you can see how the bright red wallpaper with spots is barely visible in the pool.

• If the pool mosaics that come with the game are not to your liking, you can create your own by using floor tiles. Use a ¼ tile to create angles and various shapes: select the floor tile you want to use and click CTRL+F at the same time. Experiment to come up with an interesting design that enhances the look of your pool.
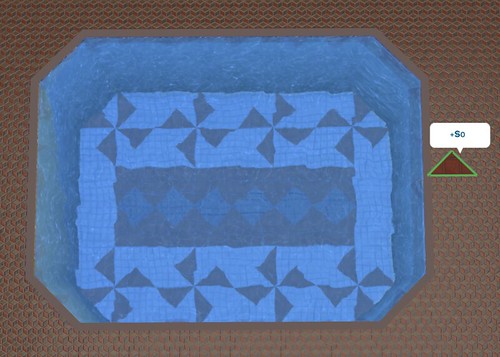
TIP: because the colors underwater are so muted, your custom mosaic will have more impact if you pick tiles with a lot of contrast. A black or red tile against a white, for instance, will show your design more clearly.
• Don’t forget the area surrounding your pool. You can also create your own custom design for the edges. Use the ¼ tile and some contrasting tiles to accent the perimeter of the pool area and add another design element to your creation.
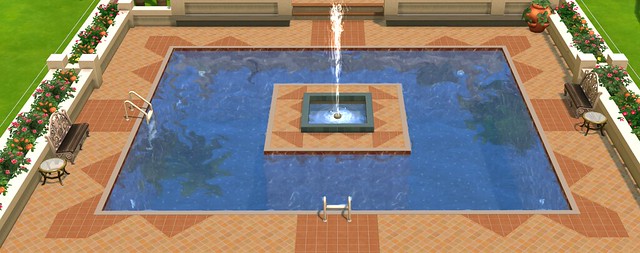
Fountains
• Fountains can be used to accent your pool’s appearance but there are some limitations.
• Fountains and water jets cannot be placed in a pool directly. They must be placed on land.
• Fountains and pools cannot be directly next to each other. There must be at least one unit of space between the edge of the fountain and the edge of the pool.
• The spray of a fountain jet cannot fall into the pool. If it does, the game will not allow you to place the jet in that location and the footprint of the item will be red and not green.
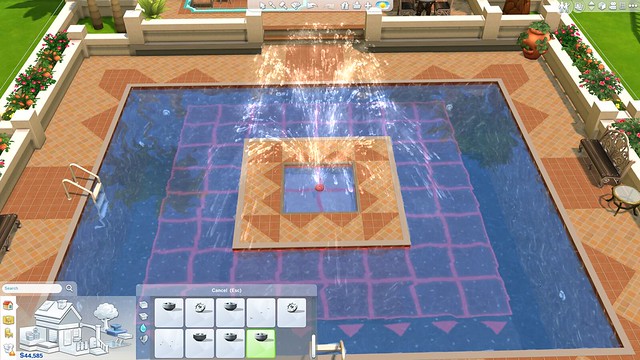
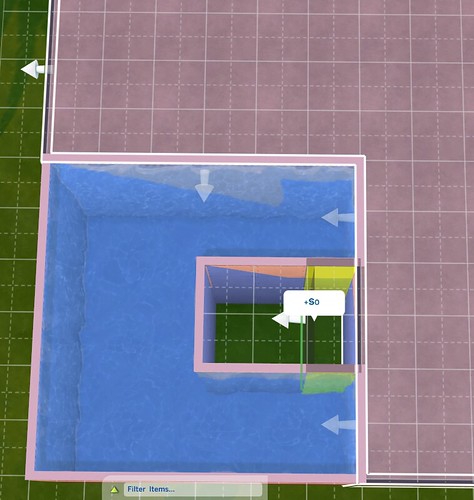
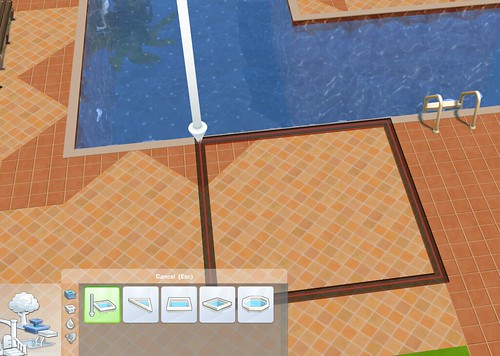
To get a water jet in the middle of your pool, you will need to create an island by holding down the Pool Tool and CTRL at the same time. Next, draw in your fountain shape using the fountain tool. Make sure you allow a one unit buffer between where you want the fountain to be and the edge of the pool. Select a water emitter and ensure that the water does not land into the pool. The more upright jets work especially well for this.
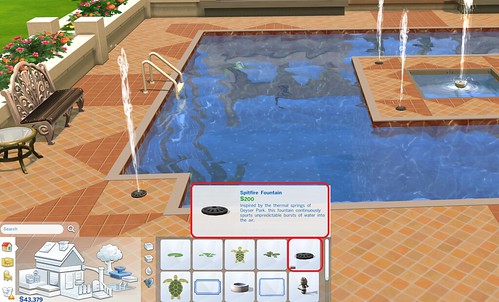
TIP: There is one fountain that can be placed right on the edge of a pool. It is the Spitfire Fountain, which is located in the Fountain Decorations section of the catalog.
For more on how to use fountains, click here: http://simsvip.com/the-sims-4-building-guide/#Fountains
Saving and Sharing Your Pool
You can save and share a lot that has a pool on it just like any other lot. If you want to share your pool area as just a “Room”, it is a little tricky.
Because pools are a room “unit” they can only be saved by themselves. When you select and highlight a pool to save or share on the Gallery, just the pool itself (and not any of the surroundings) will be saved. Any textures you applied to the interior of the pool will be saved and transfer.
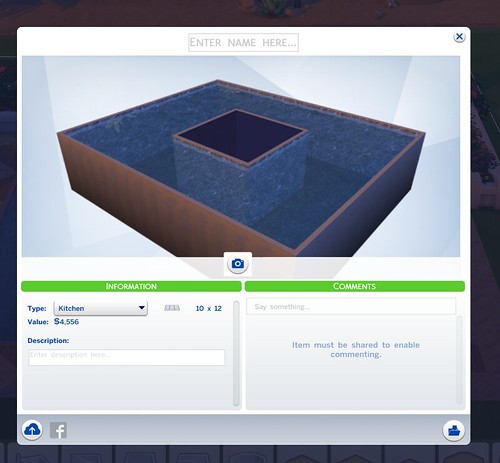
Placing a pool on a deck does not allow you to save the surrounding items. The game considers the deck and objects one room and the pool itself a whole other room. In this example, clicking on the deck to save the room results in everything except the pool being included. That is because the pool is its own room.
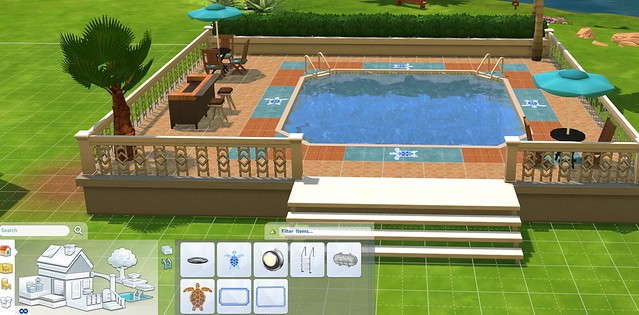
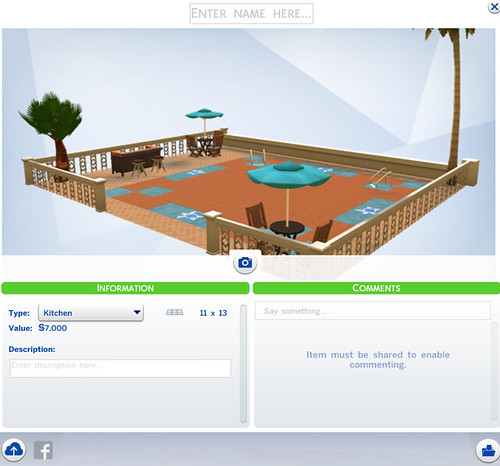
If you come up with a really cool pool area that you want to share on the Gallery as a room, you will need to do it as 2 parts: one for the deck surrounding the pool and one for the pool. Consider naming them part 1 and part 2 to make it easier for people to find them and mention the other part in your description as well.
Remember to experiment with different shapes and textures to give your pool a fun, unique look. Don’t be afraid to try unusual combinations. And be sure to have a sim on the lot to test the routing. Switch over to Live mode and ensure sims can get in and out with no problems. Come on in….the water is fine!


")
")


")