")

Have you ever watched your sim level up their baking skill and wished it was that easy in real life? In this series I want to prove to you it can be that easy. With a little practice you too can level up your baking skill and impress your friends.
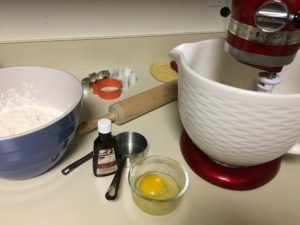
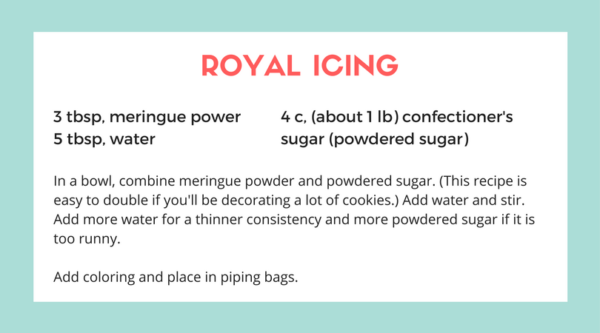
Today we are revisiting one of the previous recipes, Let’s Bake Sugar Cookies, and taking them up a notch! Today we’re making Spooky Cookies! This recipe will focus on how to decorate sugar cookies so you’ll want to make a batch first or buy some undecorated cookies from the store. We will be using royal icing (flood icing) to decorate so first here is the recipe for icing. I use meringue powder, an egg white substitute, for my recipe. You can find it in the baking aisle of most grocery or craft stores.
Tip: My recipe is for the Wilton brand meringue powder. I don’t know how much it varies from brand to brand but the recipe for royal icing is often on the side of the container. If you’re using a different brand follow their recipe.
How to Prepare the Icing:
1. In a large bowl mix 4 cups (about 1lb) of confectioner’s sugar, also called powdered sugar, 3 tablespoons of meringue powder and 5 tablespoons of water. Stir. If the mixture it too thick you can add a little water. If it is too runny you can add more powdered sugar.
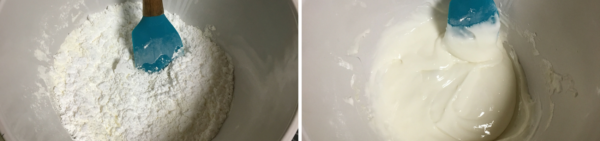
2. Scoop out what you need for the first color into a small bowl. Cover the large bowl with a plastic wrap to prevent the icing from drying out. Add your food coloring until it is the desired color.
Tip: Gel food colors are popular for cookie decorating because it doesn’t alter the consistency of the icing. I personally use whatever type of food coloring I have and adjust the consistency as needed.
3. Now we need to adjust the consistency. This is the most important step to working with royal icing and can take some practice to get it just right. I will show you two different ways to use royal icing. The beginner method you’ll outline with a thicker icing then flood the center with a thinner icing. The more intermediate/lazy method is to just make a medium consistency icing. I’ll go into detail on what each of these consistencies looks like but for now you only have to remember: Add water to make the icing thinner, Add powder sugar to make it thicker.
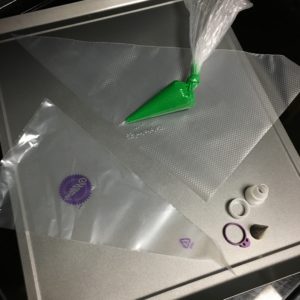
4. Once you are done coloring the icing, and adjusted the consistency, scoop it into a piping bag. You can use the standard reusable or disposable piping bags that require piping bag tips. I recently discovered tipless piping bags (which you can buy online) and I find them so much easier to work with. You just fill the bag and tie the end. Then you cut the tip to the desired size. I like these because they are easier to squeeze and less mess overall. The biggest downside to this is if you cut too large of a hole at the tip you have to transfer the icing to a new bag and try again. With regular piping bags you can just switch to a different size tip.
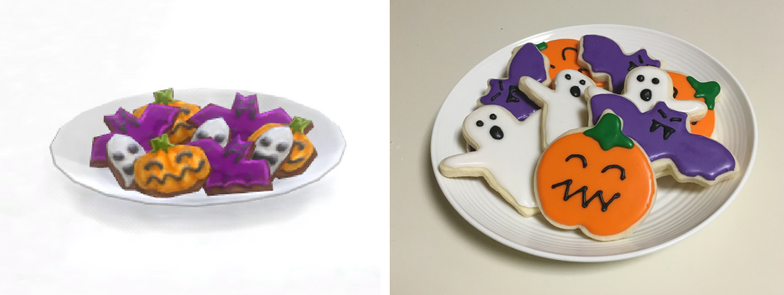
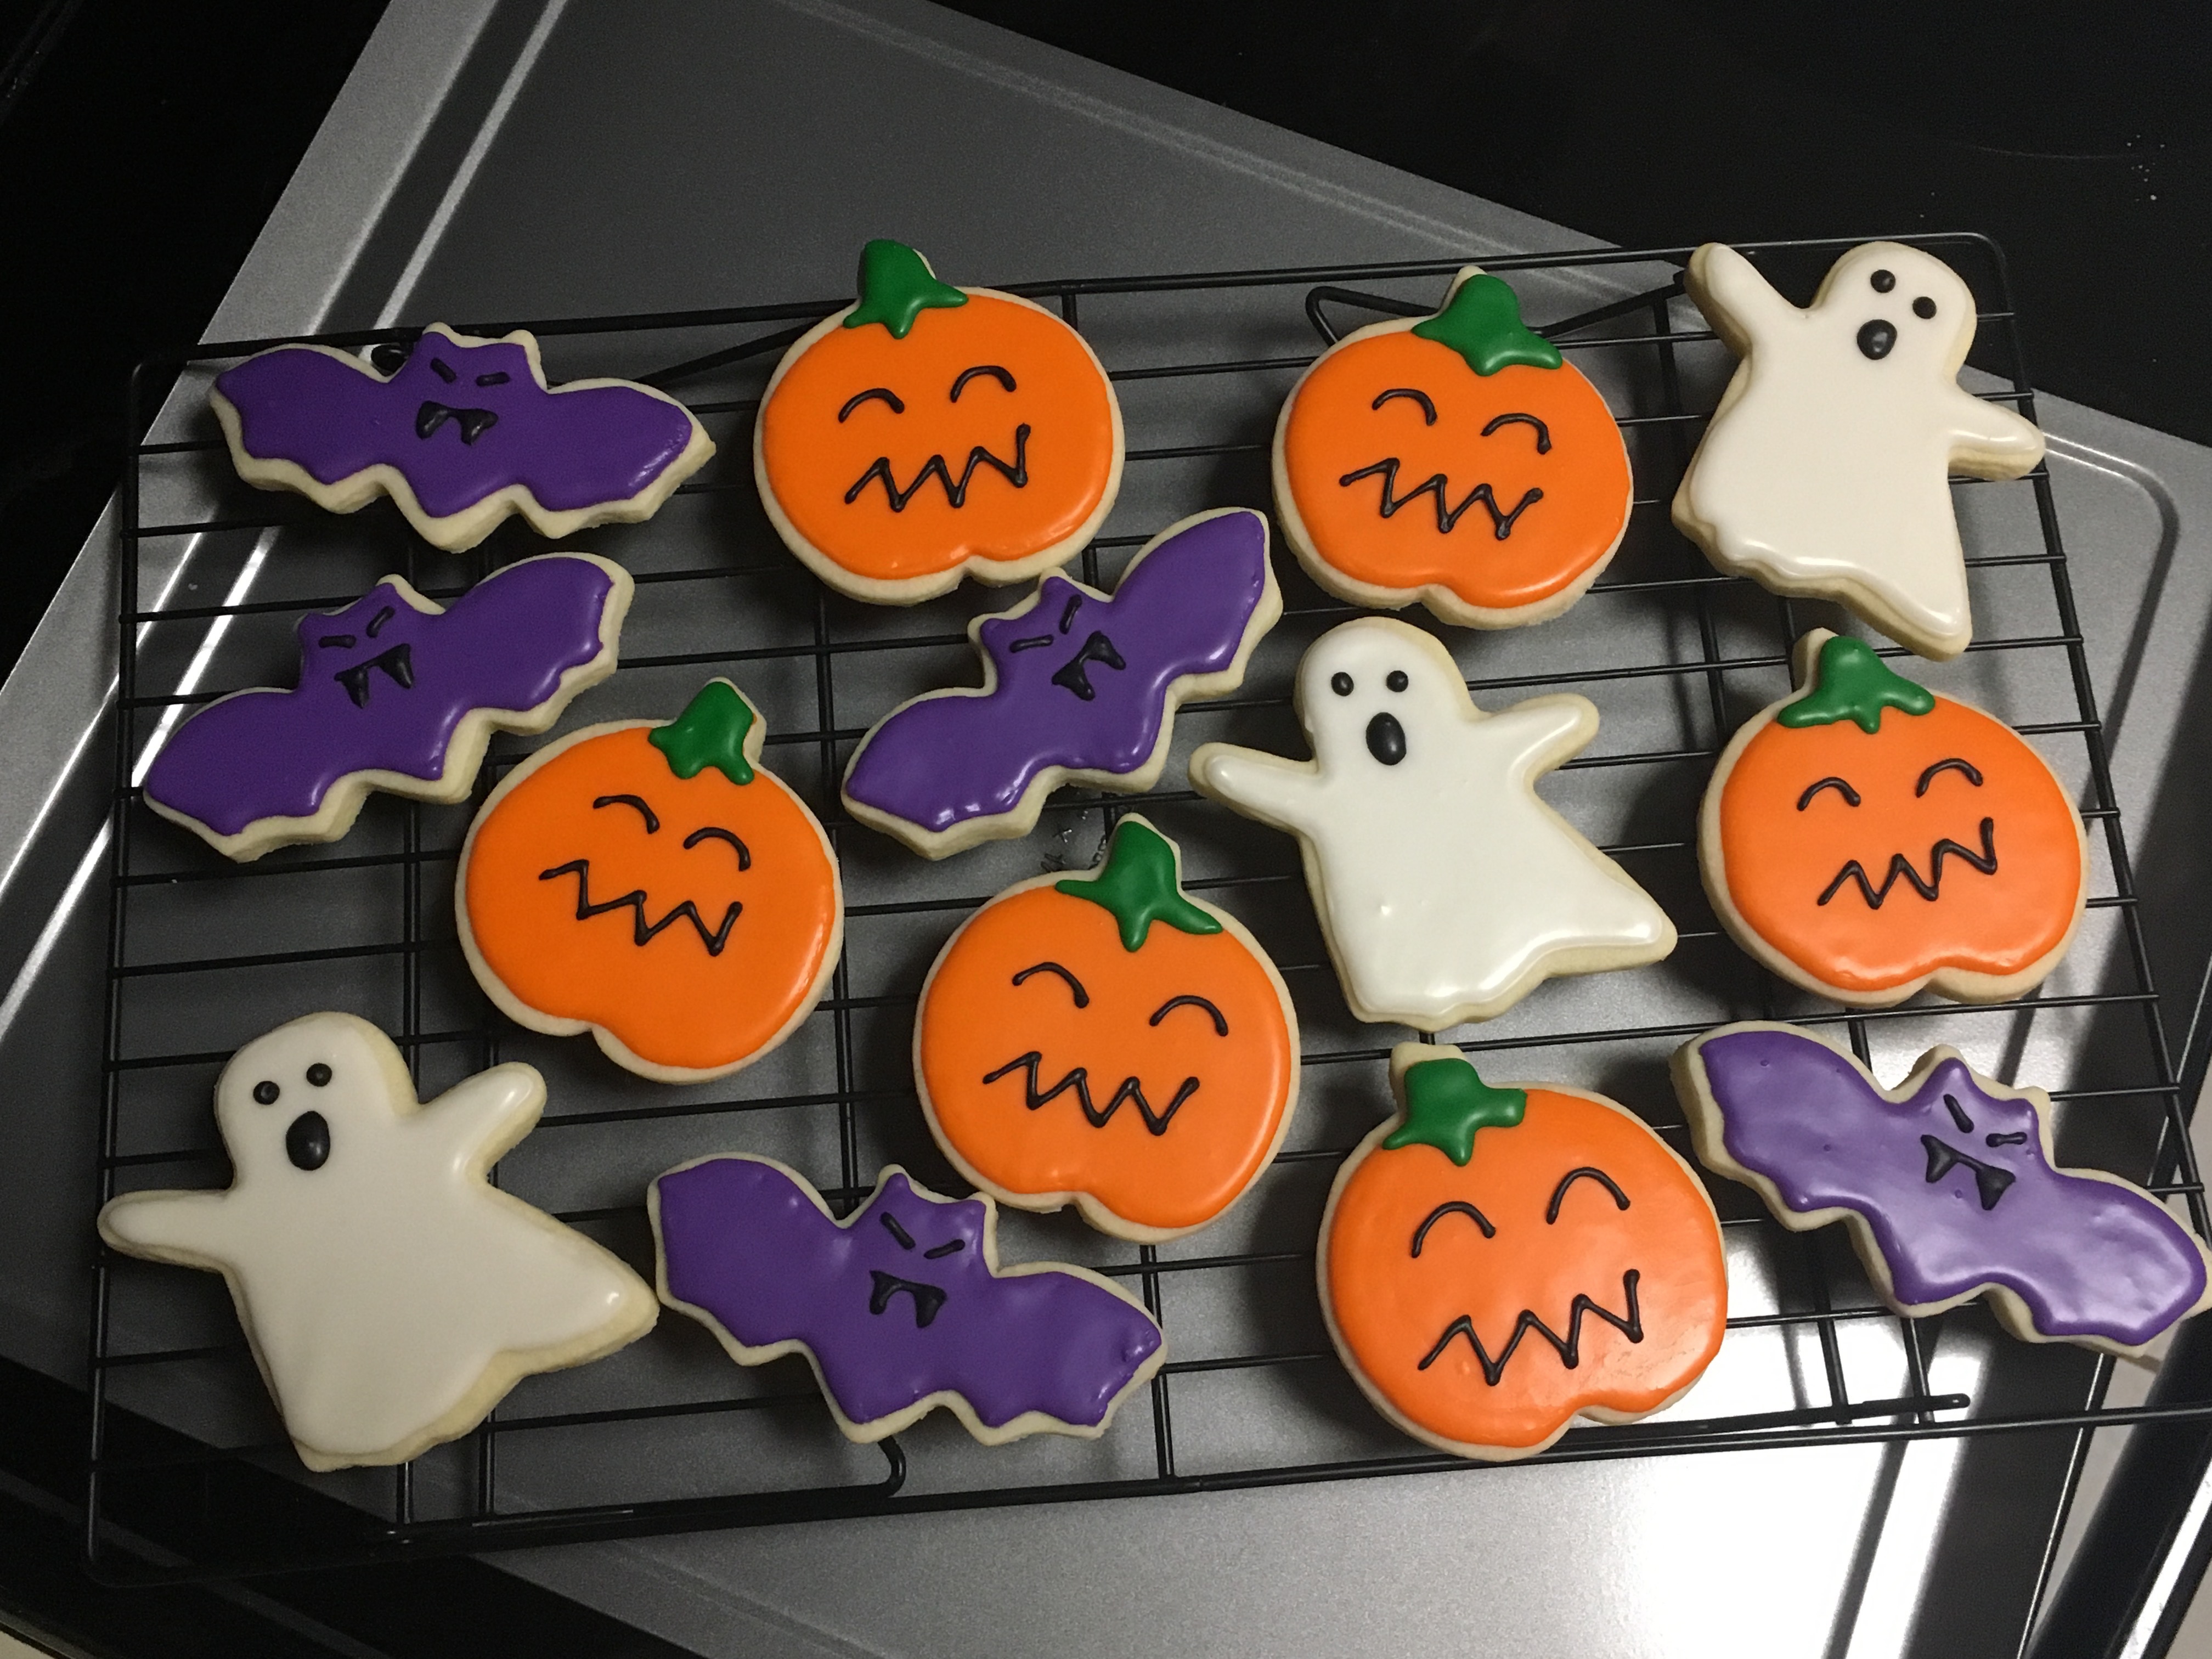
5. Repeat steps 2-4 until you have all your desired colors in piping bags. For the spooky cookies you’ll need Orange, White and Purple for the main colors. Then a green and a black for the details.
Decorating Method #1:
This method is best for beginners and perfectionists. It is more forgiving to mistakes but does require 2 piping bags for each main color. So if you have more intermediate skills and are lazy, like me, you can use method two.
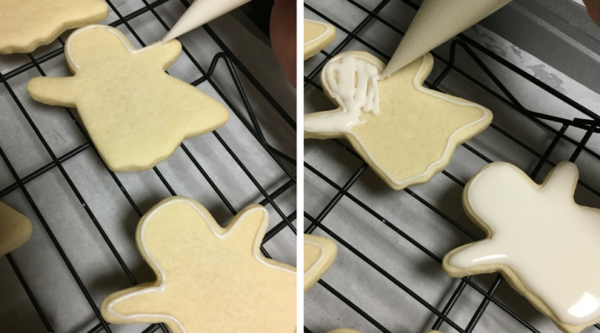
1. Outline the cookies with a thicker consistency icing. On a scale of 1-10 with 1 being the paste that hold together gingerbread houses and 10 being water, you’ll want to make this one about a 3/10. I always do a spoon test to judge the consistency of icing. The spoon test involves taking a scoop of icing, then tilting your spoon to observe the speed it falls back into the bowl. A 3/10 will probably stay on your spoon for a second or two before falling back into the bowl.
2. Allow the outline to dry for 10-15 minutes. It doesn’t have to be a perfect line. Like I mentioned this one is very forgiving to mistakes. The idea is this line will act as a barrier to keep the flood icing from spilling over the sides. When you’re really good at this method you can get the outline right next to the edge for beautiful looking cookies. My example I brought the line in just a tad to show off this method better.
3. Next take a thinner consistency icing, about a 8/10, and piping it into the center. For the spoon test, this icing with pour off your spoon in a fast, smooth stream. This icing will spread out on it’s own (hence the need for the outline so it doesn’t go over the sides) so feel free to scribble that icing around like a small child just learning to color inside the lines.
4. Using a toothpick or turkey trussing needle pop any large bubbles and use circular motions to nudge the icing into any little corners.
5. Allow to dry for 3-4 hours. The meringue powder/egg white part of royal icing means it hardens as it dries. This makes it a popular icing to work with because you’re designs won’t smudge after they are dry and you can have a picture perfect plate of cookies to share. Or not share, no judgement. 😉
6. Add any icing details with your secondary colors. You’ll want the consistency of this to be a little thicker much like the outline consistency. If you’re doing multiple layers of details allow each layer to dry before adding the next.
7. When you have finished decorating your cookies allow them to rest for several more hours. I often just make these cookies the day before the event I want them for and let them dry overnight.
8. Enjoy!
Decorating Method #2:
This method is a little less forgiving to mistakes and requires the icing to be at just the perfect consistency. If you do it right, it means fewer piping bags and less mess so I like this method for when I’m feeling lazy. If you try it and your icing is too thin, you’ll make a huge mess as icing spills over the sides of your cookies.
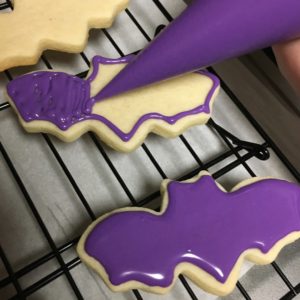 1. You’re icing consistency will need to be about a 6/10. For the spoon test it will poor slowly but in a smooth stream. Like with the previous method, start with an outline to create a smooth edge around the cookie. It doesn’t have to be completely perfect. You can use your toothpick afterward to smooth out mistakes.
2. While the outline is still wet fill the center of the cookie. The outline keeps the edges neater but the outline and flood with blend together to create a seamless design. With the first method, the outline icing is sometimes noticeable.
3. Use a toothpick or turkey trussing needle to pop any large bubbles or correct small flaws.
4. Allow to dry for 3-4 hours. Add icing details with your secondary colors. Then allow them to dry for several more hours, preferably overnight.
5. Enjoy!
Thank you for reading! I know this was a long post. If you have any questions feel free to leave a comment and I will try to answer it. If you missed the previous Let’s Bake post you can find that here: Let’s Bake Cereal Marshmallow Squares. Until next time, Happy Baking!


")