")
Thanks to the Sims team, as of November 2017, we have 4 brand new roof types in The Sims 4! The addition of octagonal, hexagonal, pentagonal, and circular roofs into the game provides players with tons of new options to experiment with. Never again will builders be forced to experience the struggle of trying to create an 8-sided roof!
The patch also included a whole new range of roof manipulation options that can be used on all the roofs in game, regardless of whether they’re new or old!
1) Limitations and Things to be Aware of…
Although it is fantastic to have some new roofs to play around with, there are some limitations you should be aware of.
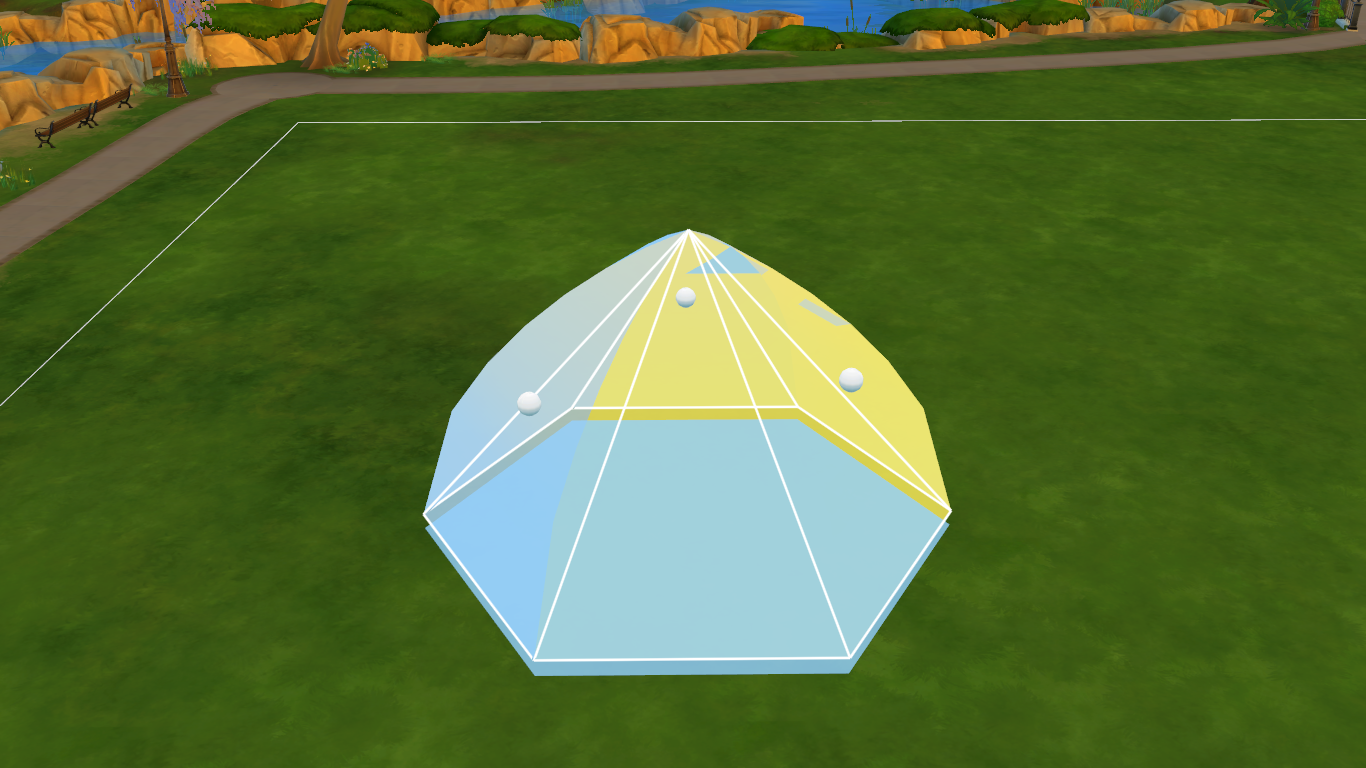
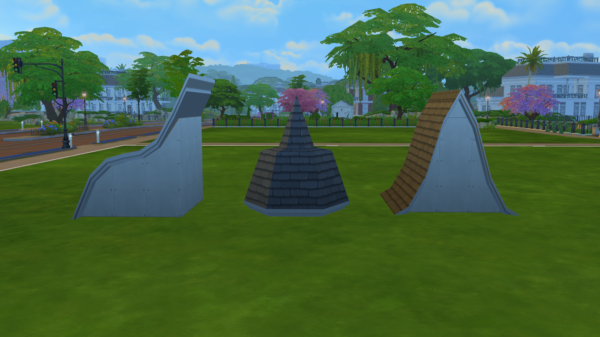
One of the most obvious limitations is that, due to the angle of the hexagonal and pentagonal roofs, they will never sit flawlessly on top of a structure. In The Sims 4 we are only able to create diagonal walls on one angle, a perfect 45 degrees. In order to create a roof piece that has 5 or 6 sides the angle of the sides cannot be 45 degrees. This means, therefore, that these roofs will not sit perfectly atop your builds. If you intend to use the hexagonal or pentagonal roof pieces, you will have to deal with either an overhanging roof, or a roof that doesn’t cover the entire ceiling. Although this isn’t necessarily a bad thing, and may actually be the look you are going for with a certain build, it is going to be a reality in your game. This is also the case for circular roofs.
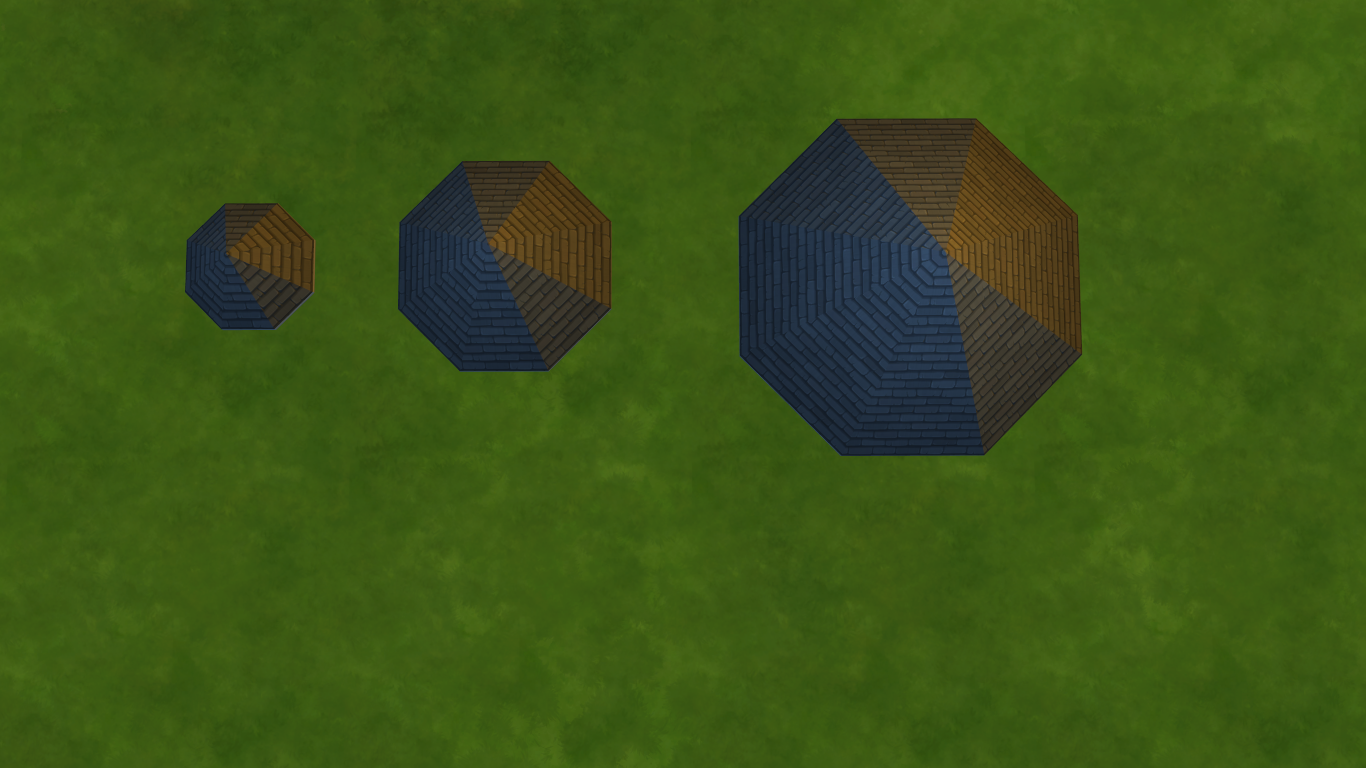
The octagonal roof is the only new roof that will sit flush with your buildings. Providing you create a perfectly symmetric 8-sided room (each of the sides needs to be the same length), you will be able to place the octagonal roof on top with no overhang.

Another thing to be aware of is that the new roofs can only be scaled up. What this means is that if you use one of the arrows to make the shape larger, it will not only lengthen that particular side of the roof, but will increase the size of the entire roof.
As you can see below, when dragging the arrow on the side of this 4-sided roof piece to increase the shape’s length, I am able to alter the length without changing the width.

When I attempt the same thing on one of the new roofs, each side increases in size at the same rate. I cannot manipulate the sides individually. This means that there are only a set number of shapes and sizes your octagonal, hexagonal, pentagonal, and circular roofs can be.
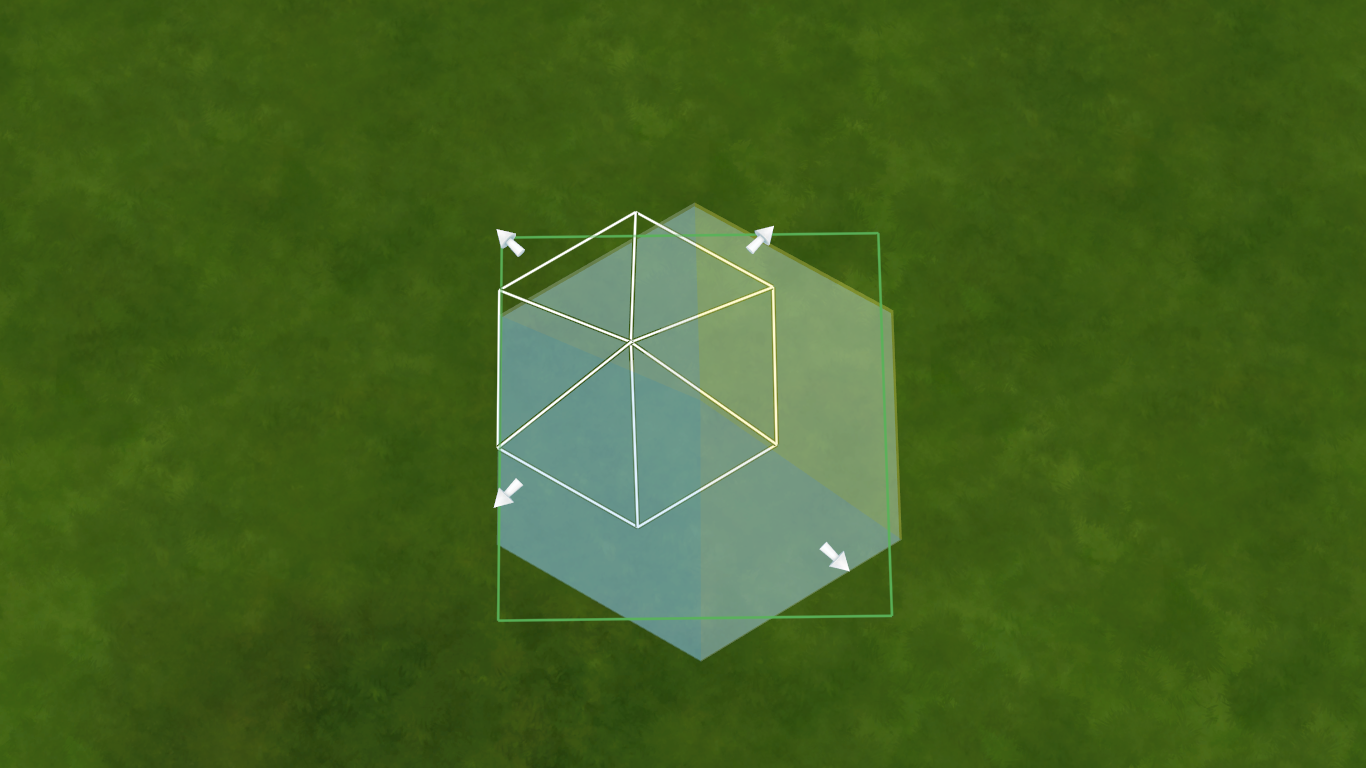
Although this roof has 6 sides, there are only 4 points of manipulation you can use to change the roof’s size.
2) Using the New Roof Types
Manipulation
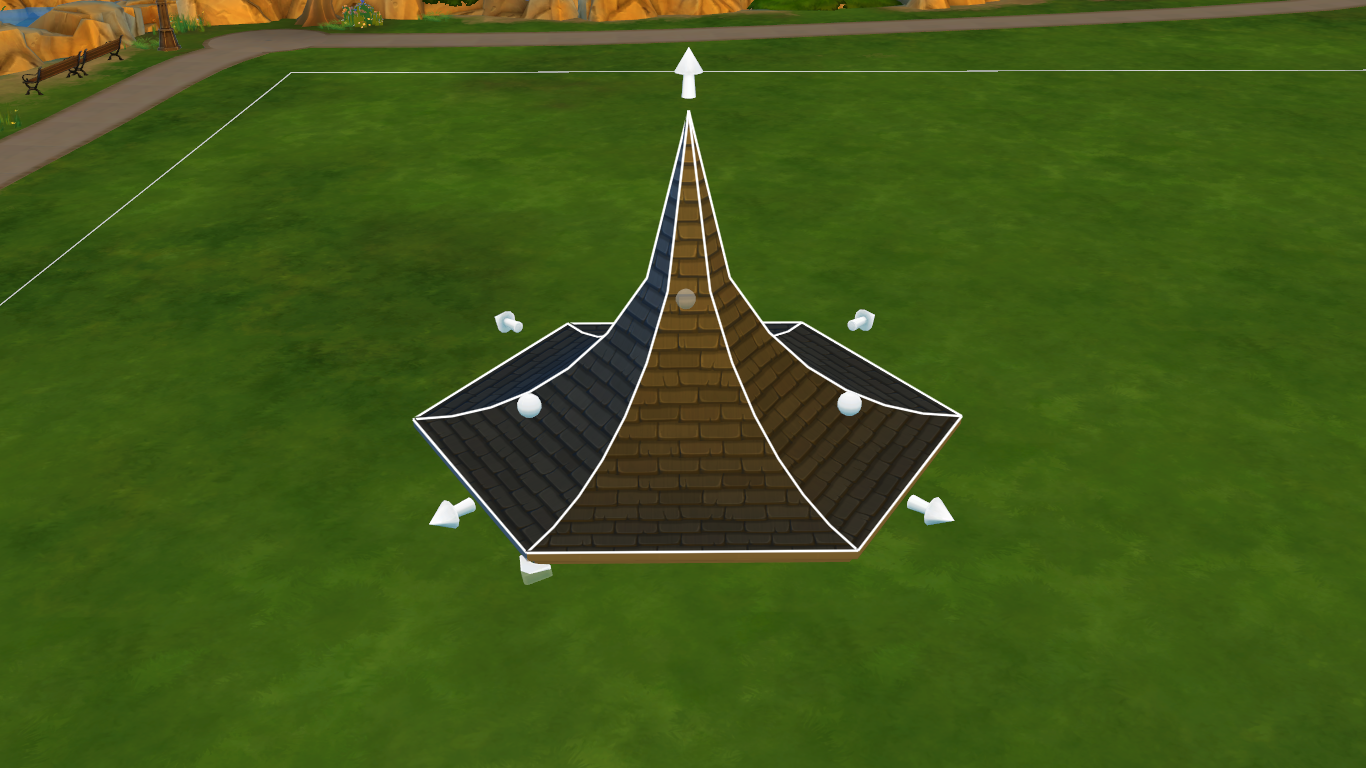
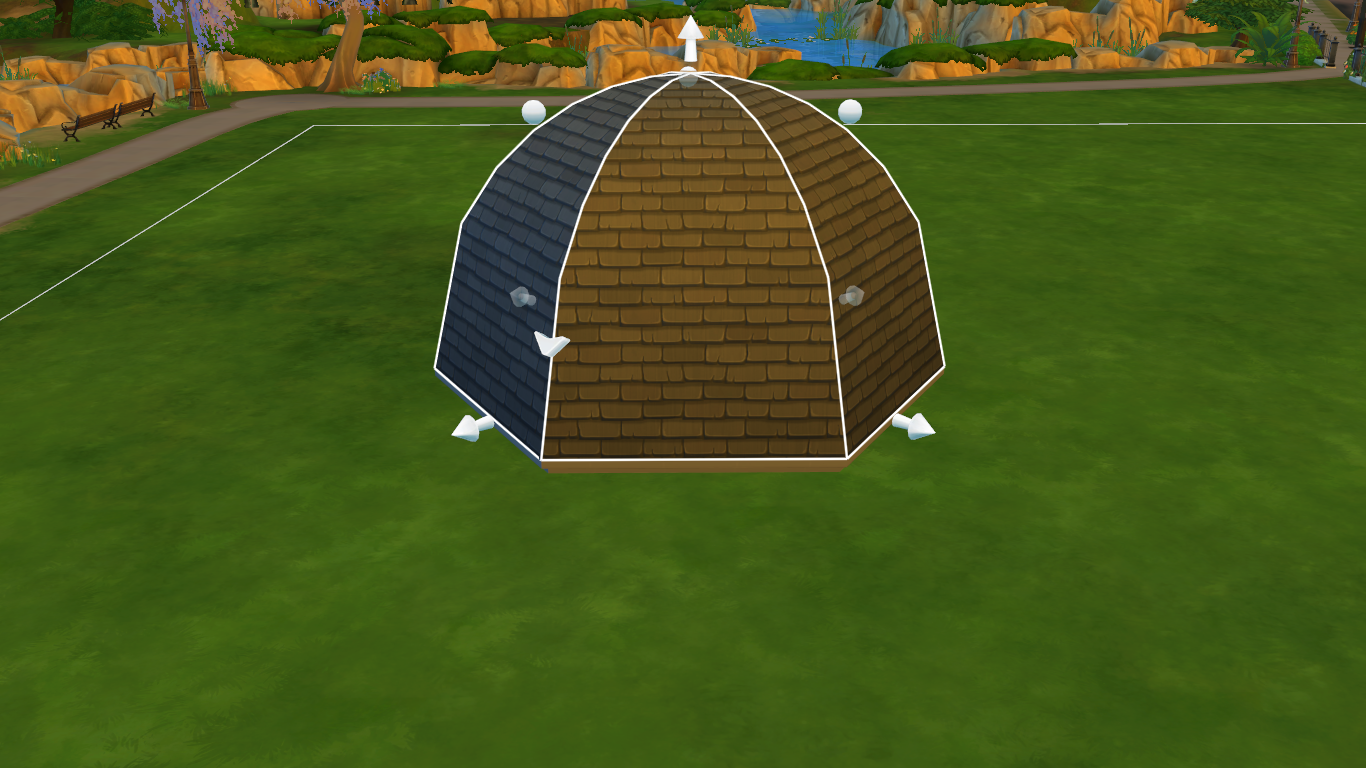
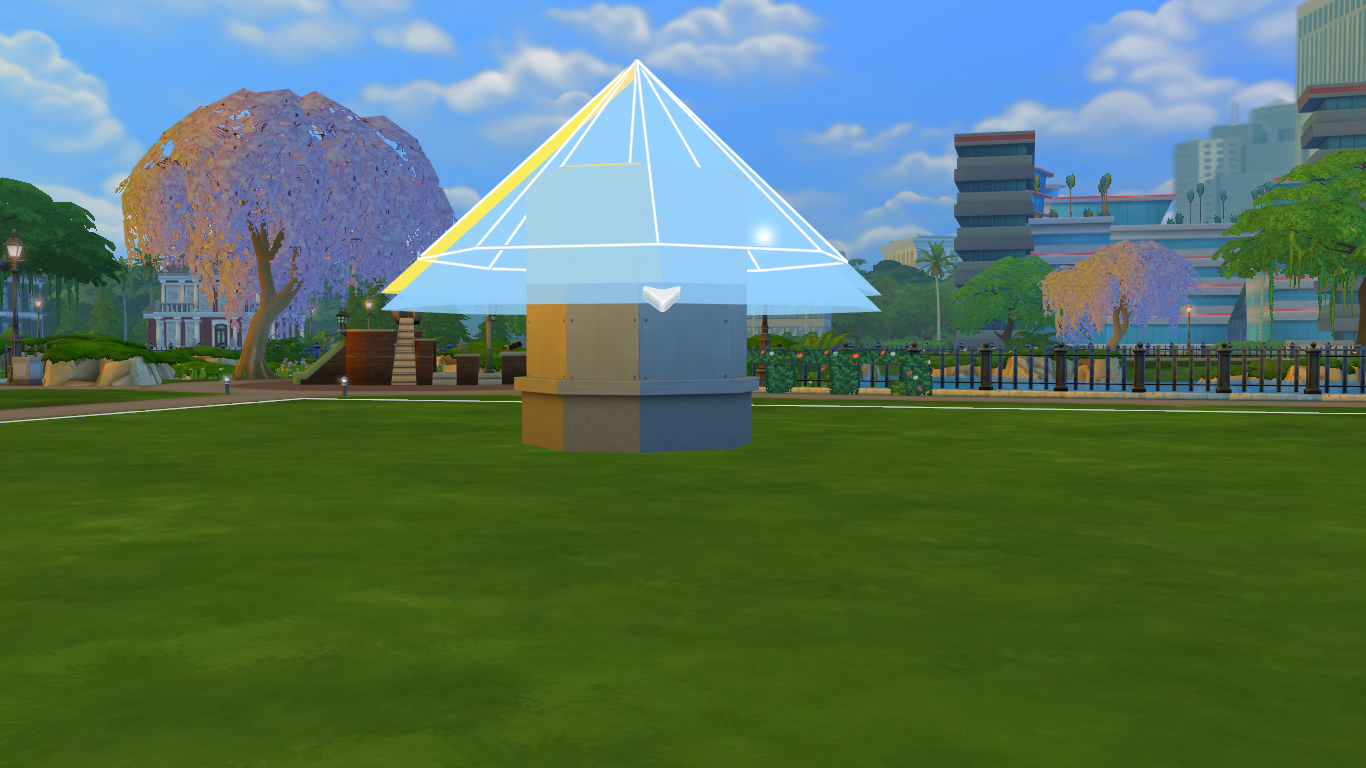
Just as with the existing roof types in the game, these new roof pieces come with various options for manipulation. You are able to increase the height, and decide how much, or how little, you want your roof to bow. There is also the option to extend the roof’s eaves.
If you are familiar with the tools used to alter and change the shape and size of the existing roofs in the game, you will find these roofs very easy to manipulate.
To change the size of the roof, simply Click and Drag one of the arrows that surround the base of the roof. It does not matter which arrow you select, as each will do the same job.
To change the height of the roof. Click and Drag the upwards facing arrow at the very top of the roof. Keep dragging until it is at a height you are happy with.
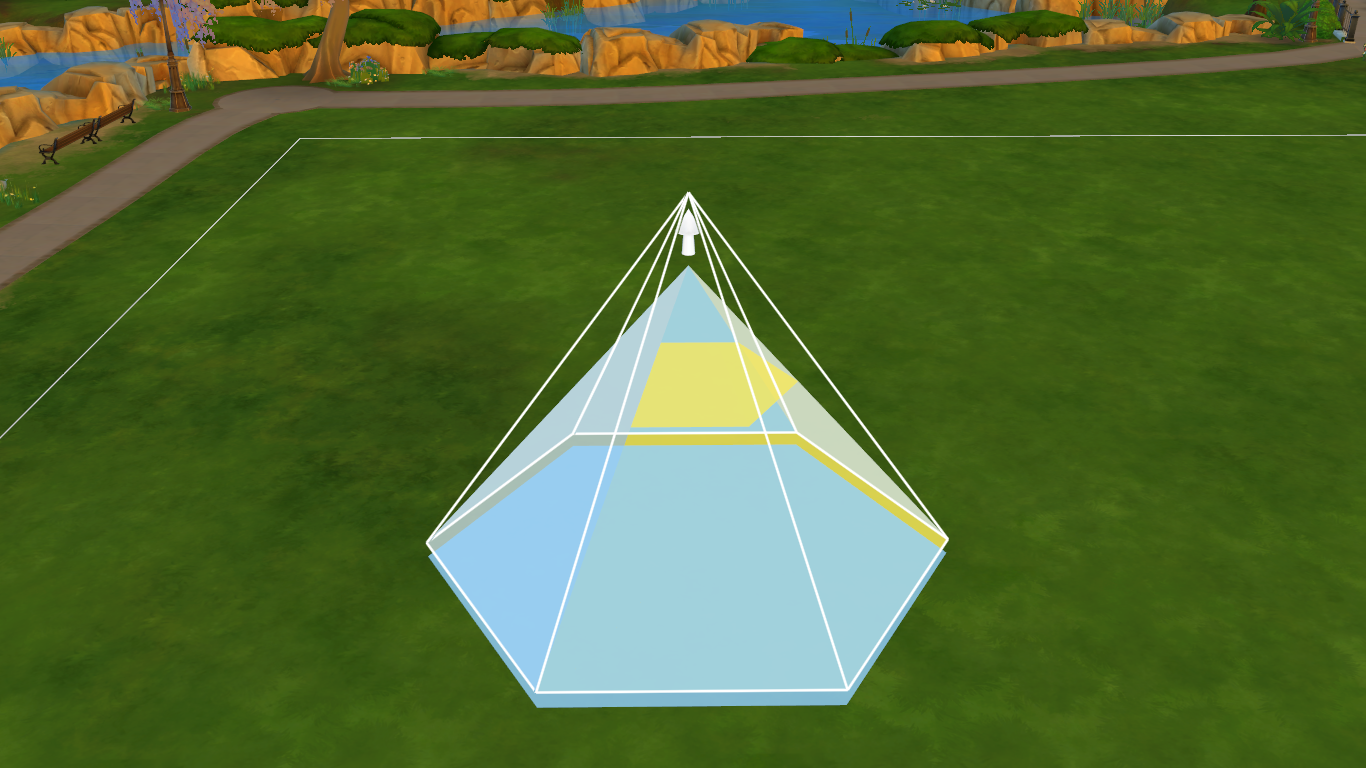
To change how much the roof bows. Click on one of the spheres that are placed around the middle of the roof. Click and Drag the sphere up and down to alter the bow of the roof. Just as you can with the other roofs in game, you will be able to create convex and concave curves on all of the new roof types. Again, it doesn’t matter which sphere you click as each one will do the same action.
Advanced Manipulation
The latest patch didn’t just come with new roof styles but also provided players with some new options for roof manipulation. These new tools are not only limited to the 4 new roof styles, however, and can be used on every roof type in the game.
In order to open up this new set of options you’ll need to press Shift+C when you have a roof selected. You will know this has worked when you see 2 spheres appear on each side of the roof.

What this new set of manipulation tools allow you to do is alter how much the roof bows at two separate points. The top half of the roof will now move independently of the bottom.
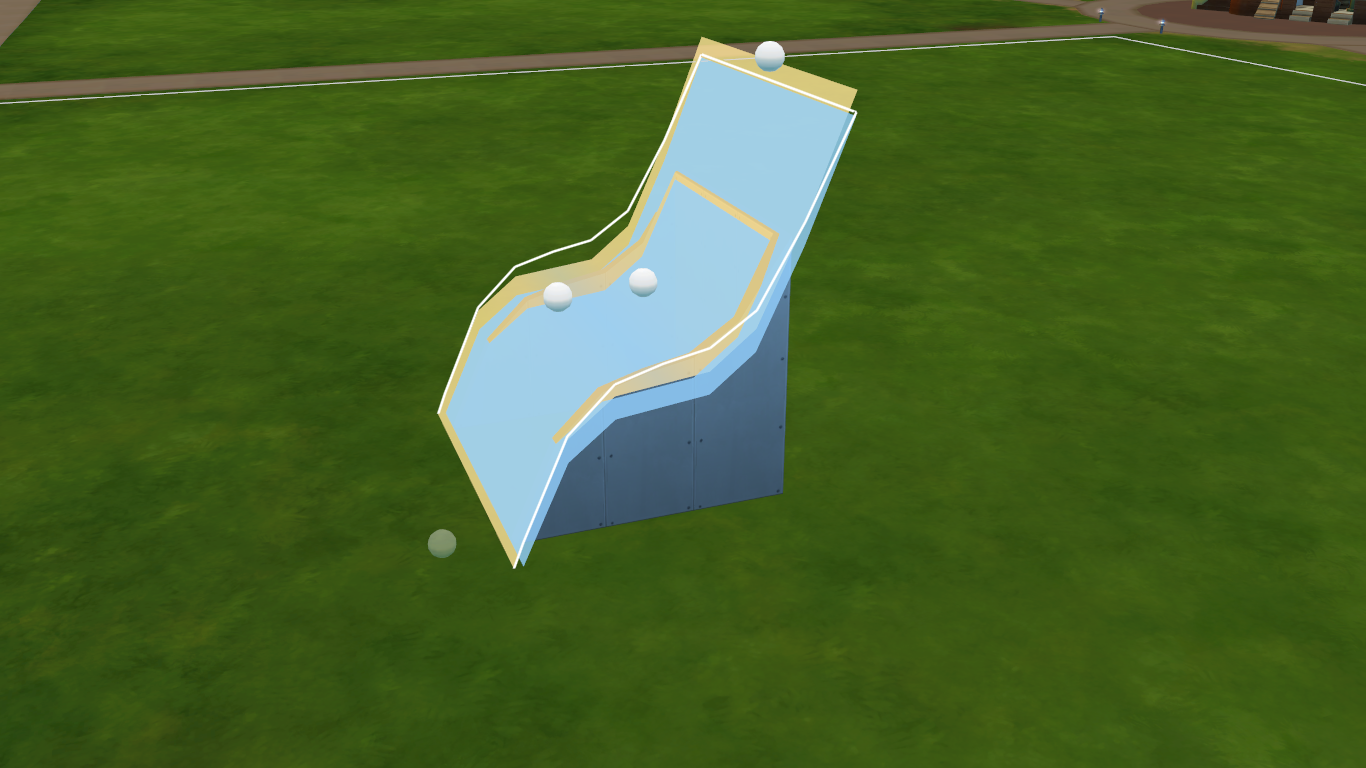
Using the tool exactly as I described above (Click and Drag one of the spheres up and down), I was able to create roof designs such as these.
To return to the normal manipulation tools press Shift+C again.
If you grab a new roof piece out of the catalogue when you already have the advanced tools enabled, you will have to press Shift+C again as they won’t automatically stay enabled.
Although you are able to alter the top and bottom of the roof piece separately, the sides of the roof pieces will always mirror one another. This means that although there will be 8 spheres on your hexagonal roof after pressing Shift+C, all 4 of the top spheres will do exactly the same thing, and all four of the bottom spheres will do exactly the same thing.
This new roof manipulation tools will be great for creating a more eccentric build full of strange angles and weird shapes!
Adding Trims
Trims can be added to these new roof types in just the same way as you add them to the game’s existing roofs. Simply select the trim you like best and click on the roof to add it onto your build.
Adding a trim should also help cover up any unsightly edges if some of your roof is hanging over the edge of the building.

Extending the Eaves
Just add you would with the existing roof styles, to extend the eave, simply Click and Drag the small, downwards facing arrow on the side of the roof. Keep dragging until you are happy with the length.
3) Some Ideas to Get You Started…
Tower
One of the biggest problems with building a tower in The Sims 4 was that you were often forced to use a 4-sided roof piece. Although it is entirely possible to get this to look good, it looks nowhere near as attractive as using one of the new roof pieces. Combining an 8-sided shape with a circular roof is really simple and effective, and gives the impression that the walls are circular themselves.
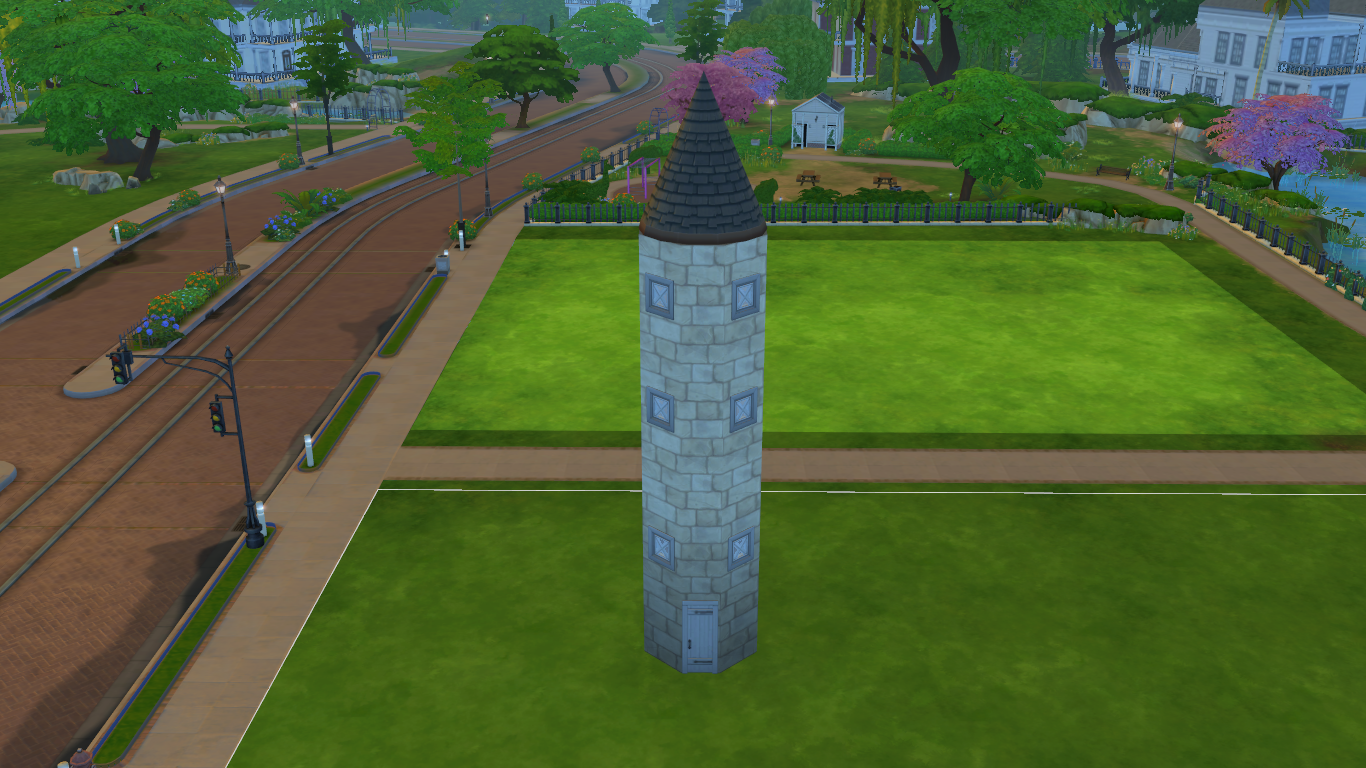
You could use the new roofs (and the new manipulation tools) to create a realistic looking lighthouse, a Rapunzel tower, or even a church spire!
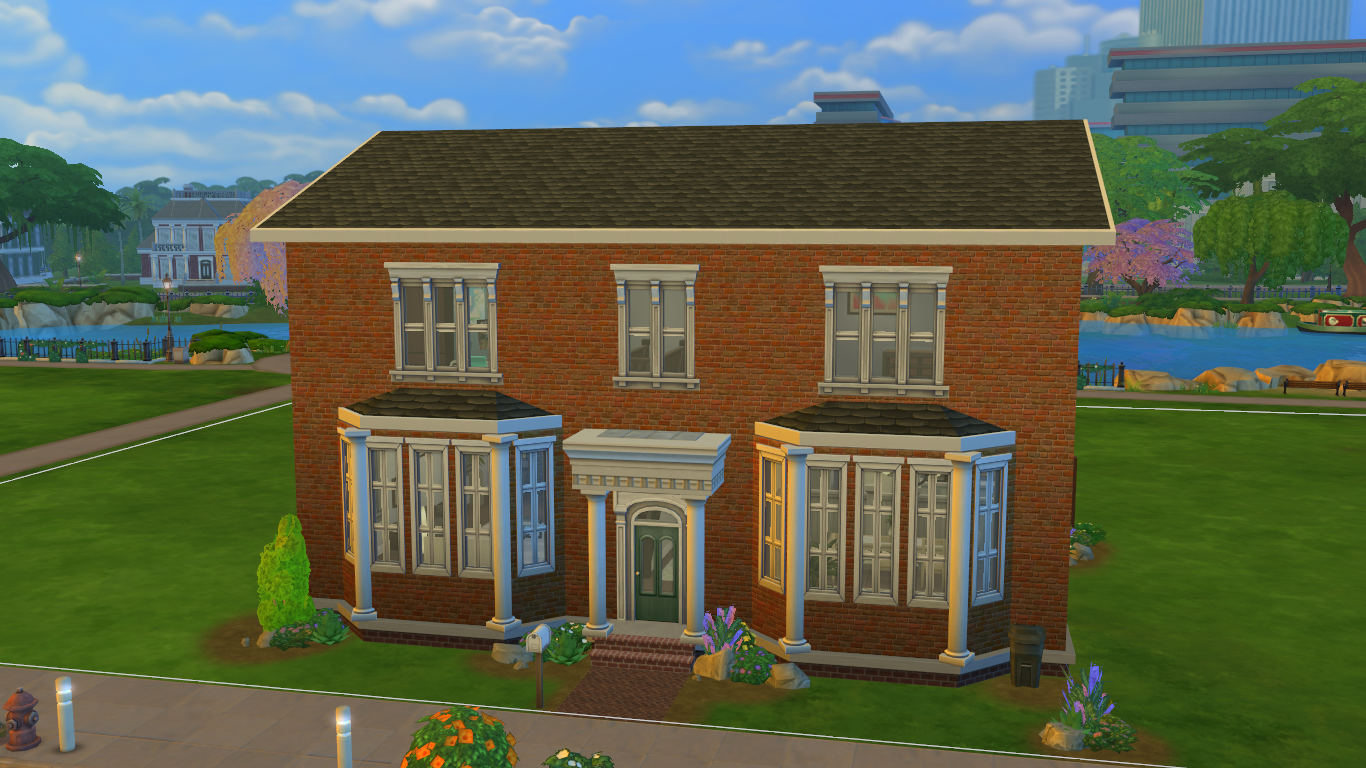
Bay Windows
Where before I would’ve spent hours playing around with every roof style on offer, by using the octagonal roof, I was able to create a roof over the top of my bay window in no time. All I had to do to create this look was grab an octagonal roof from the catalogue and enlarge it until it was the right size for my build.
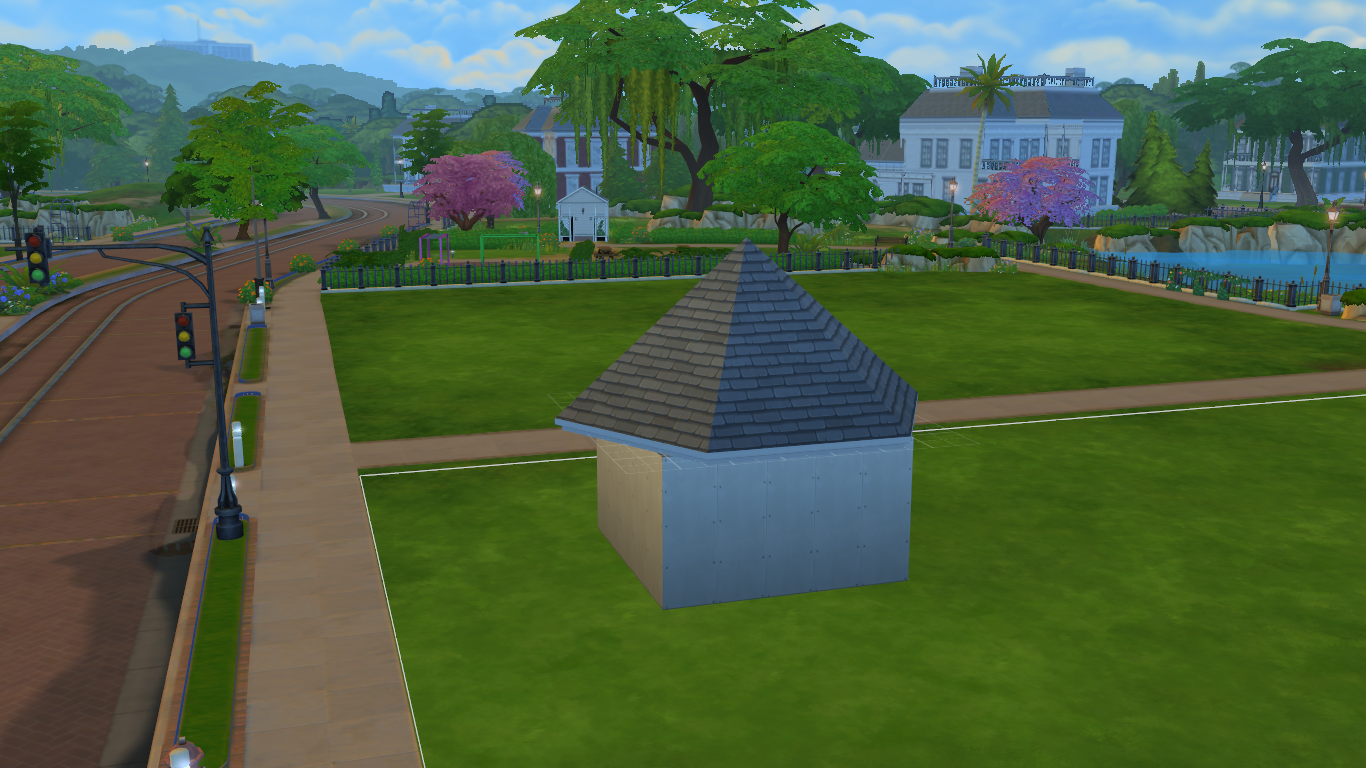
Pavilions
Using an octagonal or circular roof can look really effective on top of a pavilion or summer house. Rather than using a 4-sided roof piece, using an octagonal shape will make your whole structure look more realistic and much more stylish!
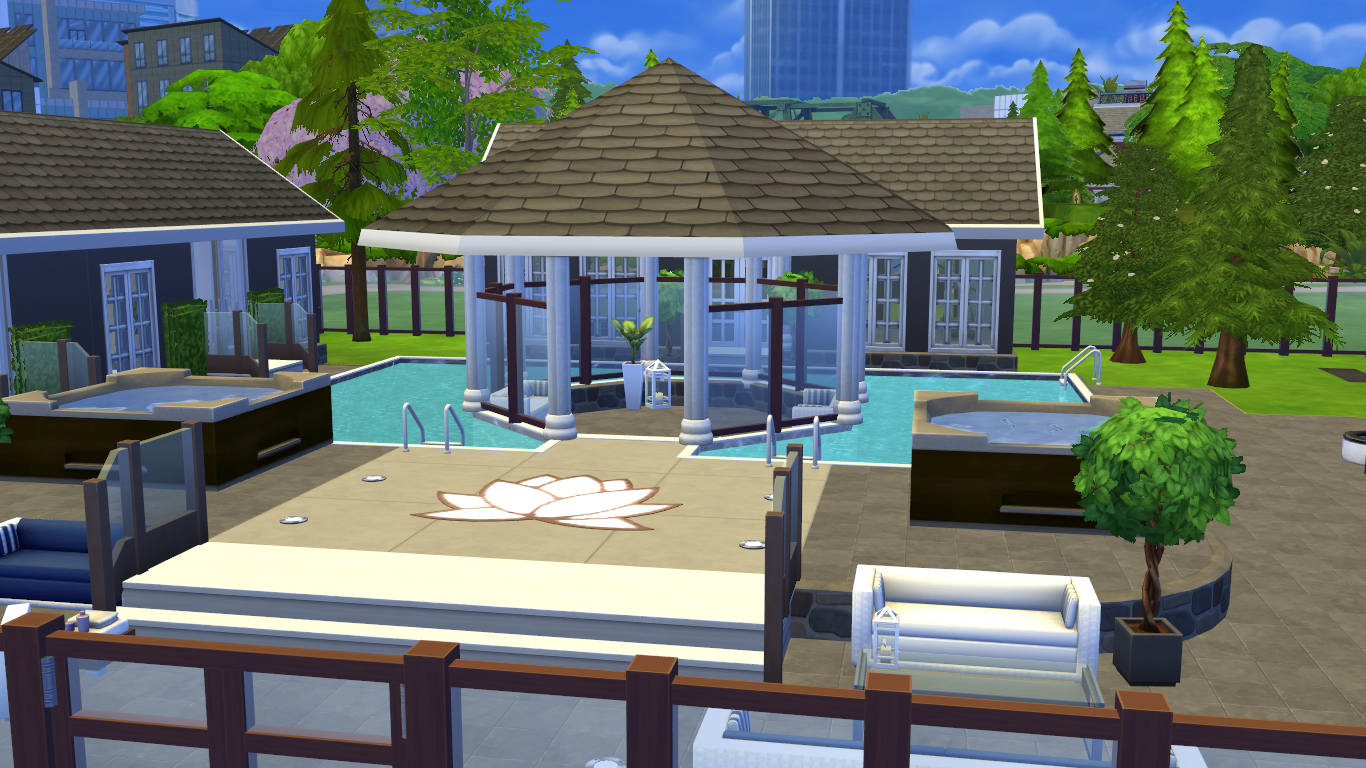
It could be fun to try and build a completely circular pavilion using the game’s rounded fence pieces and the new roof!


")