")
The starter homes in Sims 4 are extremely bare and boring. Some people may hate the lack of space, but I love the challenge. I’ve always found it more realistic, trying to make the most out of what you have. In this post I hope to inspire your own starter home upgrade and show you that you really can do a lot with a little.
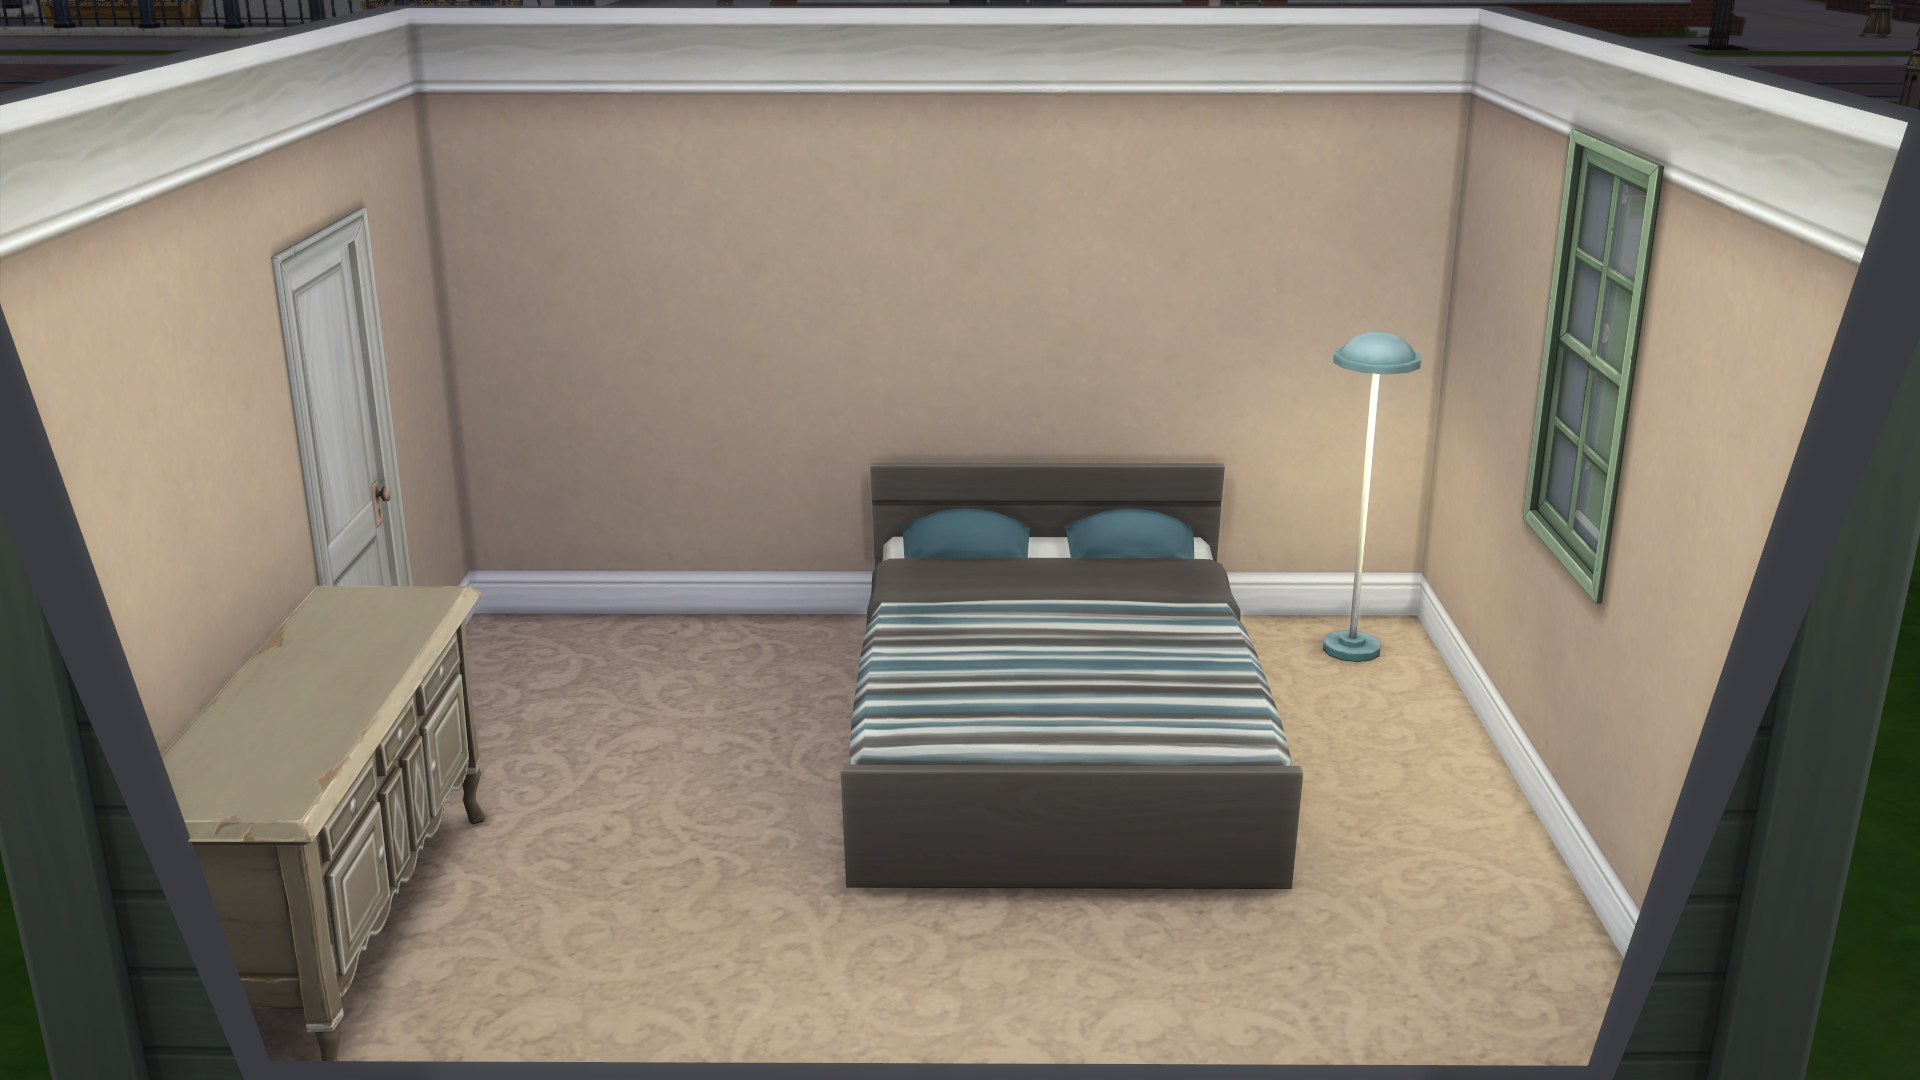
 For this example, I want to take a look at the bedroom from the Streamlet Single starter home in Willow Creek. I do have to give the developer’s credit, this bedroom screams starter home. Everything about this room feels like cheap furniture that has been scavenged together. The bed is uncomfortable. The lamp is intended for a child’s room. The dresser feels out of place. All that said, the room is a good size and the layout is not bad. So let’s keep the layout and change out the furniture.
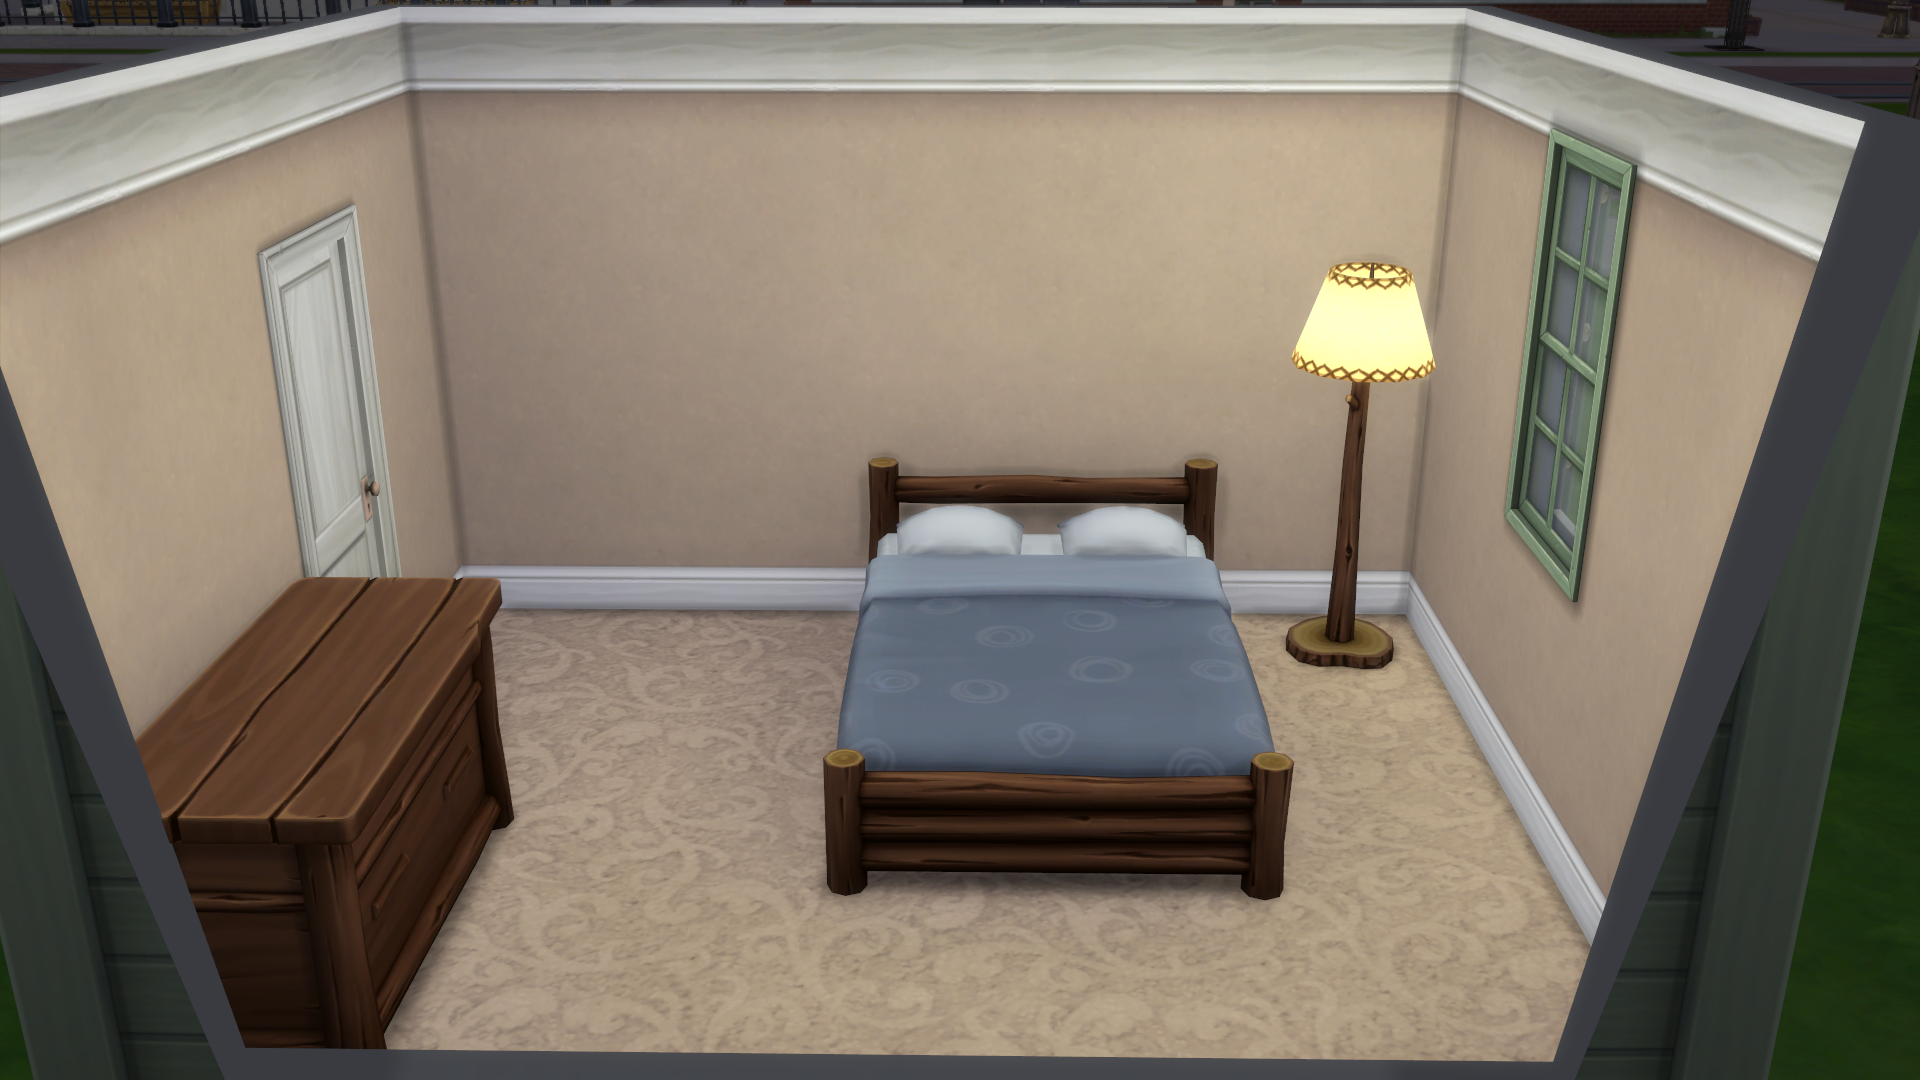
Here I have the same layout and types of furniture. I decided for this example I’m only going to use items from the base game and Outdoor Retreat. I know most people don’t have every the game pack and expansion. You can still do a lot with the content you have. I also want to add these three pieces of furniture from outdoor retreat only cost $500 more than the original setup. So if you are playing without money cheats this upgrade is totally achievable on a starting salary.
For this example I was keeping the basic layout, but my first step for any room decorating is to place the big pieces first. Figure out the items that take up your floor space, making sure your Sim has enough room to get around. I thought a nightstand would work well in this room so I’m going to add that to my next example photo.
Step two is to figure out your textiles. Curtains and rugs can really add a lot to a space. They can add color, define space and add dimension to a space. Don’t forget to use your move cheat (bb.moveobjects) to nudge rugs into the spot you want. For more finesse rotating objects, you can switch to the Sims 3 camera. Now instead of being able to move objects freely, you can rotate them. Here is the room with the new nightstand and the new textiles.
 Can you tell what a difference adding textiles can make? Simply adding curtains and the rugs makes this space feel so much more inviting. I’m sticking to a very rustic feel, but different textiles would give this room an entirely different feel. And if you’re keeping track of this room’s budget, I’ve spent an additional $940 on the nightstand and textiles. I did put curtains on the 3 additional windows not show from this view.
The final step is to add plants and decor. The textiles give a great foundation to a room, but it is the personal touches that can help your space tell a story. Maybe your Sim is a messy teenager. Adding extra clutter to the surface or dirty clothes on the floor can really capture those messy teenager vibes.
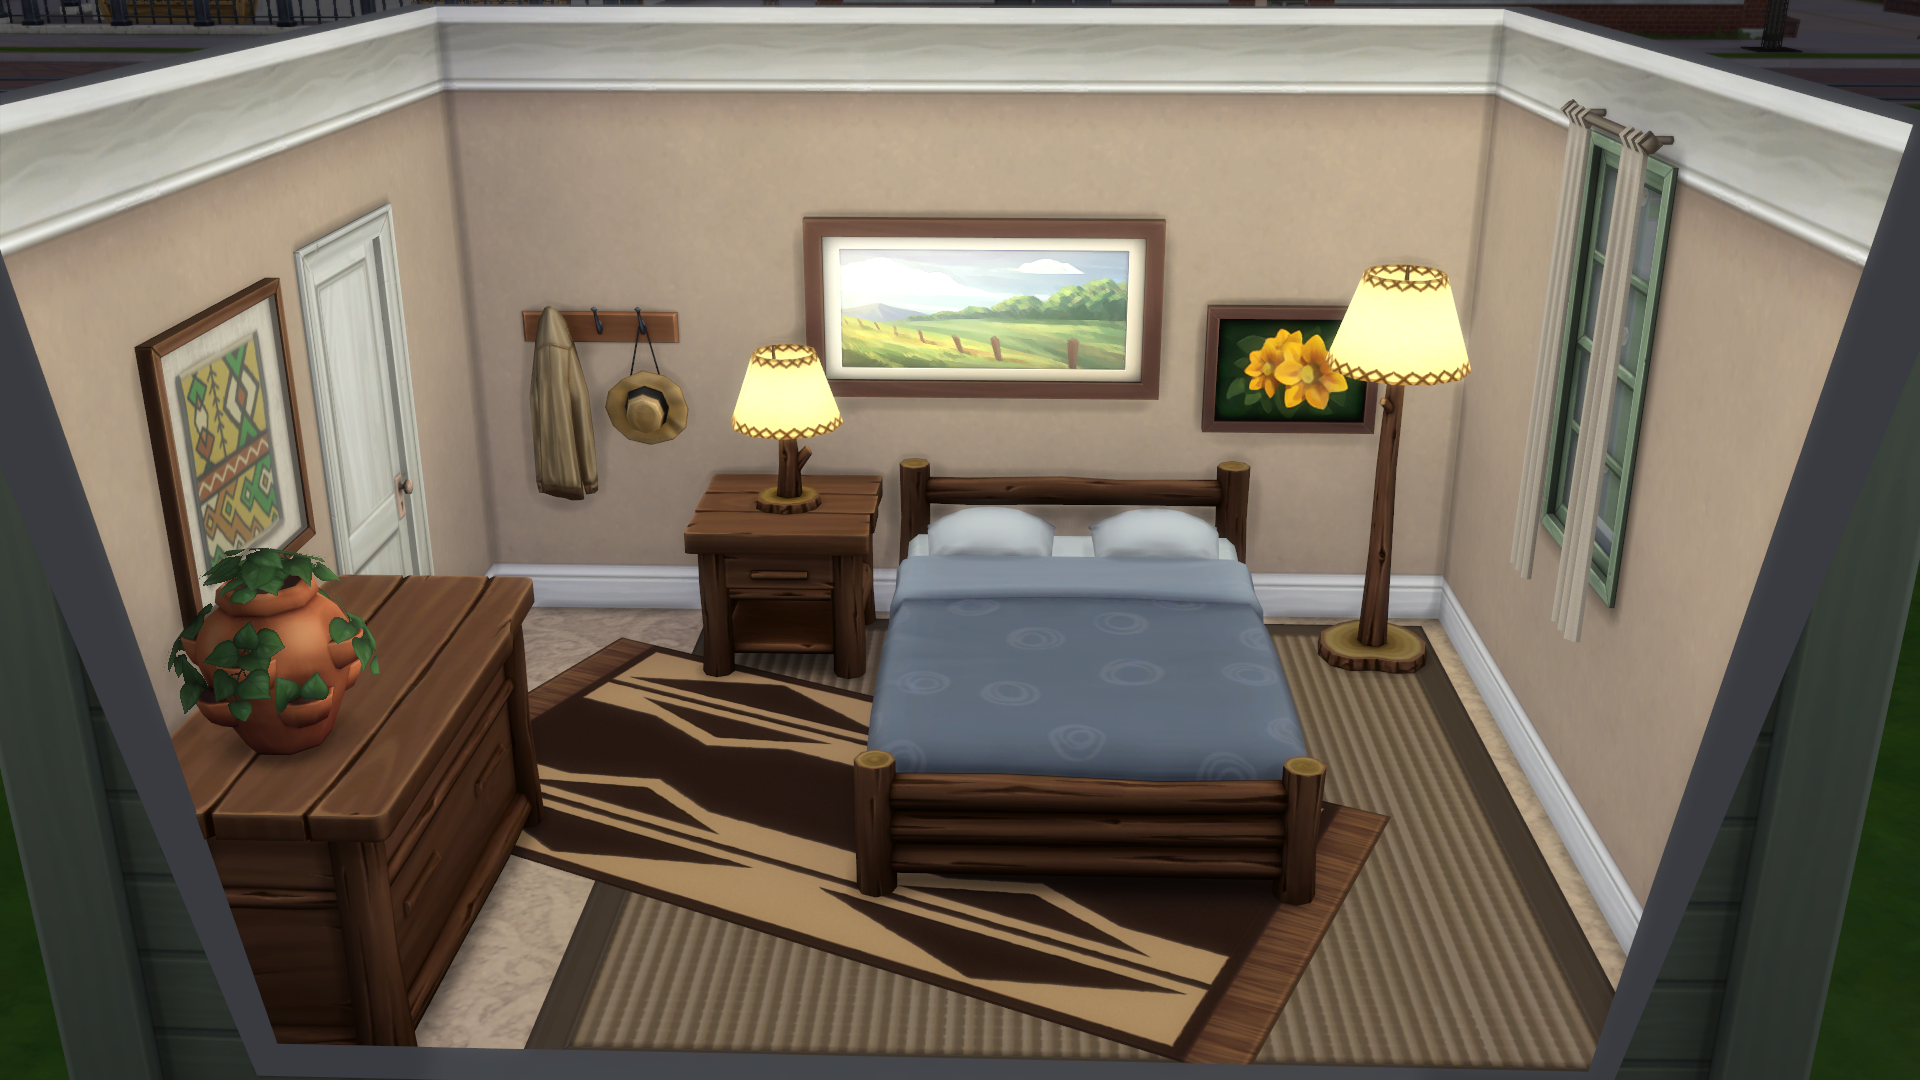
Here is my styled starter house bedroom using only items from the base game and Outdoor Retreat. If you do have more packs that just gives you a greater variety of decor items and plants to decorate with. That said, I still don’t believe you need to own everything. It’s better to invest in the packs you’d get the most use out of. Let me know in the comments if a breakdown of my favorite items from different packs is something you’d like to see.
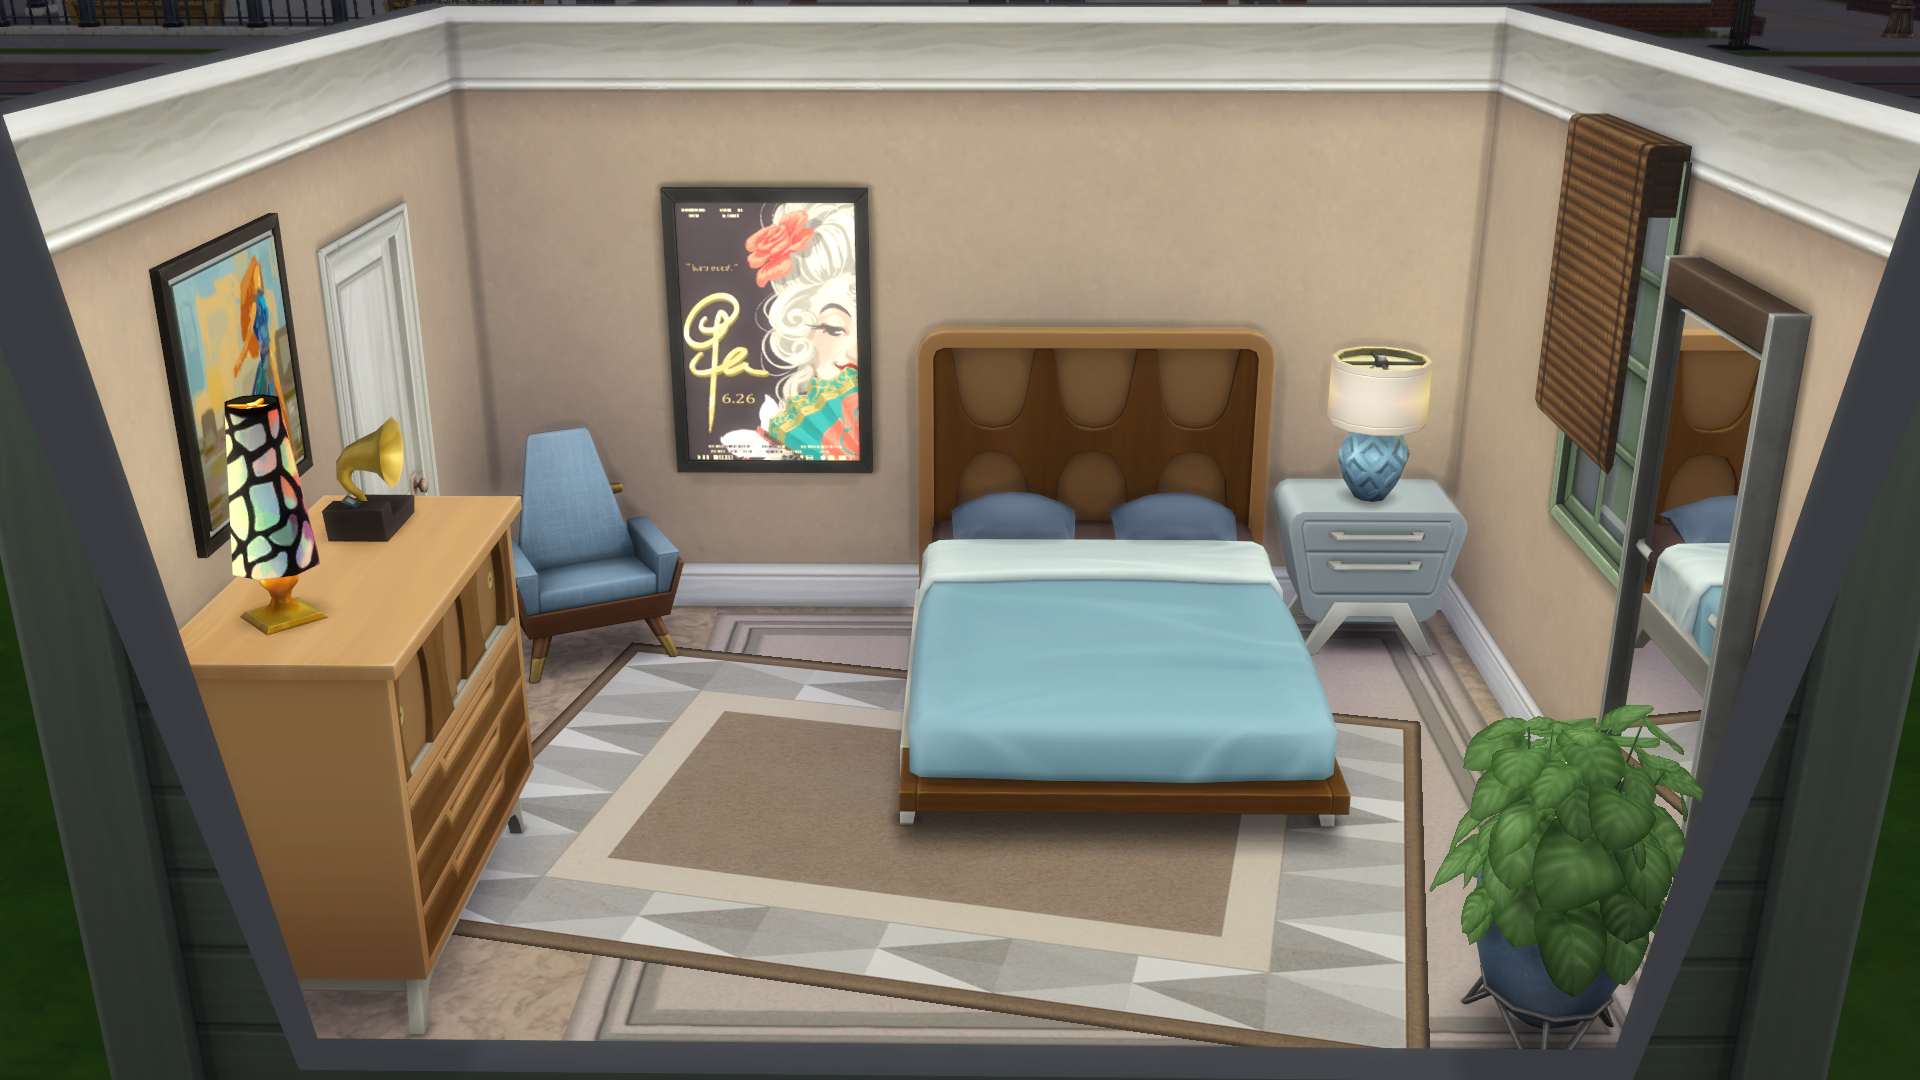
In the meantime, I will leave you with two more examples of this room layout. One uses items from Base Game/Seasons and the other room is furnished using Base Game/Get Famous.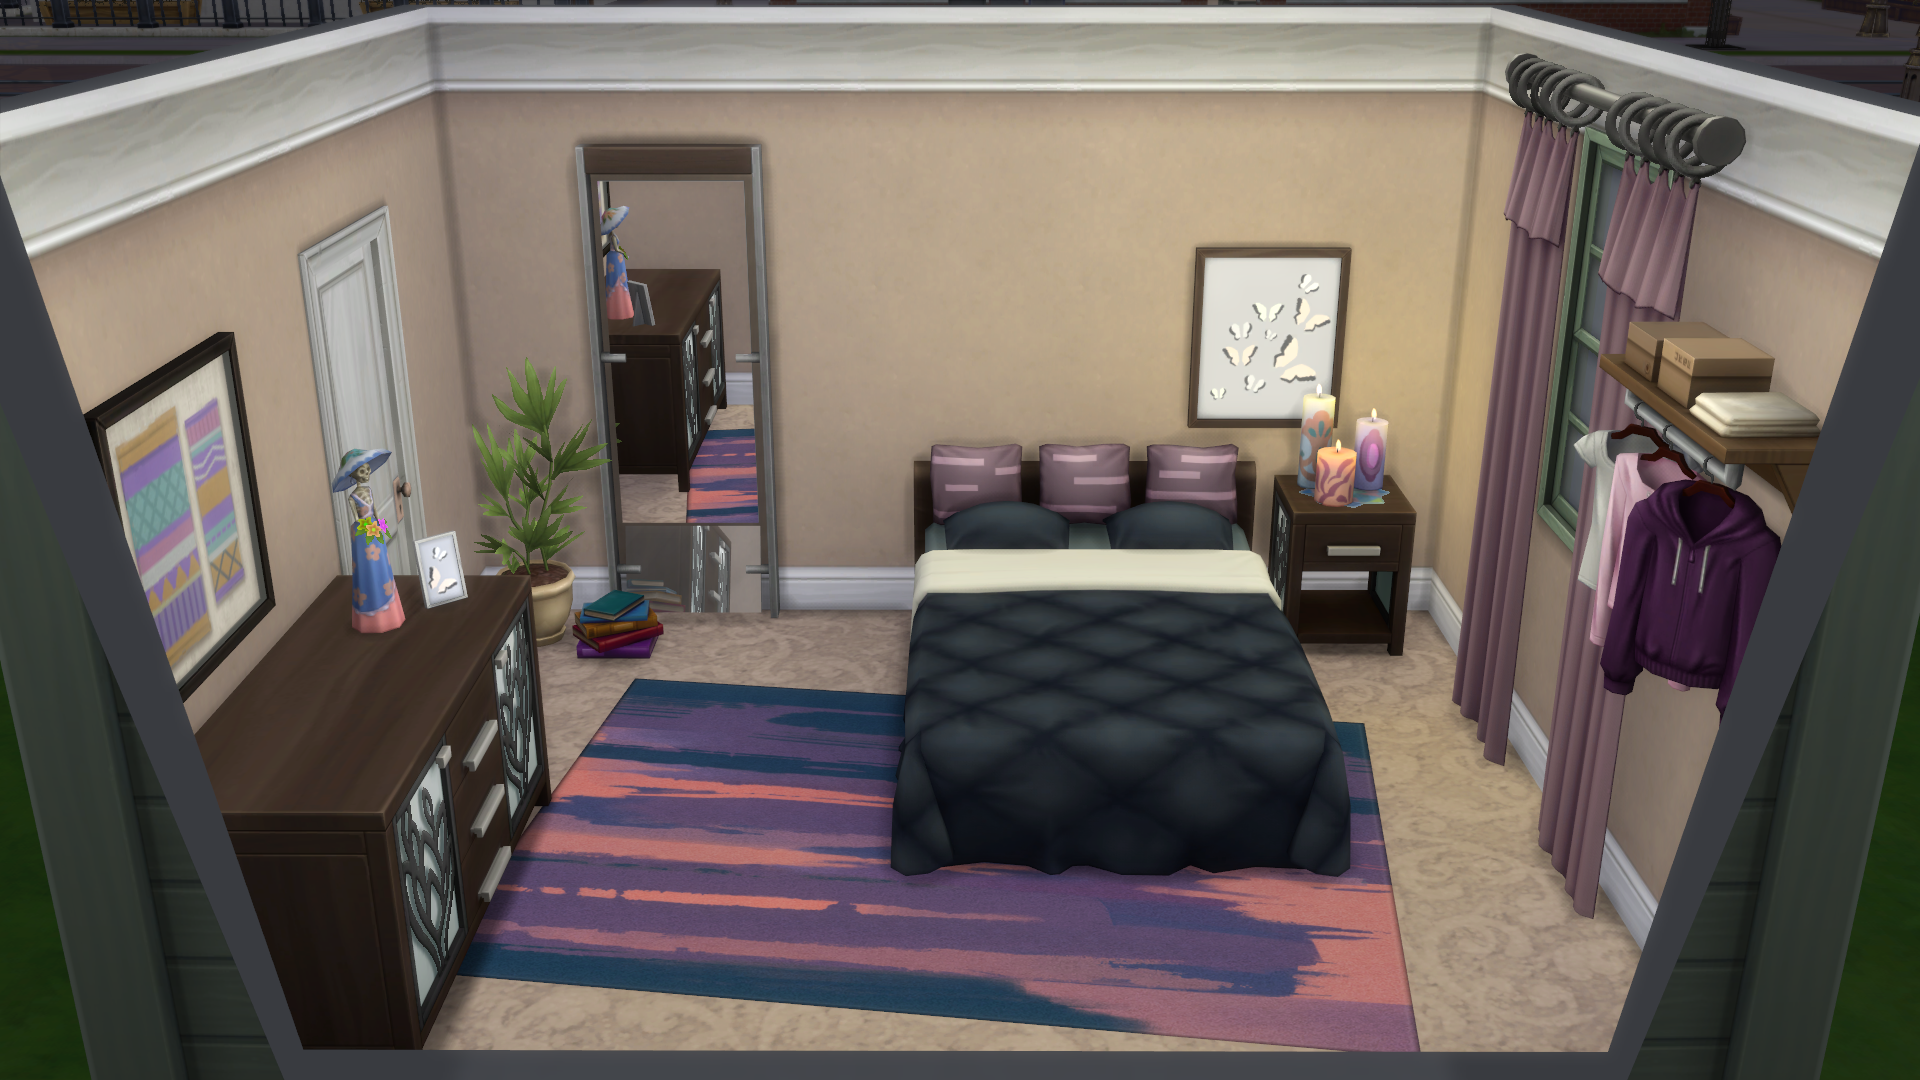
 Which room design is your favorite? Would you like to see more posts of this type that show you ways to upgrade your starter home? Let me know in the comments below!
Happy Building!


")
")


")