")
Create A Mod – Updating Mods will show you how to update XML mods after a patch. This is not for Script mods! You need the latest version of Sims 4 Studio. Before you begin, please make sure that you’ve followed these tutorials:
Create A Mod – Programs for Modding
Updating Mods
After a game update, we need to make sure that our mods are compatible with the new patch.
Setting Up and Extracting
- Update your game and move your mods to your Desktop.
- Follow the Create A Mod – Setting Up tutorial if you have not done so already. If you have already followed it, then just skip to the Extraction instructions.
Note – If an error pops up after you extract, then Sims 4 Studio will need updated for the new patch. Therefore, you’ll have to wait until they release the update before continuing this tutorial. If Sims 4 Studio extracted with no problem, then go ahead and continue.
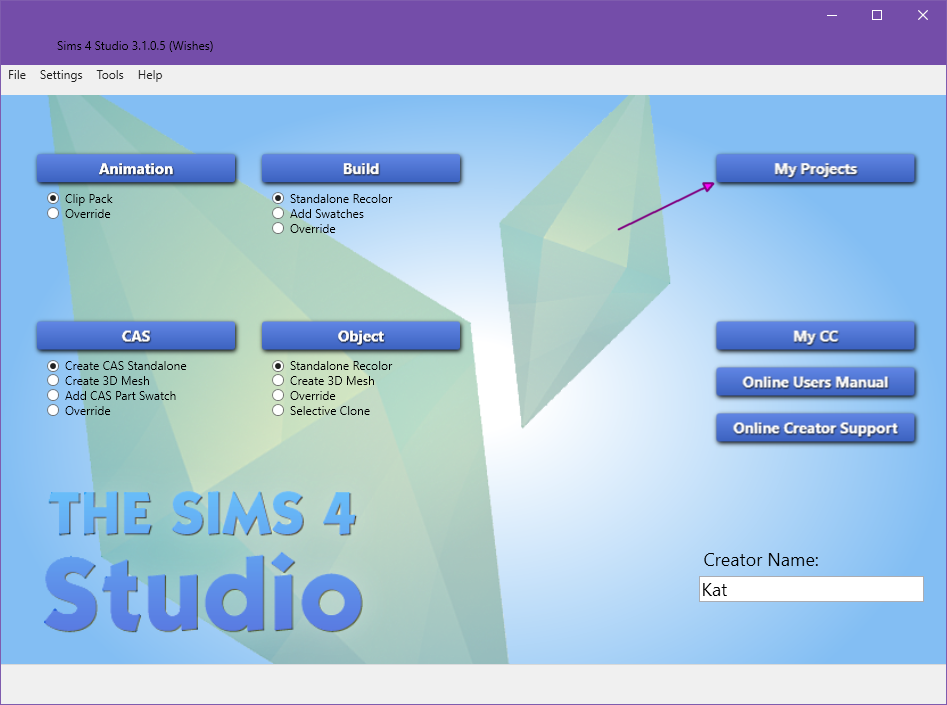
- Open Sims 4 Studio, then click on My Projects:

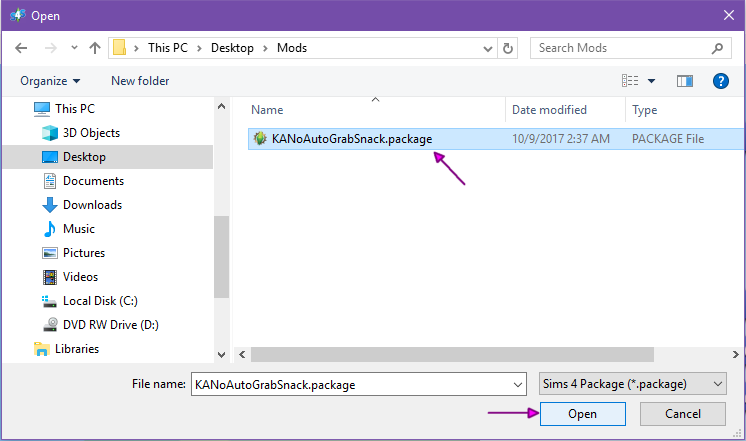
- Select a Mod to check, then click Open (for this tutorial I’ll be using No Auto Snacks! by meharie as an example):

- Select any resource in the left window, click Ctrl + A to select all of resources if there’s more than one.
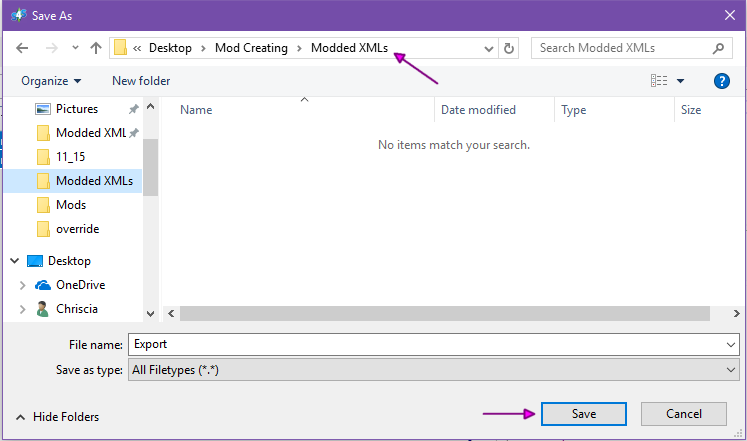
- With all the resources selected, click Batch Export:
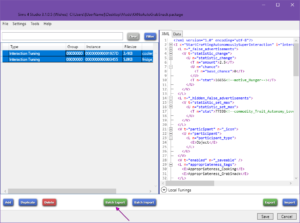
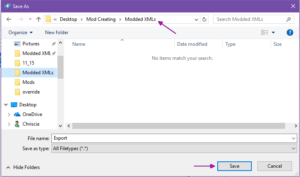
- Navigate to your Modded XMLs folder, then click Save:
- Do NOT close your mod in Sims 4 Studio, keep it open!

Checking the Mod
If you’re updating a mod that you made, then these steps are easy, all you have to do is copy over the differences that you didn’t change in your mod. However, if this is someone else’s mod, it might be difficult to know what’s supposed to stay and what’s not. I suggest having a slight knowledge of how XML works before attempting to update someone else’s mod. My earlier tutorials should help.
- Open TS4 XML Compare.
- Click each Browse to set the paths as shown below:
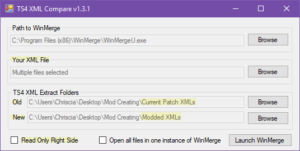
- Your XML File – Select all the XMLs in the Modded XMLs folder. Do NOT select any more than 50 at a time (see note from scumbumbo)!
- Old – Select the Current Patch XMLs folder
- New – Select the Modded XMLs folder
- Read Only Right Side – Un-tick*Setting the Current Patch XMLs folder to Old and the Modded XMLs folder to New allows us to update the XML immediately if needed.
- Once you have everything set as I do in the screenshot above, click Launch WinMerge. It will take a minute to index the folders. If it says Not Responding, that’s normal, just let it go until it’s finished and all the XMLs load.
Note – If you get the Not Found in Extracts pop up for any of the XMLs, follow this fix.
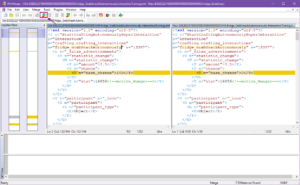
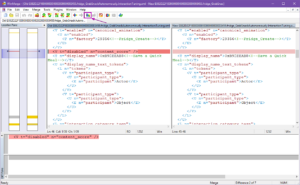
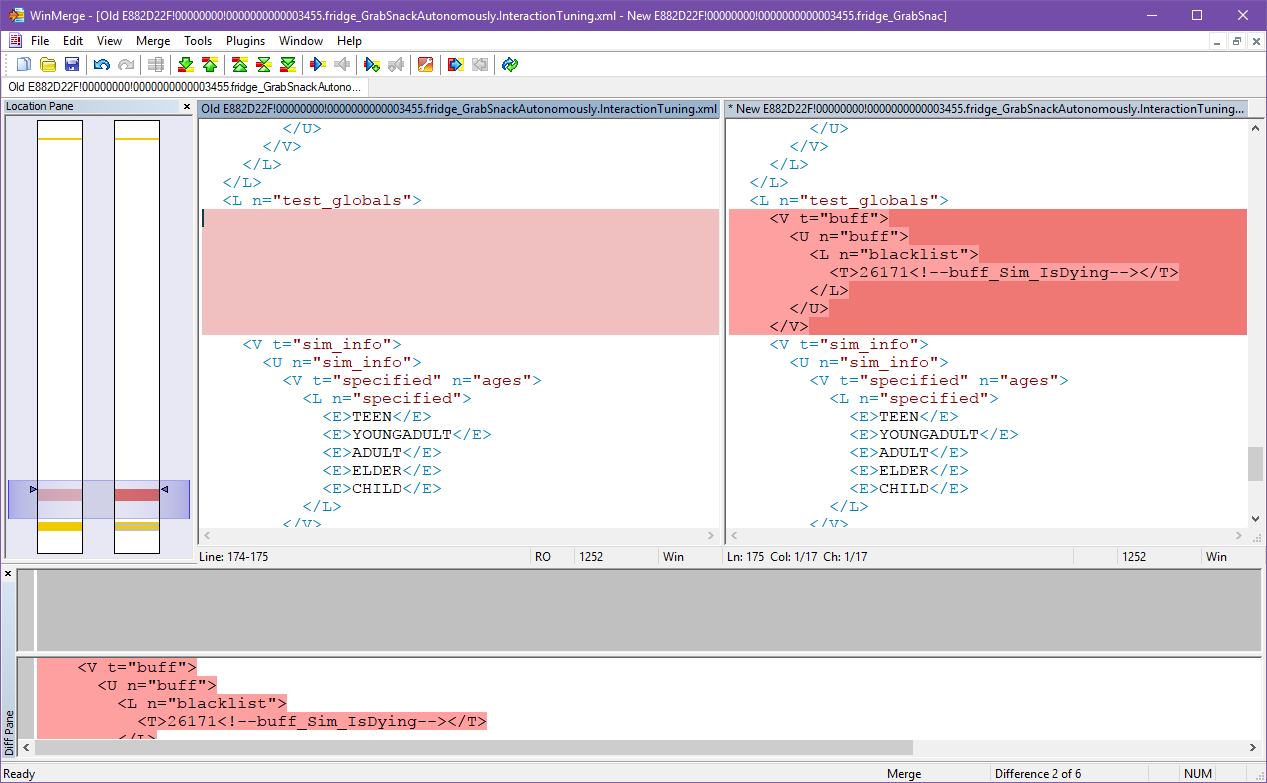
- Let’s check the fridge_GrabSnackAutonomously XML first (if the other one loads on top for you, just minimize it to get to this one). The left window is the new XML that we extracted from the game, the right window is the modded XML.
- Click the Next Difference button (green down arrow) to go to the first difference:
 Knowing the purpose of the mod that you’re updating will help you know what’s supposed to stay.
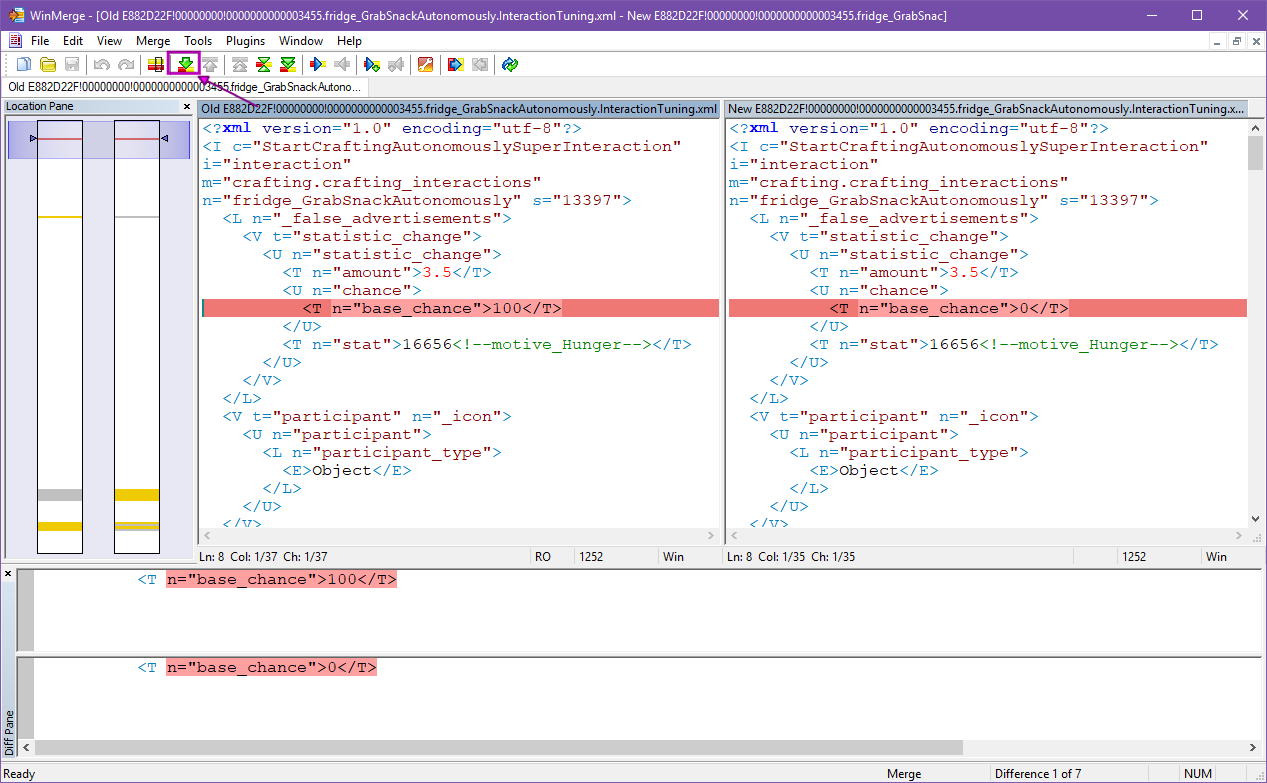
In this first difference the modded XML shows base chance of 0, since this mod is to prevent Sims from autonomously grabbing a drink, we need to keep that difference there. So, click the Next Difference button again:
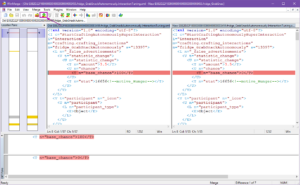
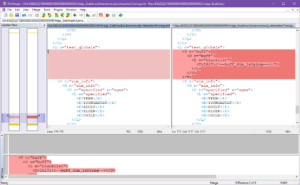
- This second difference has nothing to do with the purpose of this mod, so we can click the Copy Right and Advance button here:
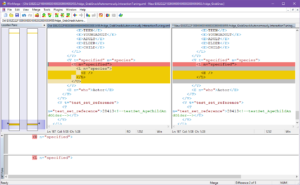
Click the Copy Right and Advance button for the rest of the differences, they also have nothing to do with the purpose of this mod:
Note – Although this mod only has to keep one of the differences, keep in mind that each mod is different, others may have more that need to stay.
Note – If you don’t need to use the Copy Right button at all, then the XML is already compatible!


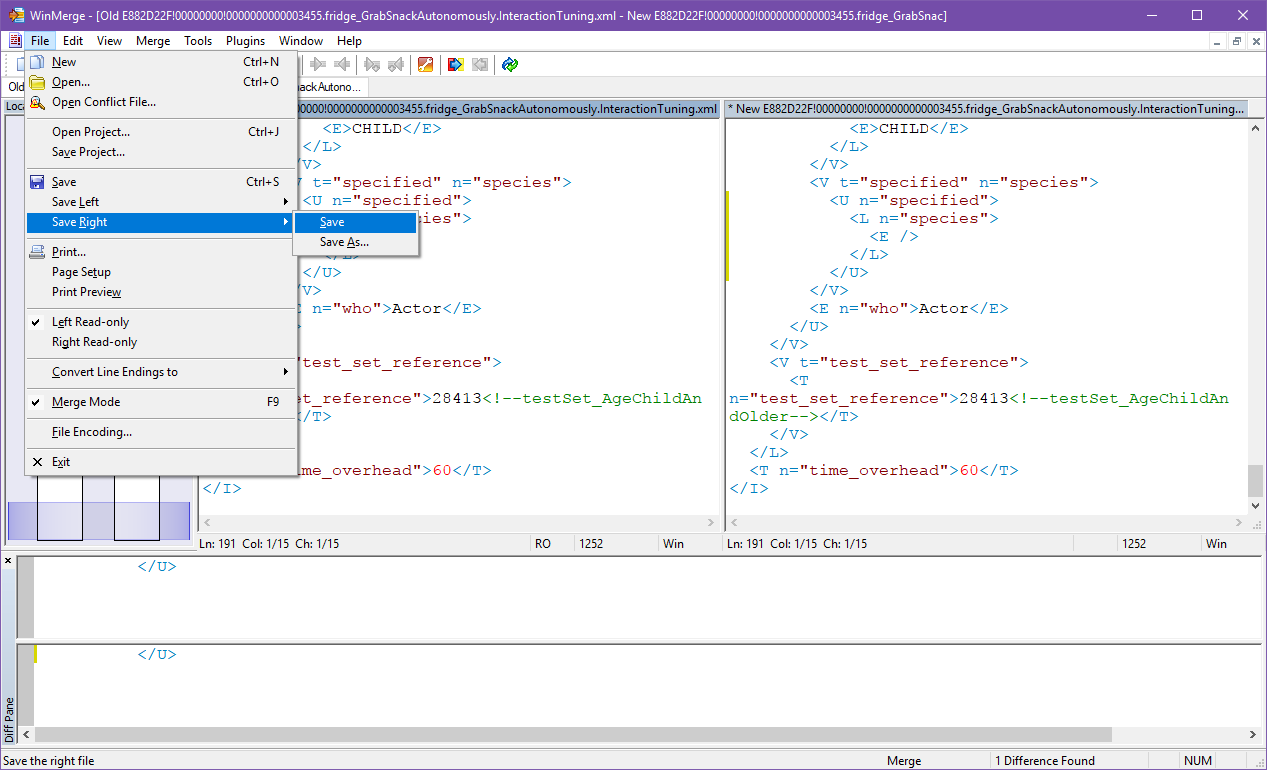
- Once you’ve finished copying over the differences that have nothing to do with the purpose of the mod, click File > Save Right > Save:
- Repeat Steps 5-7 for any remaining XML(s) from Step 3.
- Close XML Compare when you run out of XMLs.
Re-Packaging the Mod
Now that we finished updating the XMLs, we need to import them back into the package.
- Go back to the mod in Sims 4 Studio.
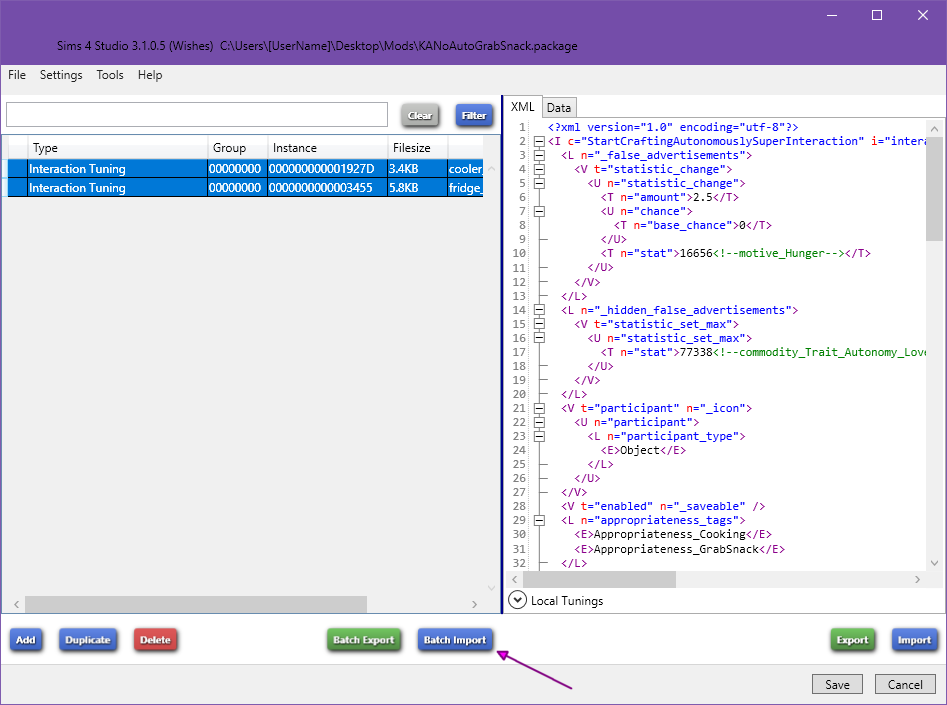
- Click on Batch Import:
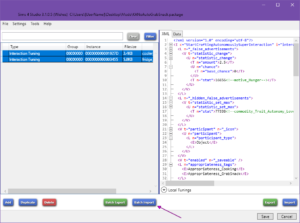
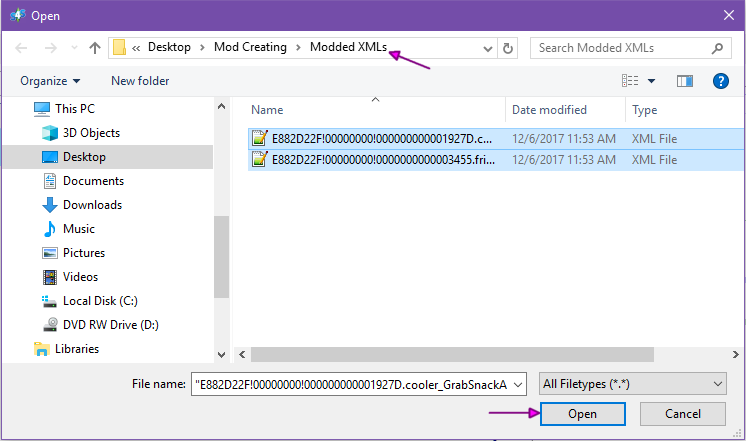
- Navigate to the Modded XMLs folder, select all the XMLs, then click Open:

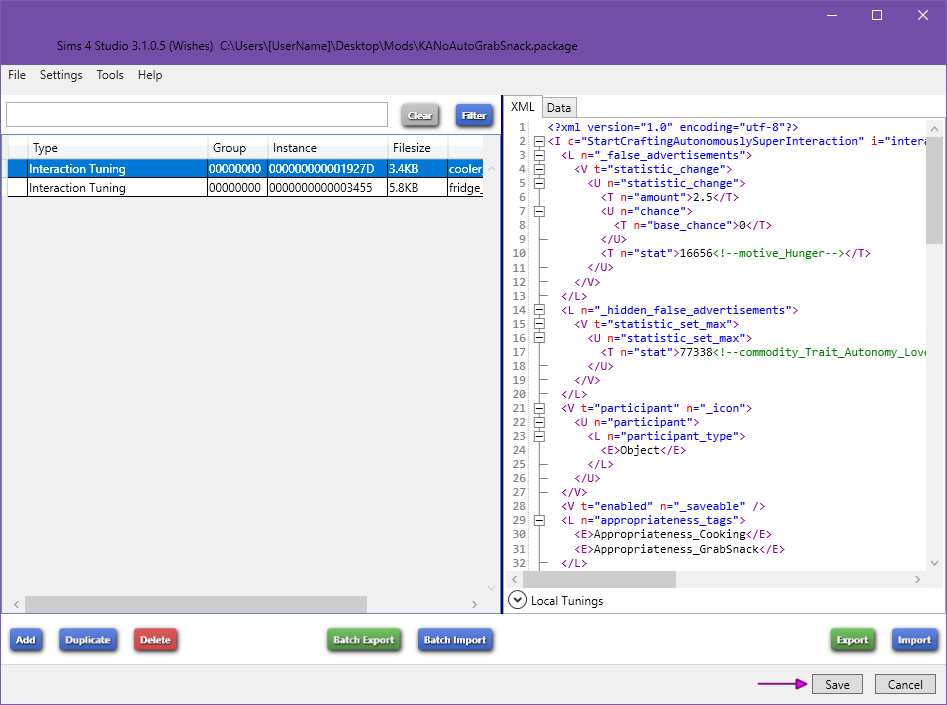
- Click Save:

- Close Sims 4 Studio, move the mod back to your game and test!
List of tutorial changes:
12/7/17 – Reduced the amount of steps needed to simplify the tutorial.


")


")