Hi everyone! With the recent release of The Sims 2 Ultimate Collection on Origin for owners of The Sims 2 Simmers have been reporting issues with their resolution being stuck at 800×600. We have written a guide for you so that you can increase the resolution to your native screen size.
THIS GUIDE REQUIRES YOU TO EDIT GAME FILES – BACK UP THESE FILES IN A SAFE PLACE BEFORE YOU EDIT ANYTHING!
STEP 1 – In order to change the resolution for your game you will need to locate GraphicRules.sgr in C:\Program Files (x86)\Origin Games\The Sims 2 Ultimate Collection\Fun with Pets\SP9\TSData\Res\Config.
STEP 2 – Open GraphicRules.sgr. (If it asks you to select a program to open it with select NotePad)
The first thing that you are going to want to do is “tell” the game to allow you to use higher settings. The Sims 2 often forces the game to play in only low settings if it can’t recognise a graphics card, which will be almost everyone now due to the newer cards since The Sims 2 Mansion & Garden first released.
STEP 3 – Near the top of this file you will find the following lines: “seti Low 1” “seti Medium 2” and “seti High 3”. These tell the game which default mode to start in and in some cases it will prevent you from changing options in the game. Change “seti Low 1” and “seti Medium 2” to “seti Low 3” “seti Medium 3”. This will tell the game to use the “high” settings within this file.
Now that you have told the game to let you use higher settings it’s time to change those resolutions.
STEP 4 – Press Ctrl+F to open the Find box and enter this line in (without any spaces and quotes) “ScreenModeResolution” then click Find Next.
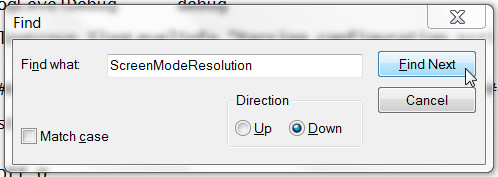
This will take you to the required section. What you see will look like this:
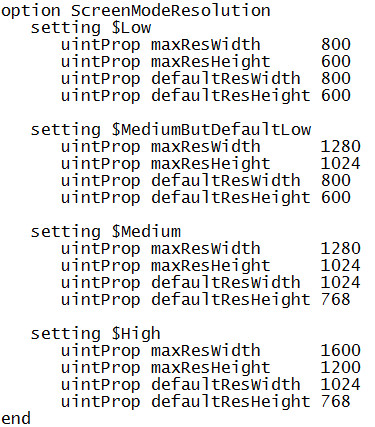
This section is what allows your game to play in different resolutions. Depending on your monitor resolution you may want to have different settings. I play on a 1080×1920 monitor so the settings I am demonstrating are based on that, if you have higher or lower resolutions sizes, adjust it to your own settings. From here you will want to edit “uintProp maxResWidth” and “uintProp maxResHeight”. These two options are what tells the game which resolution mode to play in.
STEP 5 – Edit “uintProp maxResWidth” to 1920 and “uintProp maxResHeight” to 1080 in all four sections so you see something that looks like this:
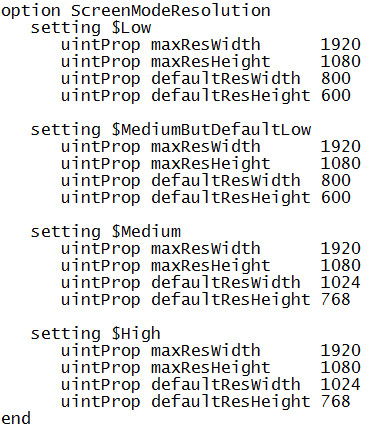
And that’s all you need to do in this file! Hit Save and exit the file then open the game up. Once you have entered a Neighborhood go to the Options then Graphics/Performance Options.
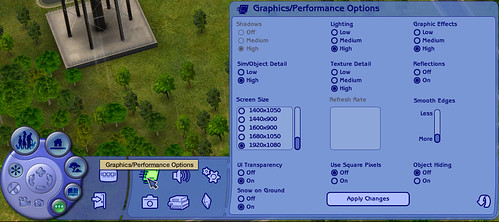
STEP 6 – You should now see that in the Screen Size settings you have many more options! Select the desired size and hit Apply Settings. You are now able to play in a larger screen size. Have fun! 😀
