")

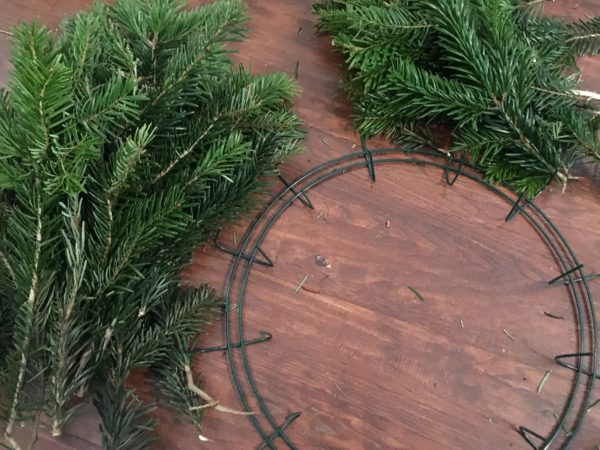
I recently asked on twitter if anyone would be interested in a few holiday themed posts and it was a pretty unanimous ‘yes’. So to begin I want to show you a super easy way to make your own holiday wreath from a few evergreen branches. First, you’ll need a few supplies.
 Evergreen Branches If you removed a few lower branches to fit your Christmas tree into a stand these work great. For those of you in the United States, hardware stores like Home Depot will usually have a bin of scrap branches near the tree cutting area. You should ask first but they’ll most likely let you take as many branches as you’d like for free.
- Wire Wreath Frame
You can find these online or at craft stores. I saved mine from a wreath I bought last year. If you can find one with prongs they are great for beginners. - Floral Wire (optional)
If you can’t find a wreath frame with prongs or ties you’ll need to pick up a spool of floral wire or something to secure the branches to the frame. Floral wire is a dark green, 24 gauge wire but twine or a similar wire would work too. Floral wire is also handy if you’d like to attach any decorations to your wreath. - Ribbon, Ornaments, Flowers or Other Decorations (optional)
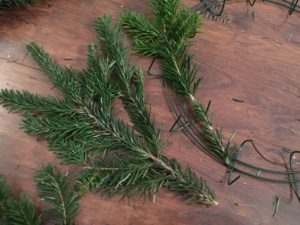
Step 1
Begin by stripping/cutting your branches down to size. You’ll want to make two piles, one of longer branches and one of smaller pieces. The larger branches will make up the bulk of your wreath. Ideally you’ll want them to be roughly 10-12 inches (25-30 cm) long. The smaller pile will be to fill in any holes and make you’re wreath look full so they can be any size.
Step 2
 Starting with the pile of the larger branches, place your branches on top of the wire frame. Work counterclockwise, slightly overlapping branches. It is also good to alternate between limbs that have more branches and ones that have fewer. This keeps the wreath looking more uniform and easier to work with. It is okay it the branches are not curving around the frame well and stick up a bit. (See the picture below)

I tucked the very end of each branch under the prongs so it stuck slightly out the back of the frame. I like to think this helped secure the branches a bit more but it probably doesn’t make a difference.
Step 3
Now that all of the large branches have been placed counter clockwise your wreath should look something like this. Work your way around the wreath shaping the branches into a tighter circle and pinching close every other prong.

Step 4
Next, continuing to work counterclockwise, close the remaining open prongs. As you work your way around, use the smaller branches from the second pile to fill any holes or hide the metal prongs. You’ll want to try to tuck the ends of the small pieces between larger branches so they are more secure. It’s okay if the ends stick out of the back a little bit. When you finish the back will look a little like this.
Step 5
This step is entirely up to your imagination. I ended up love the look of a plain wreath but you can add any sort of decoration you like. You can use floral wire to secure ornaments or ribbons to the wreath. If you thread the ends of the wire through the wreath, you can attach it directly to the metal frame. I recommend this because then the weight of the item is supported by frame and won’t pull down on your branches.
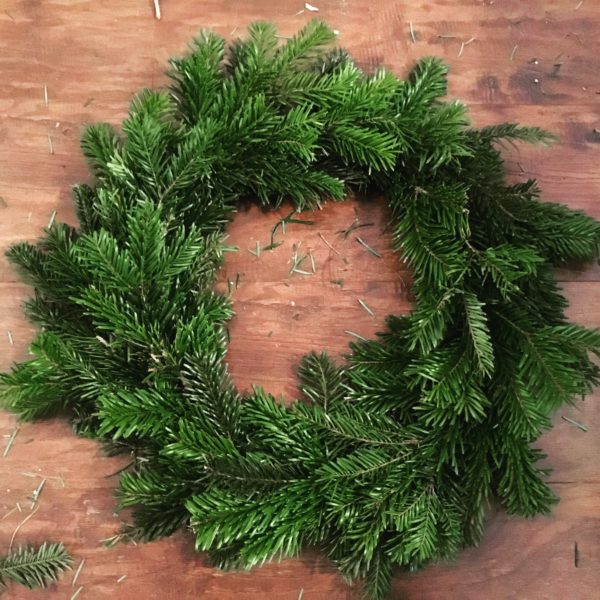
Finally, here is my finished wreath. I hope you enjoyed this tutorial and maybe feel inspired to make your own wreath. If you do make a wreath I would love to see what you come up with. (You can send me pictures of your wreaths or questions on twitter to @simserasera) I’ll be back with more crafts, recipes and holiday builds. May your days be merry and bright!


")


")